Create ESS Job in Oracle ERP Cloud using BI Reports
An Enterprise Scheduler Service or ESS Job, in Oracle ERP Cloud, is analogous to what we know as Concurrent Programs in Oracle E-Business Suite. Using an ESS Job, one can schedule a job to be executed at specific intervals to perform specific tasks like retrieving, updating, deleting and inserting records. They can also be used to perform operations like archiving, synchronizing, merging, copying, import, export, etc. ESS Jobs can be easily created and executed following a few simple steps.
In this blog I will demonstrate the step-by-step process of creating and registering a custom ESS Job using BI Reports in Oracle ERP Cloud. For demostration purposes, I will be creating a very simple report to fetch records from the all_objects table, and will add the all_objects.owner as the parameter in the report.
On a high-level, the steps involved in creating the ESS Job are as follows:
1. Create the Data Model
2. Create Report Layout
3. Create ESS Job
4. Submit the ESS Job
So let us begin with the first step.
1. Create the Data Model
Login to an Oracle Cloud ERP instance and navigate to Tools > Report and Analytics.

Now, click on the Browse Catalog button on the right-hand top corner.

Click on New and the select Data Model from the drop-down.

Click on the + button to create the Data Set in the Data Model canvas and select SQL Query.

A new window will pop up. Enter the details of the Data Model as follows:
| Name | XXRM_TEST_ESS_JOB |
| Data Source | FUSIONDB |
| Type of SQL | Standard SQL |
| SQL Query [ You can also use the Query Builder to generate the SQL ] | Select ao.owner , ao.object_name , ao.object_type , ao.status From all_objects ao Where owner = NVL(:P_OWNER, ao.owner) |

Check the checkbox to use the bind variable from the query to create the parameter.

Enter the ‘Display Label’ and ‘Text Field Size’ for the parameter. If you want the parameters to contain comma-separated values, then tick the checkbox in Options, and click on View Data.

The data fetched would be in a form of a Tree View, by default. For this demo, I prefer the records to be fetched in a tabular format, so I click on Table View.

The next step is to save the sample data set by clicking the Save As Sample Data button. This step is extremely important. If you don’t do this, you’ll see an error returned by the xdo engine, while creating the Report Layout in Step-2.

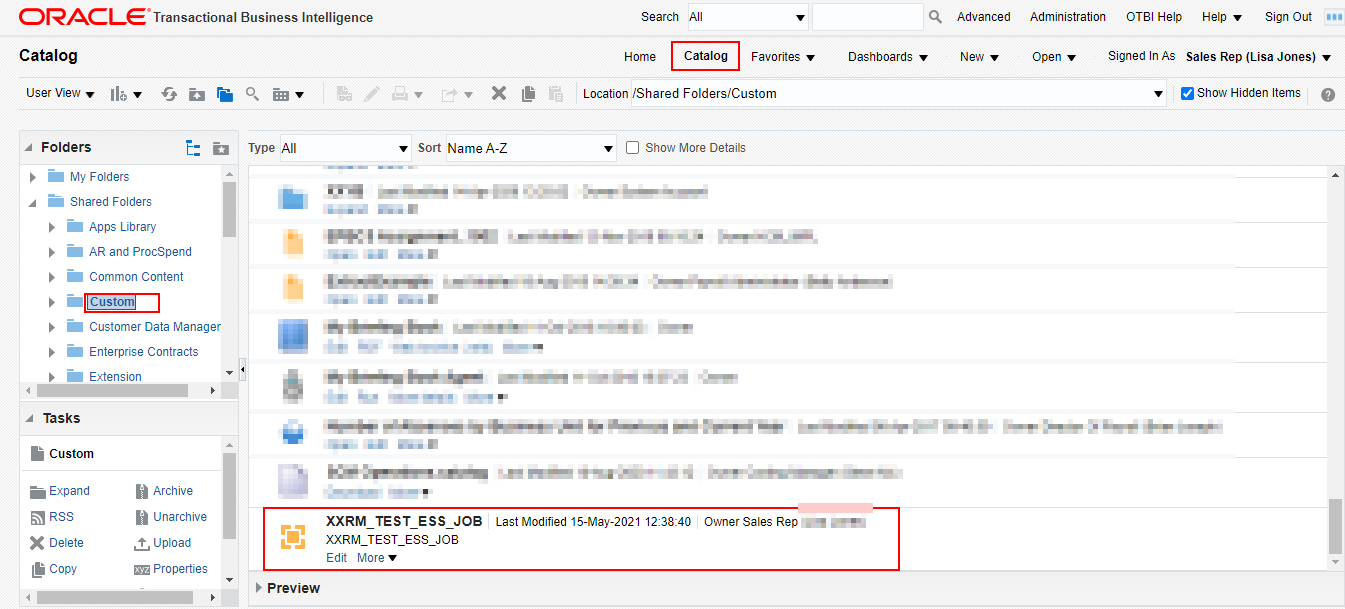
Now, save the Data Model in a folder. I saved it in the /Shared Folders/Custom folder.


Now, if you browse through the Catalog, you should be able to see the Data Model in the path you saved it under.
2. Create Report Layout
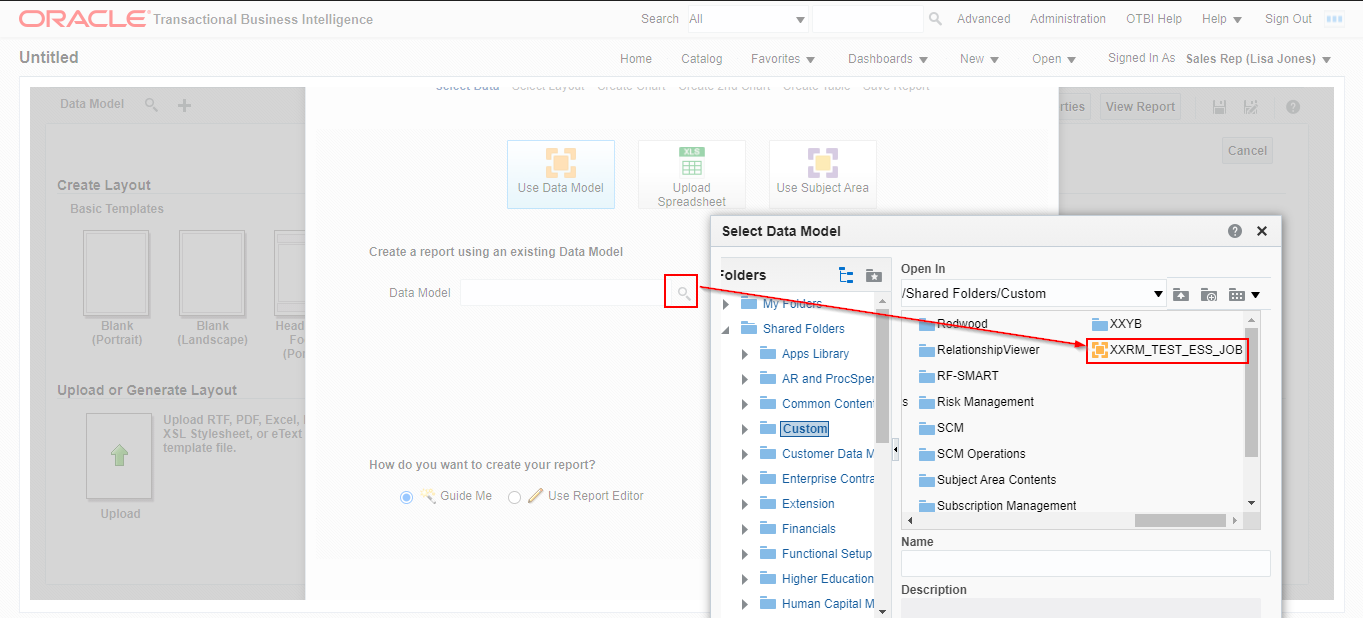
Now that we have the Data Model created, the next step would be to create the Report Layout. To do that, click on New > Report.

Since we have already created the Data Model, we need to select Use Data Model and search for our Data Model, which in this case is ‘XXRM_TEST_ESS_JOB’.
Select the Use Report Editor Radio button and click on Finish.

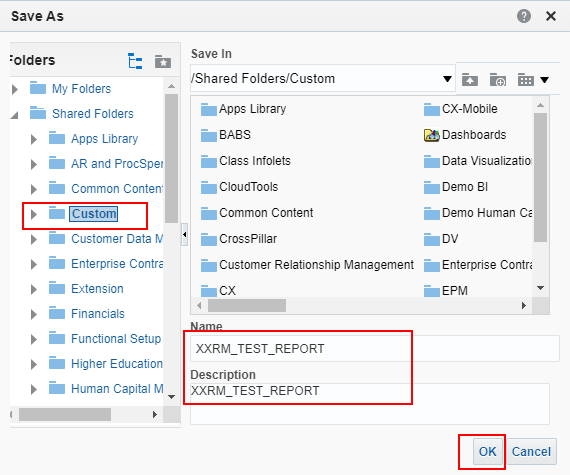
A pop up window will open, provide a valid name for the report layout and click OK.
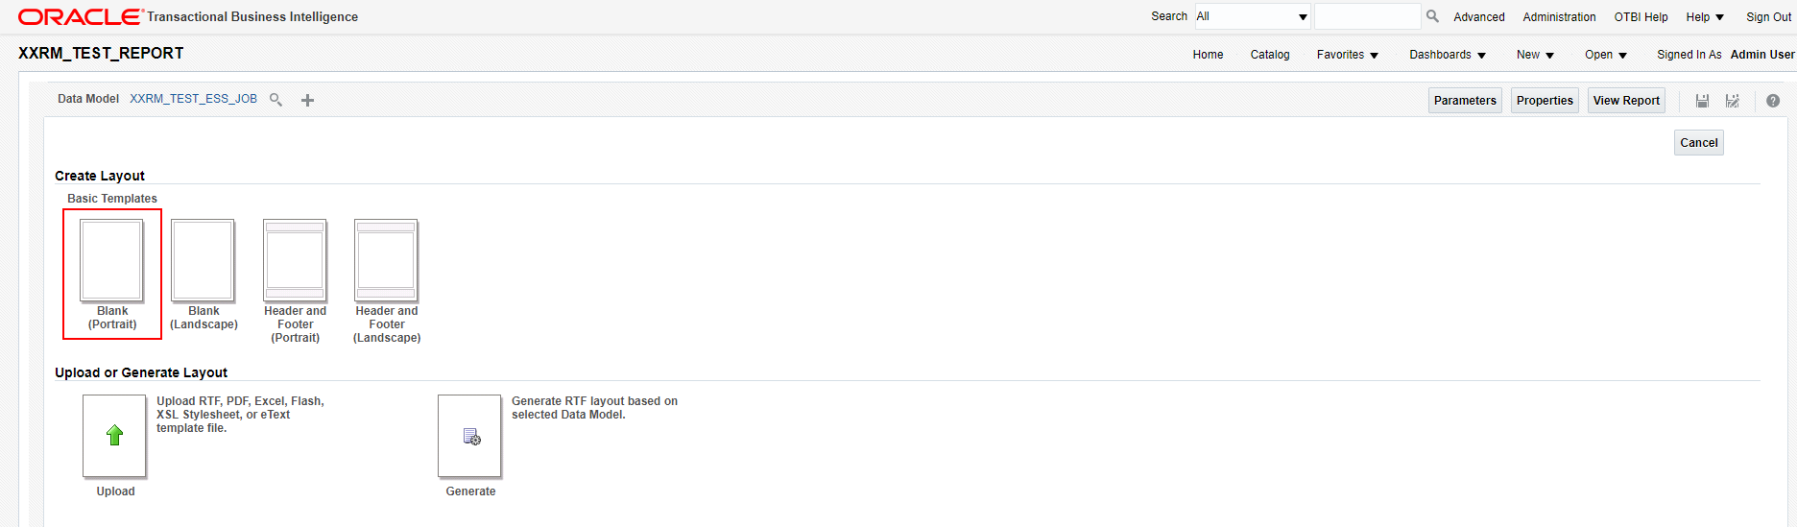
Here, I’m selecting Blank(Portrait) Layout for the demo. You can use any of the options. Additionally, if you want, you can design the template and upload it at this stage.
From the designer pane on the left hand side, expand the Components section, and drag and drop Data Table in the report design area, since we want the report in a tabular format.

Now expand the Data Source section and drag and drop the available columns from the data model that we had created earlier.

Provide a valid name for the layout and save the layout.

Click Done and then click on View Report on the right hand top corner. That’s our report created. Next we will register the report as an ESS Job.

3. Create ESS Job
We have created the Data Model, then created the BIP report, followed by creating the layout. At this stage our report design is complete. The final step is to register the report as an ESS Job. To do that, navigate to Setup and Maintenance and from the Task List click on Search.

Search with Manage%Enterprise%Scheduler%. Click the application under which you want to create the ESS Job, for example, ‘Manage Enterprise Scheduler Job Definitions and Job Sets for Financial, Supply Chain Management, and Related Applications‘.

Click on the + button to navigate to the Create Job Definition page.

Enter “Display Name”, “Name”, “Path”, “Application”. Select Job Type as ‘BIPJobType’. For the “Report ID”, copy the entire path of the report except ‘/Shared Folders/’ folder and the report name suffixed with .xdo.
In our case, the report XXRM_TEST_REPORT is saved under /Shared Folders/Custom. Hence, the Report ID would be ‘/Custom/XXRM_TEST_REPORT.xdo‘.

Click on the + button in the Parameter section to add the details of the parameter as shown below. If you have more than one parameter, then the order of the parameters should be same as that you entered while creating the report.


Click Done.

This concludes registering the ESS Job. The next and the final step is to Submit the ESS Job and test whether it works.
4. Submit the ESS Job
To submit the ESS Job, navigate to Tools > Scheduled Processes. Click on Schedule New Process.

Search for the Job and click OK.

Fill in the value of the Parameter and click on Submit.

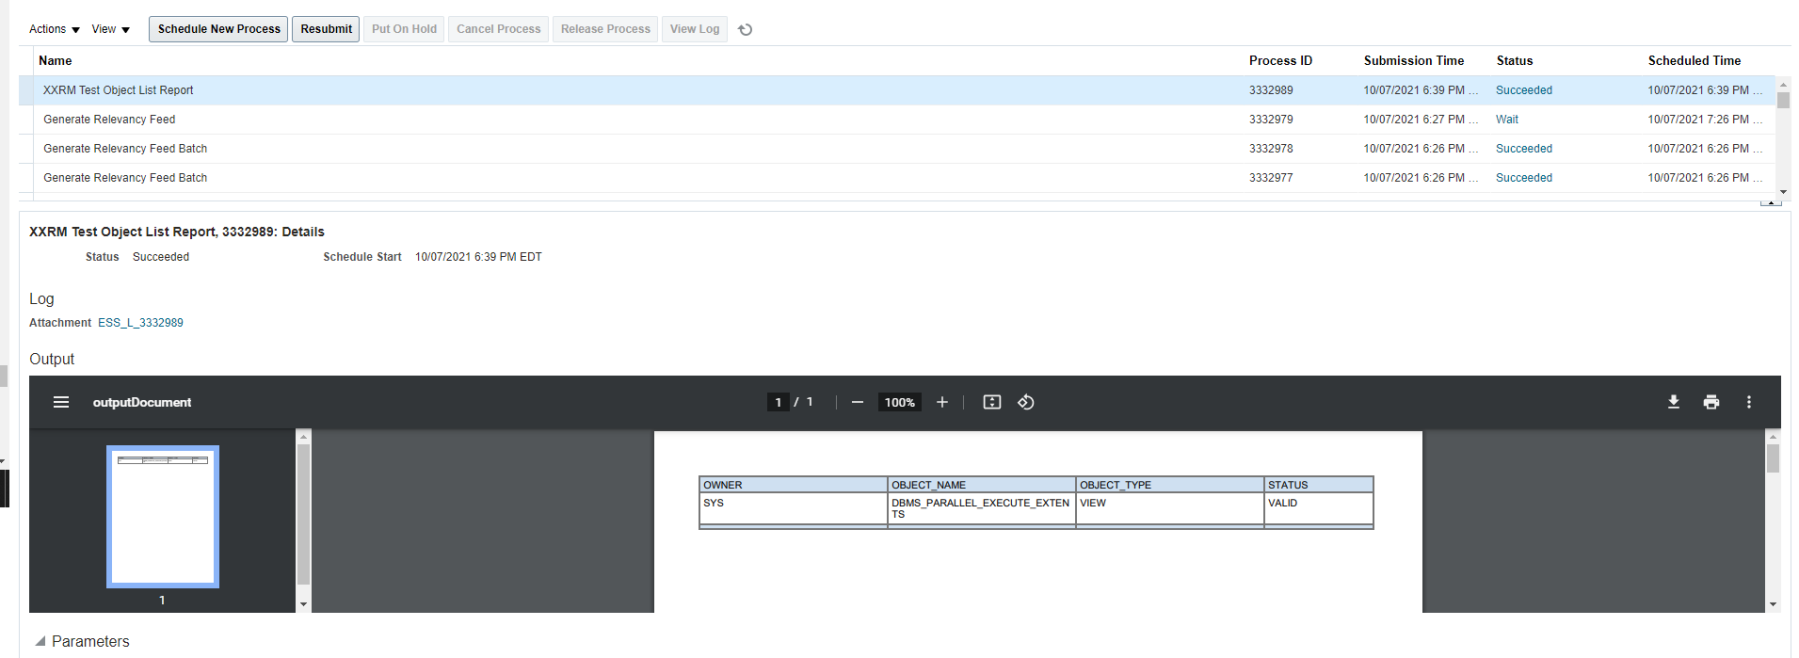
Note down the Request ID/Process ID.

Refresh to get the status of the Job. When the ESS Job completes successfully, click on the job to check the Log, Data XML and Output for the Job execution.


Congratulations! We just created our first ESS Job in Oracle ERP Cloud, using BI Publisher.
I hope you find this post helpful. If you do like this post, please let me know in the comments section below, and share with friends and colleagues. In case you have any further queries, please feel free to reach out and I’ll try my best to get back to you.

A great post with detailed steps to create ESS jobs that makes use of BI Reports. Nice one, Rishin
LikeLiked by 2 people
Thank you.
LikeLiked by 1 person
Pingback: Create an ESS Job with Parameters using Lookup | RishOraDev's Oracle Blogs
Hello Rishin
First of all thank you for detailed article, but i am stuck on step where we submit the ESS job , when i am searching XXRM Test Object Report it is not coming in schedule process, please guide where i did mistake.?
LikeLike
Hello Rishin
First of all Thank you for step by step Article, but i am stuck on the step when we submit ESS job, when i am searching for XXRM Test Object Report no data is coming in schedule process ,please guide where i made a mistake
LikeLike