Step-by-Step Guide to Oracle Database API for MongoDB
Using Oracle Database API for MongoDB, you can manipulate collection of JSON documents stored in an Oracle Database. If you are using ORDS version 22.3 or later, then you can use Oracle Database MongoDB API with any Oracle Database Release 21c or later, or Oracle Autonomous Database 19c or later(serverless, dedicated, and cloud@customer).
You can modify the configuration of an existing Oracle Autonomous Database by configuring ACLs or by defining a private endpoint.
However, for this blog, we will see how we can configure a new Oracle Autonomous Database and enable Oracle Database API for MongoDB for release 23ai.
So lets crack on!!!
Create Autonomous Database 23ai
To create Oracle Autonomous Database 23ai, login to your OCI console and navigate to Oracle Database > Autonomous Database and click on Create Autonomous Database.

Provide a Display Name and Database Name and select the Compartment where you want to create your Autonomous Database.
For the Workload Type, select JSON as shown below.

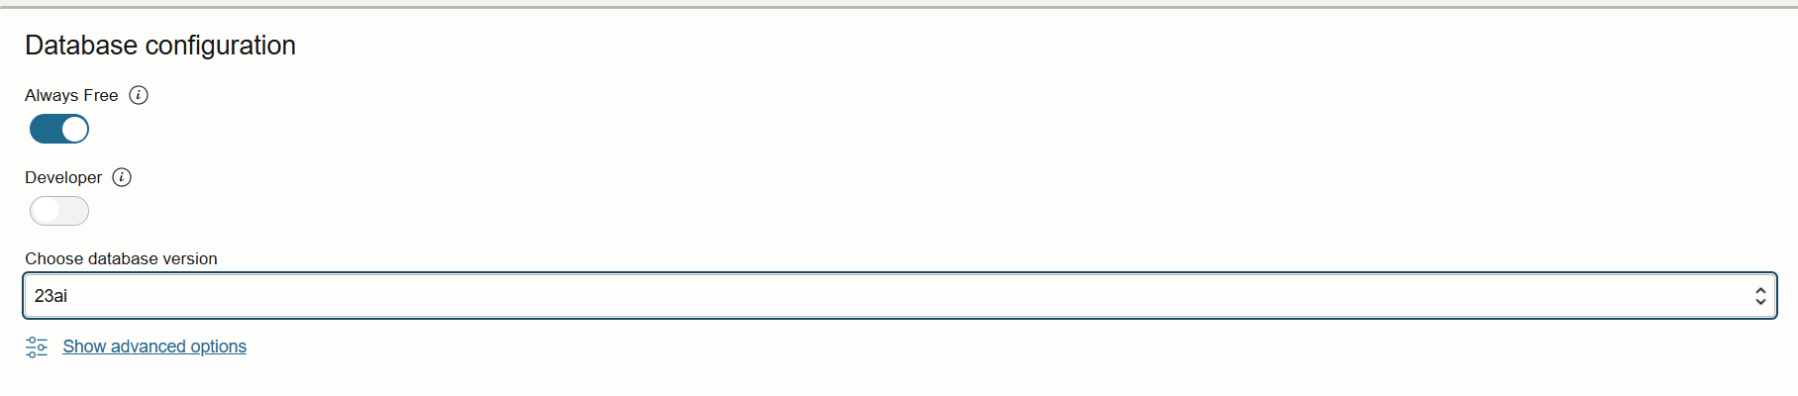
In the Database Configuration section we chose release 23ai.
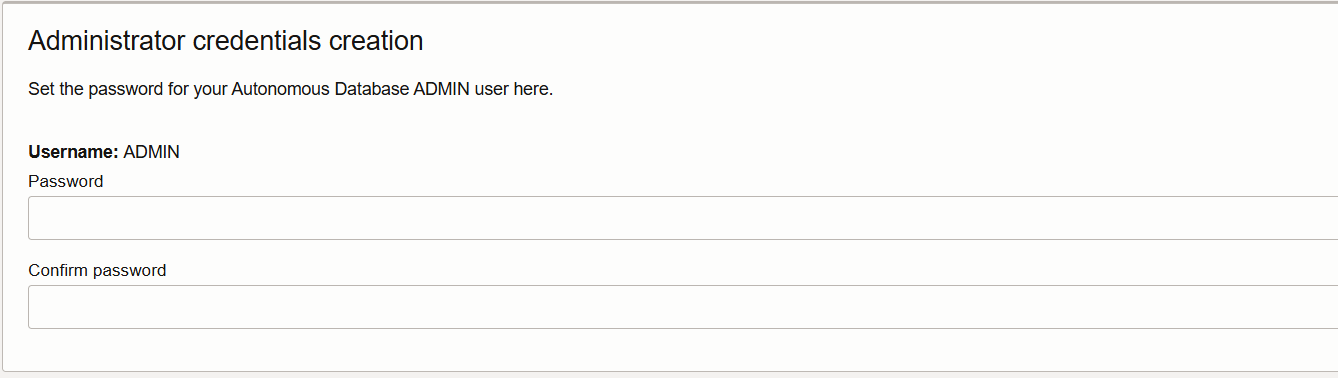
Set the password for the ADMIN user.
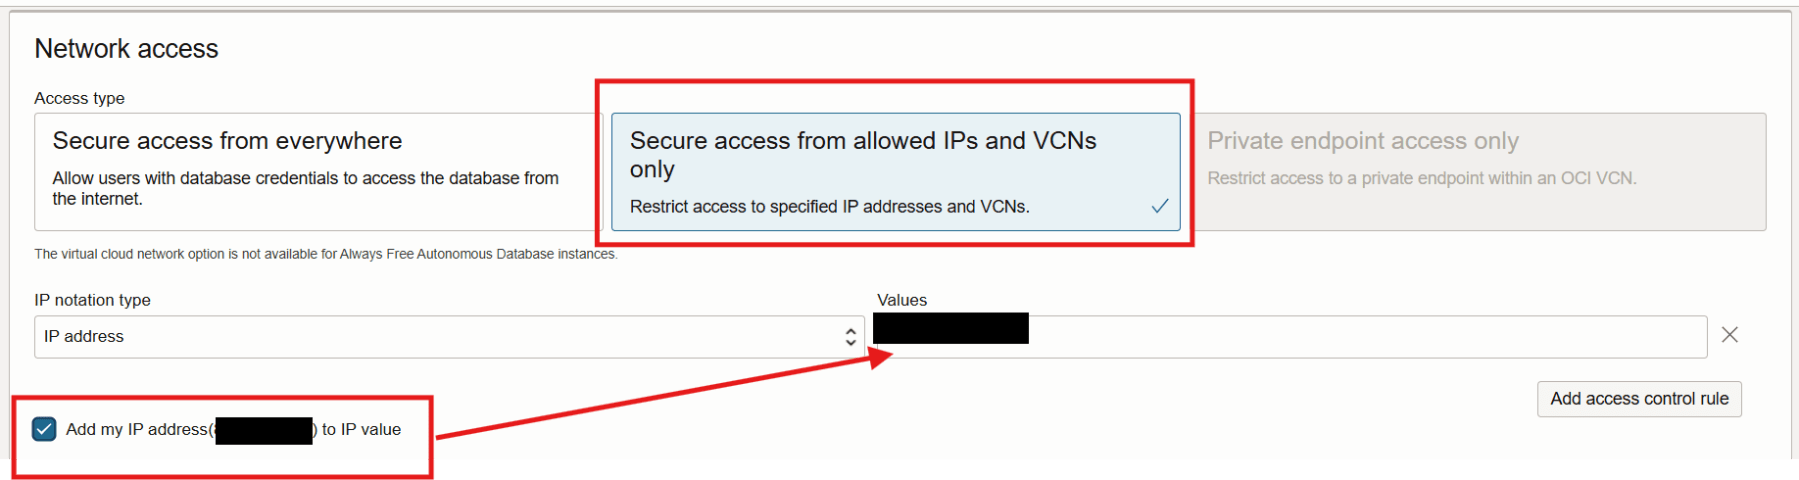
Scroll down to the Network access section, select Secure access from allowed IPs and VCNs only. Enable the Add my IP address checkbox. This should populate your IP address in the field highlighted below.
Note: You can also chose to use and configure Private endpoint access only, but we will use Secure access from allowed IPs and VCNs only for this blog.
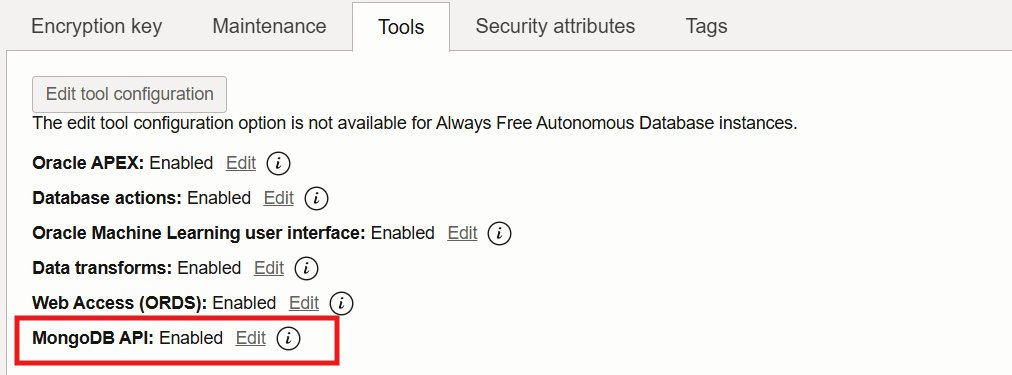
Scroll down to the very bottom of the page and click on Show advanced options. Navigate to the Tools tab and ensure MongoDB API is enabled.
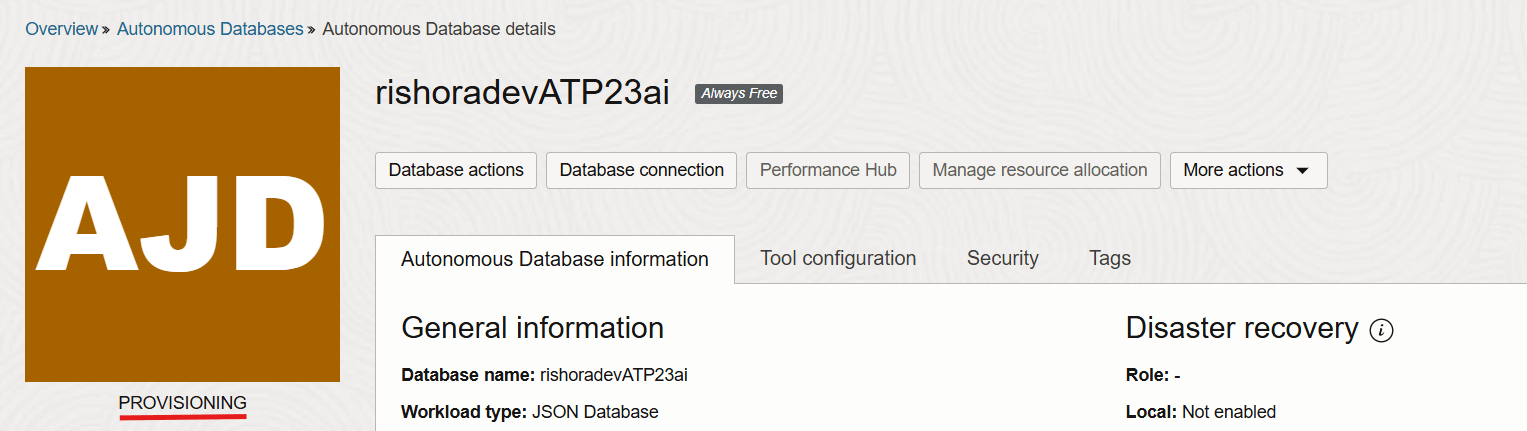
Now click on the Create button. It takes a few minutes for the database to get created. The status is shown below.
Once the Autonomous Database is provisioned, the status should change to Available.
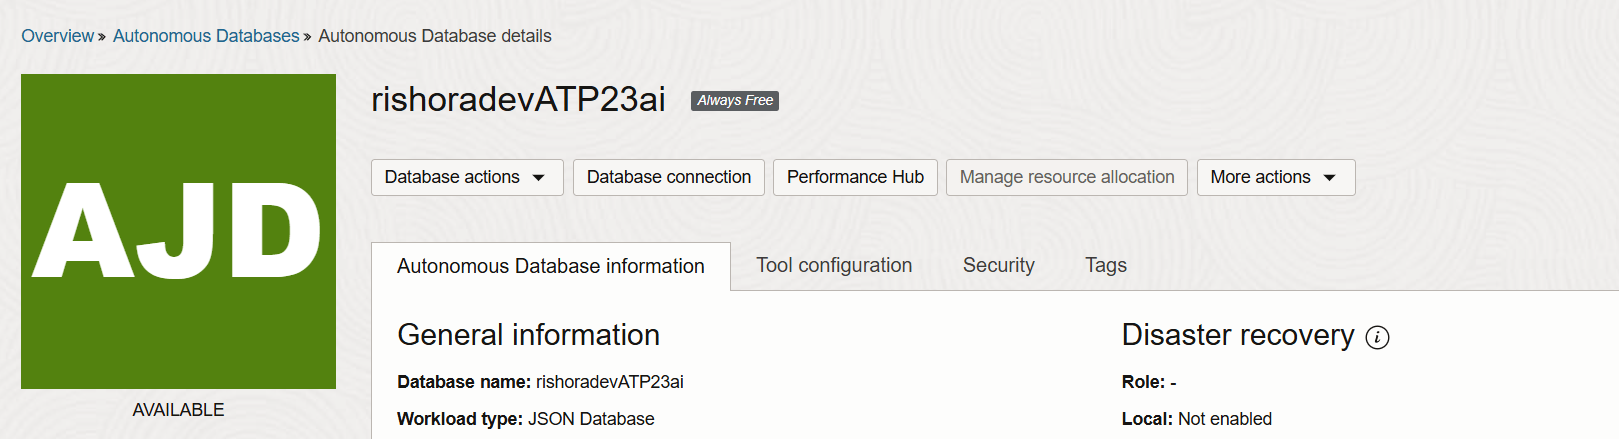
Our Autonomous Database is now created. Next, we will create an user.
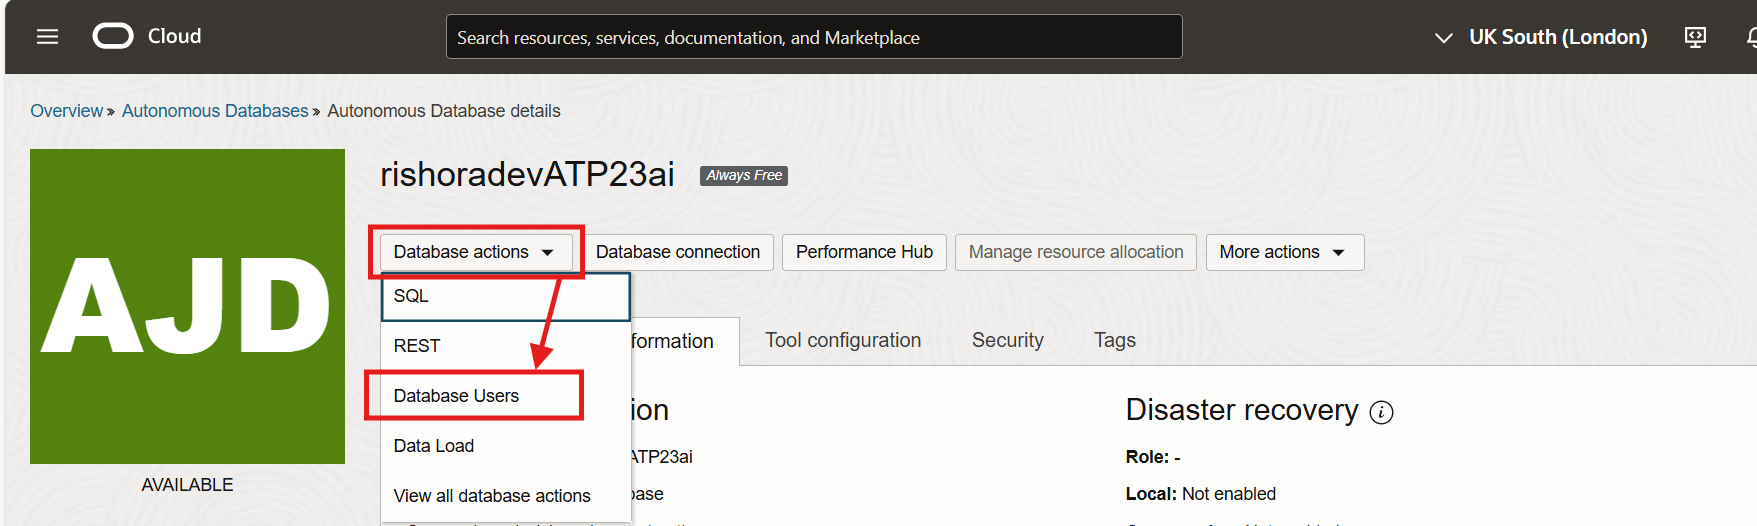
Create Test Autonomous Database User
To create an user, select Database Actions and click on Database Users.
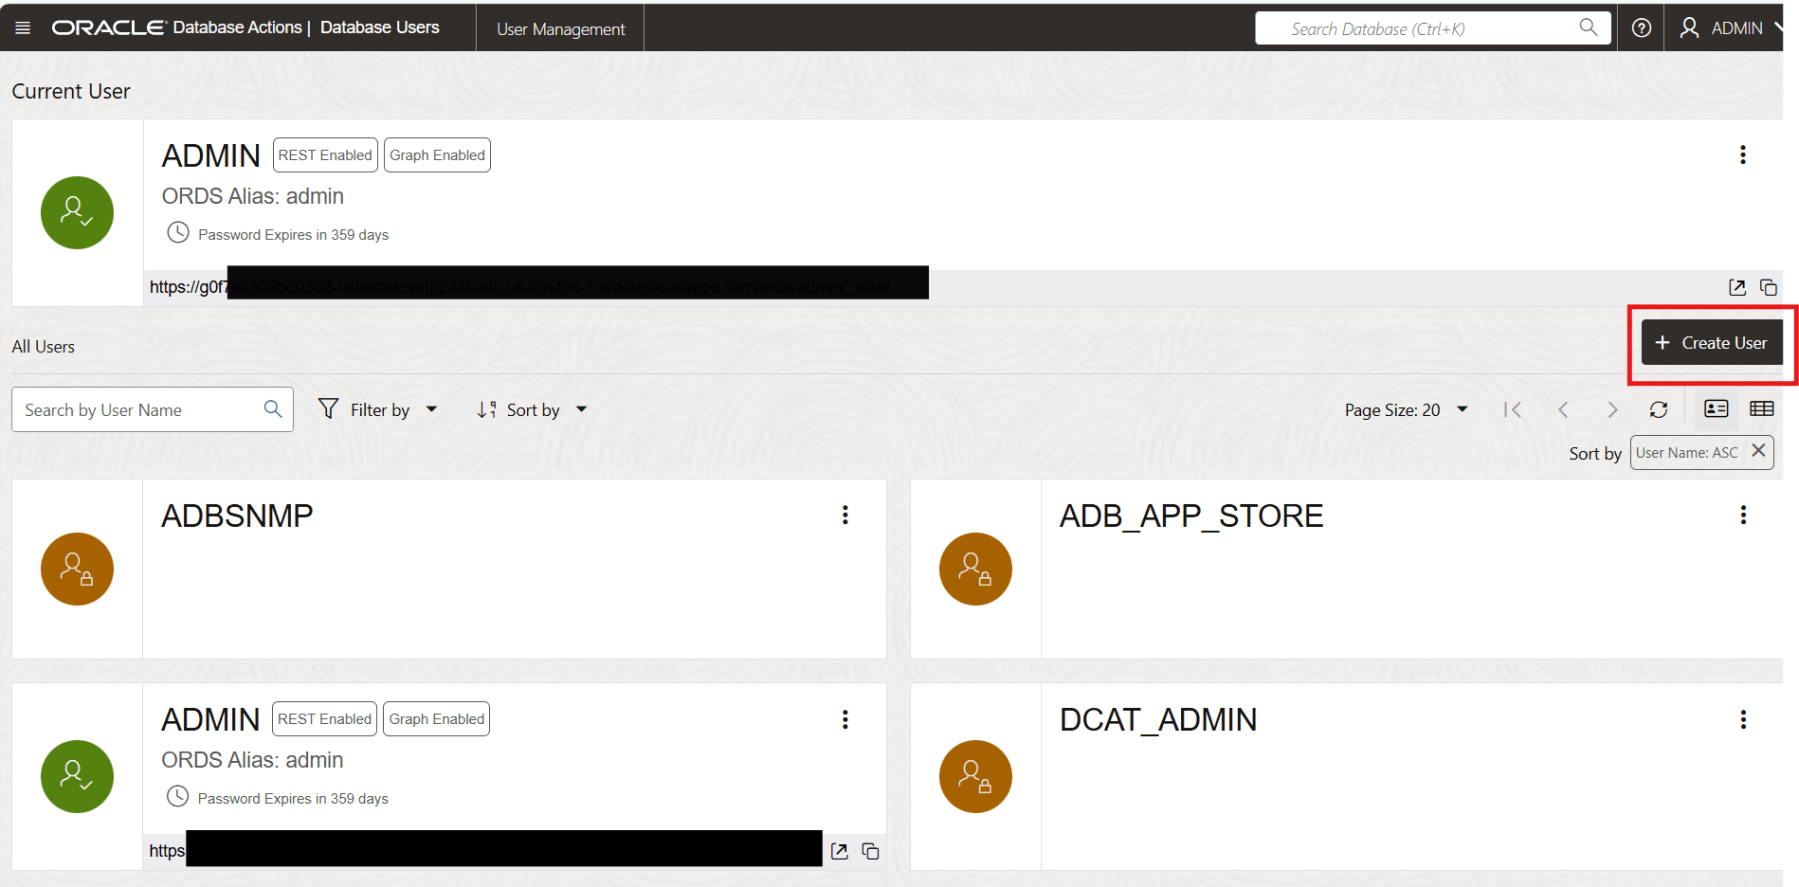
Click on the + Create User button on the Database Users page.
Enter a username and password for the Test Autonomous Database User. Select appropriate tablespace size.
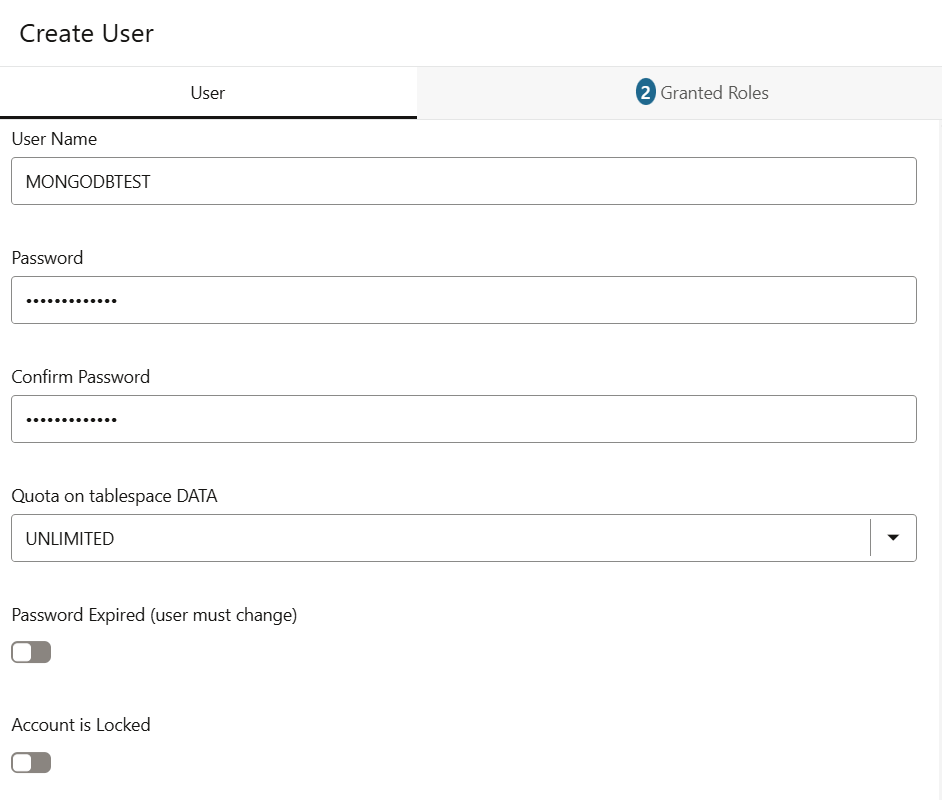
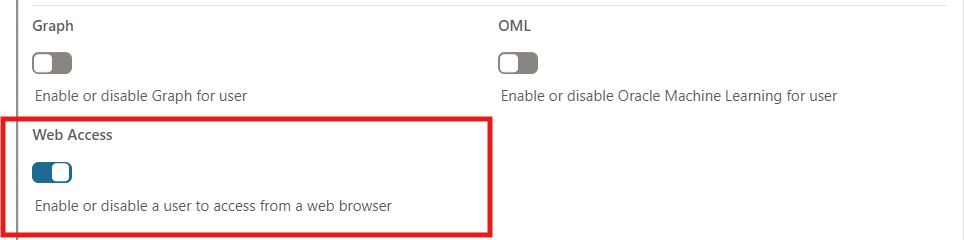
Enable Web Access.
Navigate to the Granted Roles tab and add the SODA_APP role for the user, in addition to the default roles.
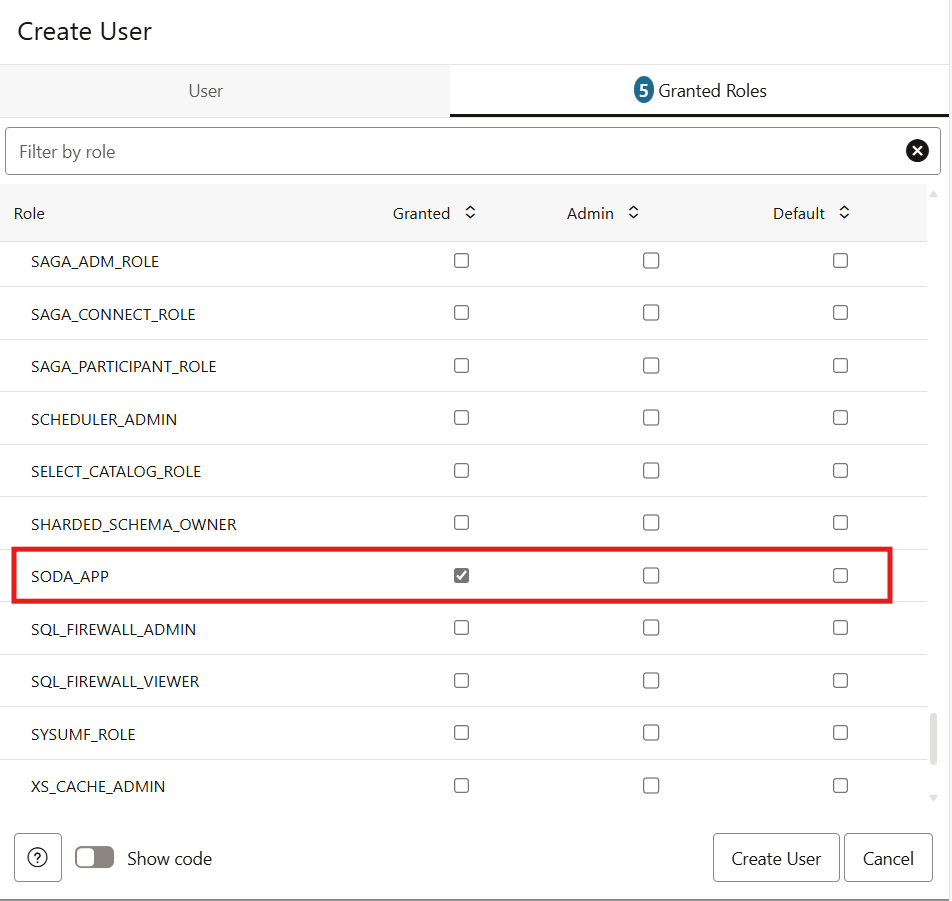
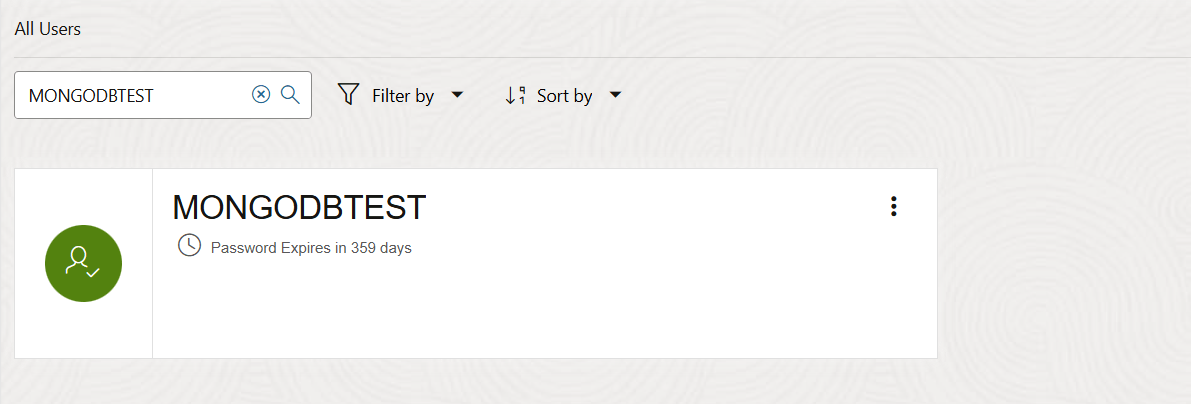
Click on the Create User button. This should create the Test Autonomous Database User.
Get e Test Autonomous Database User
In order to connect to the Oracle Autonomous database using the MongoDB Shell, we first need to get the connection string. To get the connection string navigate to the Tool configuration tab on the Autonomous Database details page.
Locate the MongoDB API row and Copy the Access URL.
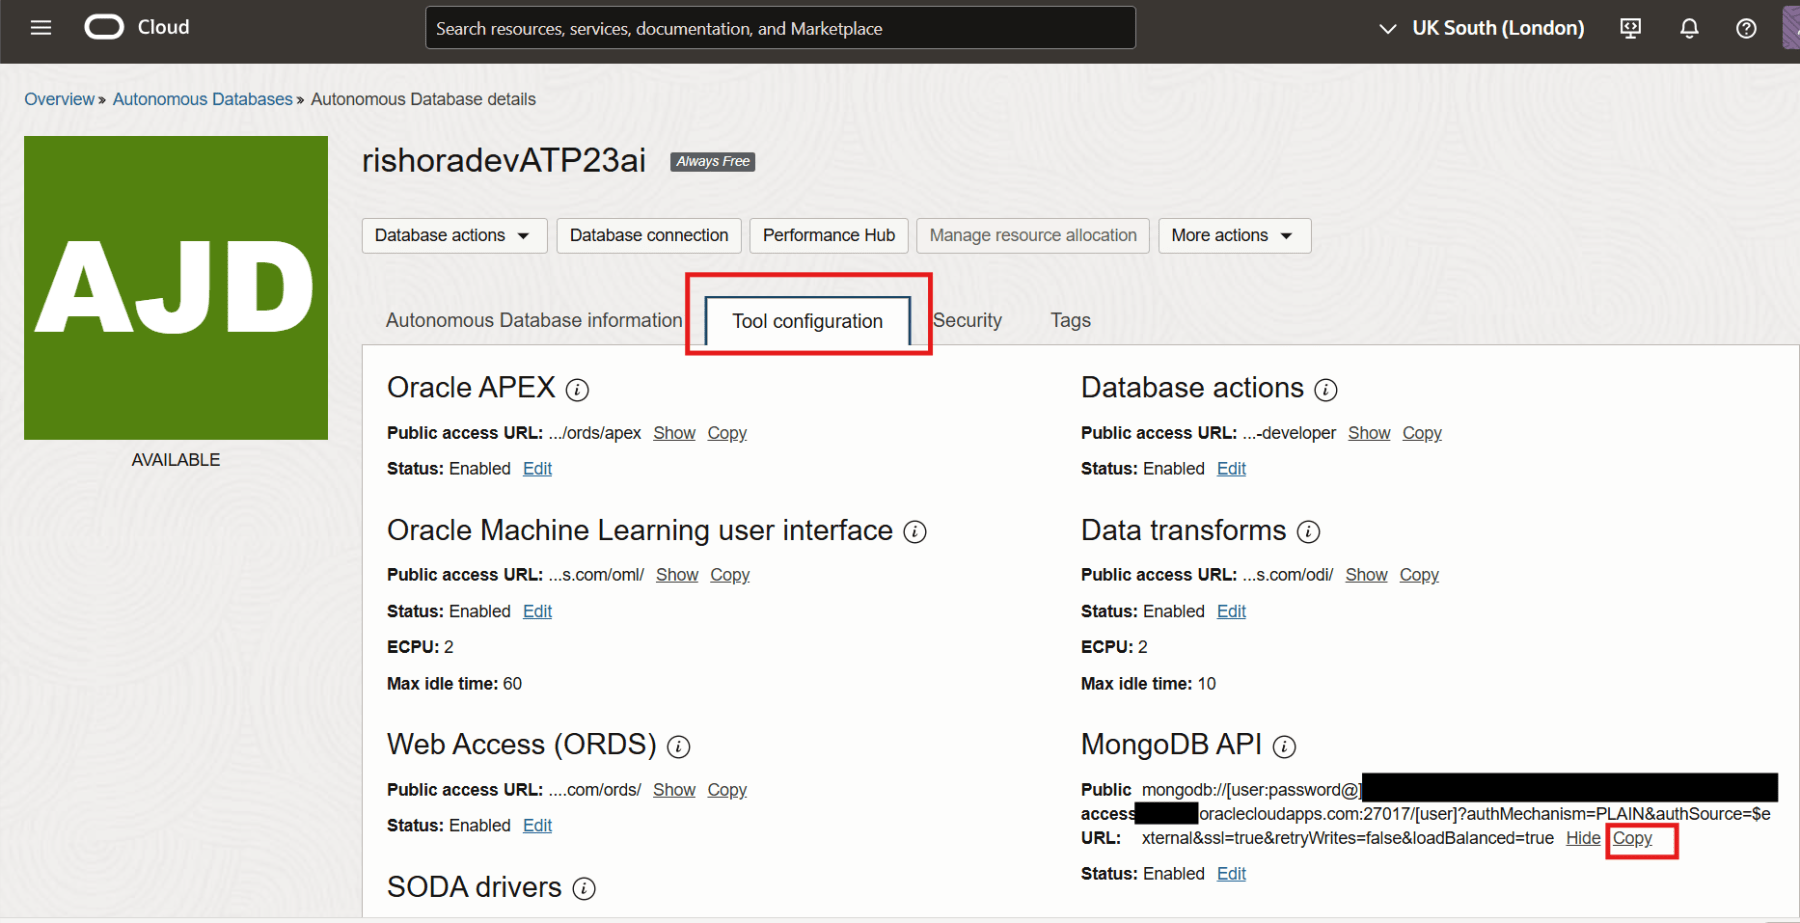
Amend the username and passwords in the Access URL. We will use this connection string to establish the connection to the Autonomous database from the MongoDB Shell.
Test the Connection
You can download the MongoDB Shell from here, if you have not already. Open the CLI and paste the connection string, when prompted, and press enter. And voila, we have just managed to connect to the Oracle Autonomous database through the MongoDB Shell.

Now that we have established the connection to our Oracle Autonomous DB instance through the MongoDB Shell, let us create a collection.
Create Collection using MongoDB CLI
We use the MongoDB “show command” to fetch all the collections.
MONGODBTEST> show collections
Use the “db.createCollection” to create a collection. We create a collection called ’emp’.
MONGODBTEST> db.createCollection('emp')
{ ok: 1 }
MONGODBTEST> show collections
emp
Insert data into the Collection using MongoDB CLI
Now that we have created the collection, we use the “db.emp.insertOne” command to insert documents into the collection. Here, we insert three documents in the emp collection.
MONGODBTEST> db.emp.insertOne({empID:1, name:"Rishin"})
{
  acknowledged: true,
  insertedId: ObjectId('67e319ae23a6a1bba4b71239')
}
MONGODBTEST> db.emp.insertOne({empID:2, name:"Rahul", job:"Manager"})
{
  acknowledged: true,
  insertedId: ObjectId('67e31a0e23a6a1bba4b7123a')
}
MONGODBTEST> db.emp.insertOne({empID:3, name:"Zahid", job:"Senior Manager"})
{
  acknowledged: true,
  insertedId: ObjectId('67e31b1d23a6a1bba4b7123c')
}
Query the Collection using MongoDB CLI
We can pretty print the collection using the “db.<<CollectionName>>.find().pretty()” command.
MONGODBTEST> db.emp.find().pretty()
[
  {
    _id: ObjectId('67e319ae23a6a1bba4b71239'),
    empID: 1,
    name: 'Rishin'
  },
  {
    _id: ObjectId('67e31b0723a6a1bba4b7123b'),
    empID: 2,
    name: 'Rahul',
    job: 'Manager'
  },
  {
    _id: ObjectId('67e31b1d23a6a1bba4b7123c'),
    empID: 3,
    name: 'Zahid',
    job: 'Senior Manager'
  }
]
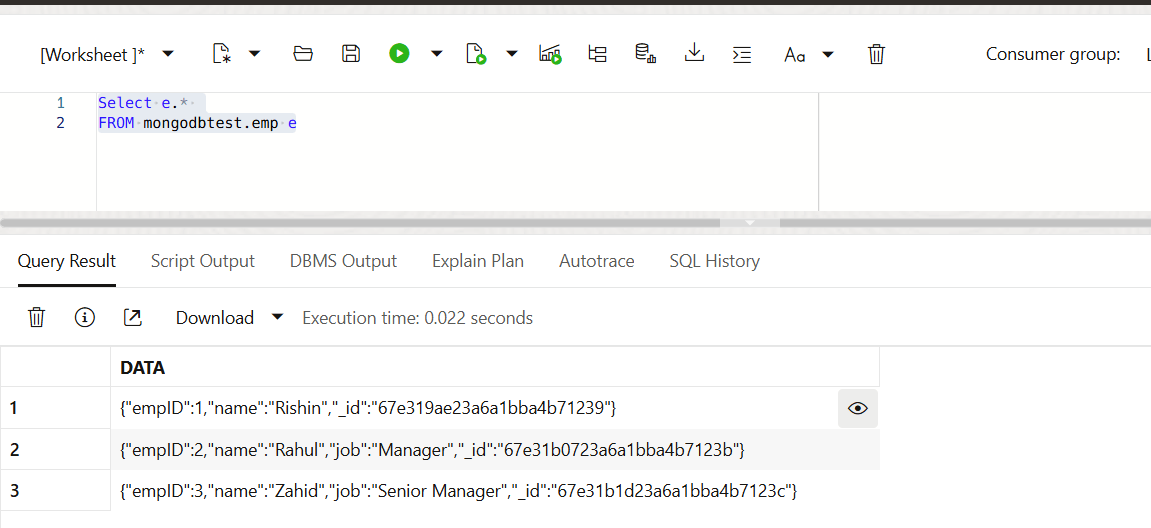
Query the Collection using SQL Client
We can query the collection, that we created from MongoDB through the SQL client.
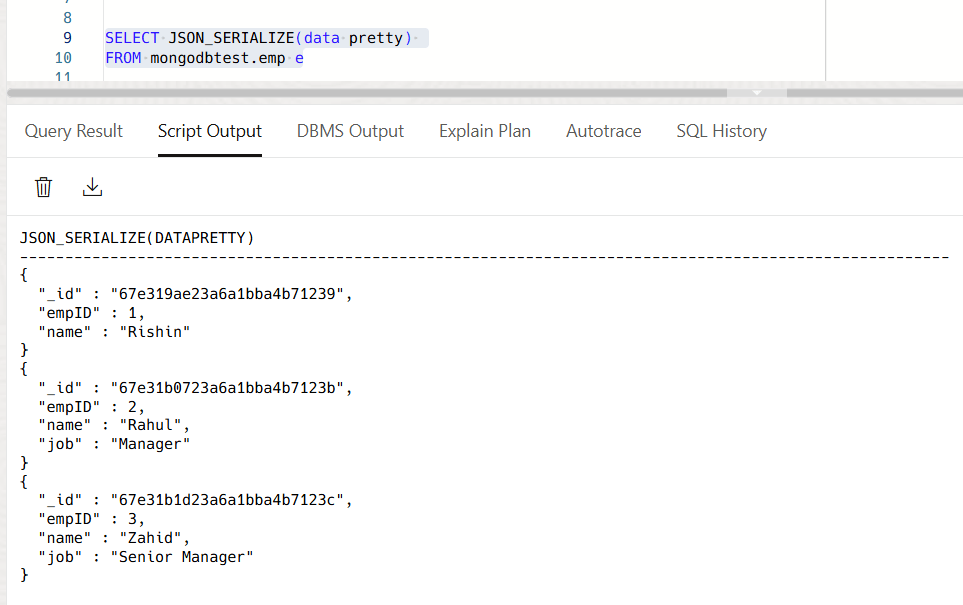
Use JSON_SERIALIZE function to pretty print the JSON data, so it is more readable.
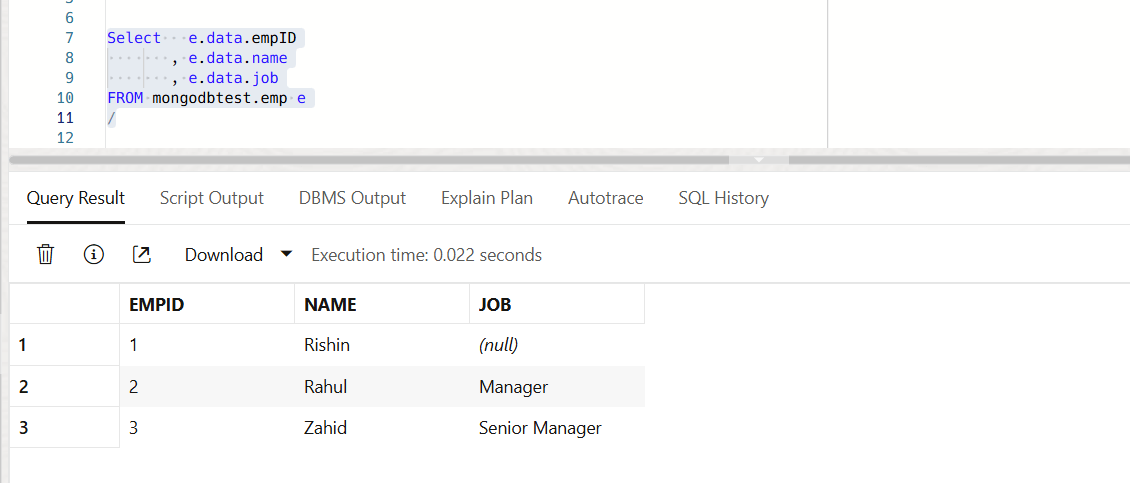
Use the following query to fetch each attribute as columns.
Hope this helps. Happy learning!!!
References
