Generating an API Signing Key through OCI Console
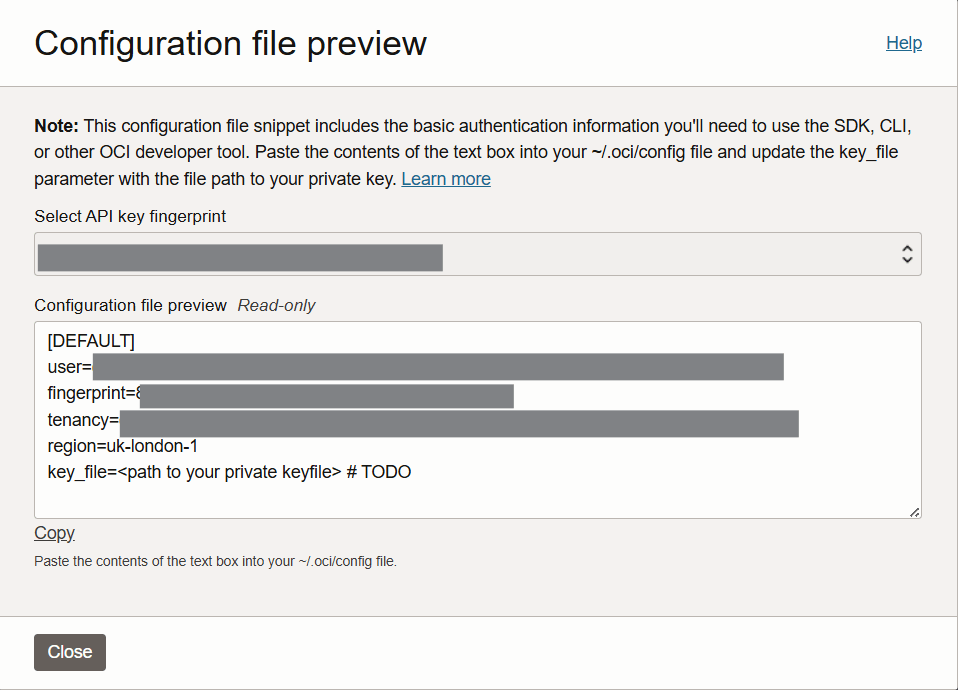
In this post, we will look into the step-by-step process of how you can generate a private key/public key pair from the OCI Console. When the OCI console is used to generate the API signing key pair, a configuration file preview snippet is generated with the following keys and OCIDs.
| Parameters | Description | |
| user | OCID of the user for whom the key pair is being added | |
| fingerprint | Fingerprint of the key that was just added | |
| tenancy | OCID of the tenancy | |
| region | Currently selected region in OCI Console | |
| key_file | Path of the file system where the private key file is downloaded and saved |
So, let’s see how you can generate the private/public key file from the OCI console.
Generating API signing key
To generate the API signing key, login to your OCI console.
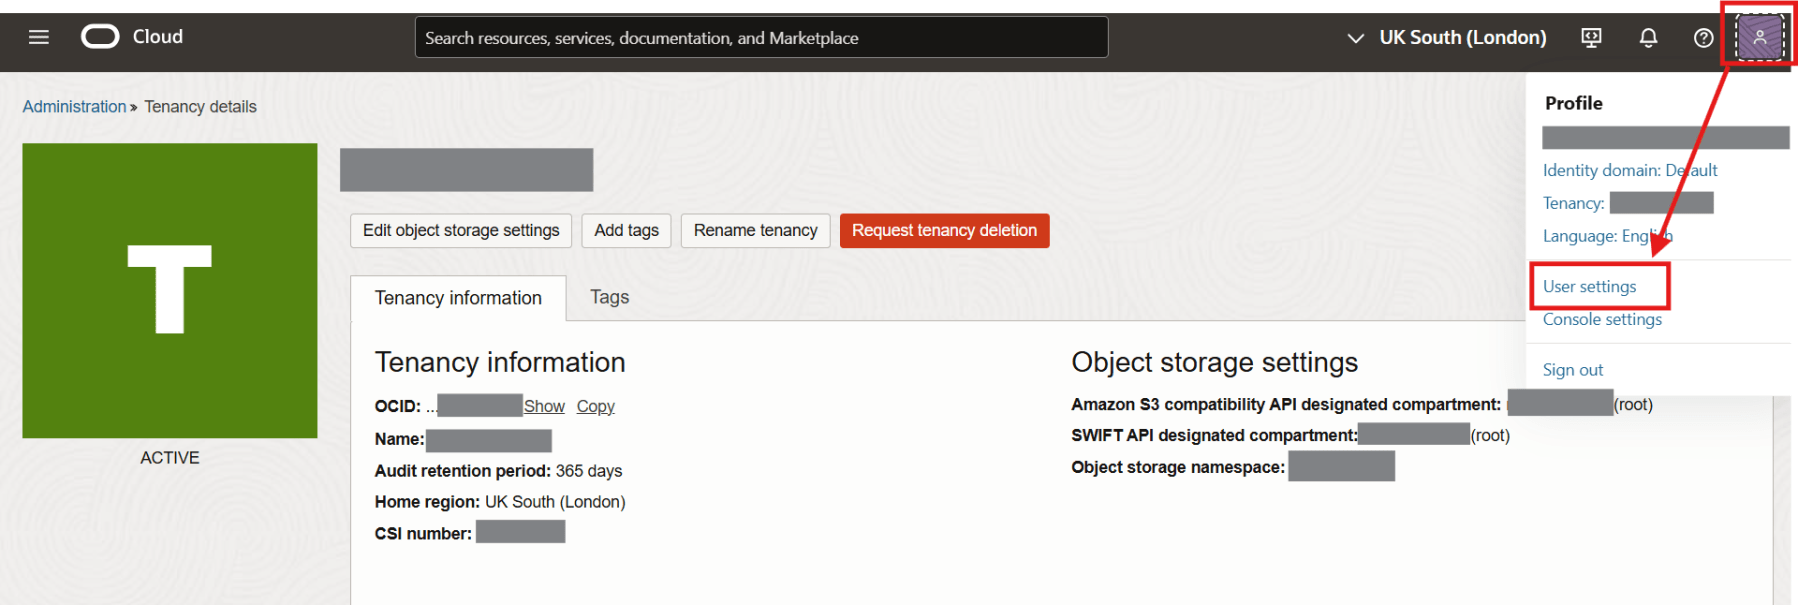
Once you login, click on Profiles icon on the top-right corner and select User settings as shown below.
Note: If you’re an administrator adding an API key for another user: Open the navigator and select Identity & Security. Under Identity, select Users. Locate the user in the list, and then click the user’s name to view the details.
Scroll down to the bottom of the page and click on API keys in the Resources section.

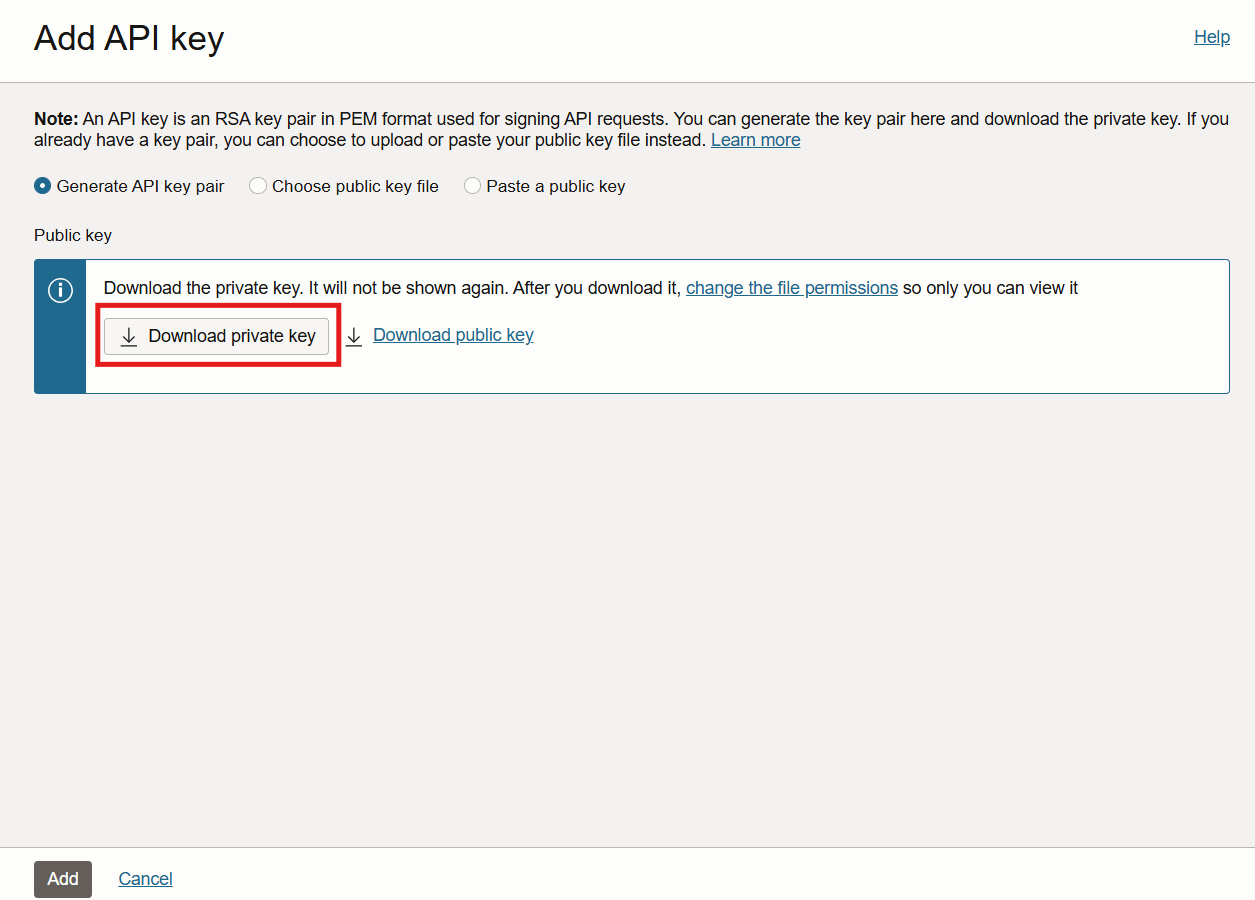
Click on Add API key.

This will open up the Add API key dialog. Click on the Download private key button and save the private key to your .oci directory. The RSA key pair will be generated in PEM format (minimum 2048 bits).
Now click on the Download public key link to save the public key.
Note: If you are using Windows, you can create the .oci directory by executing the following command from a PowerShell CLI.
mkdir %HOMEDRIVE%%HOMEPATH%\.oci
Once you have saved the private key file, click on Add.

The key is added and the Configuration File Preview is displayed. The file snippet displays the required parameters needed to create the configuration file.
Click Close and voila, we successfully generated the private/public key through the OCI console.

References
