Bulk Upload Lookup Types and Lookup Codes in Oracle Fusion
In this blog we will look at how we can bulk upload Lookup Types and corresponding Lookup Codes into Oracle Fusion. We can use File Based Loader for this purpose. The process is fairly simple and consists of the following steps.
- Prepare the Lookup Files
- Upload the Files to the UCM server
- Import the Uploaded Files
- Verify imported data
So let’s understand each step in more detail.
Prepare the Lookup Files for Upload
First step is to create the import files including all the mandatory columns and optional columns. We need to use the pipe ‘|’ as the delimiter in the file. Remember that we will have to create separate files for Lookup Types and Lookup Codes. The following table shows the columns that should be included for Lookup Types.
| Header | Description | Data Type | Size | Required or Optional |
| LookupType | Displays the Lookup Type | String | 30 | Required |
| Meaning | Displays the name of the Lookup Type | String | 80 | Required |
| Description | Displays the Description of the Lookup Type | String | 240 | Optional |
| ModuleType | Displays the module associated with the Lookup Type | String | 60 | Required |
| ModuleKey | Displays the module code associated with the Lookup Type | String | 60 | Required |
Typically the entry would look like this.
LookupType|Meaning|Description|ModuleKey|ModuleType
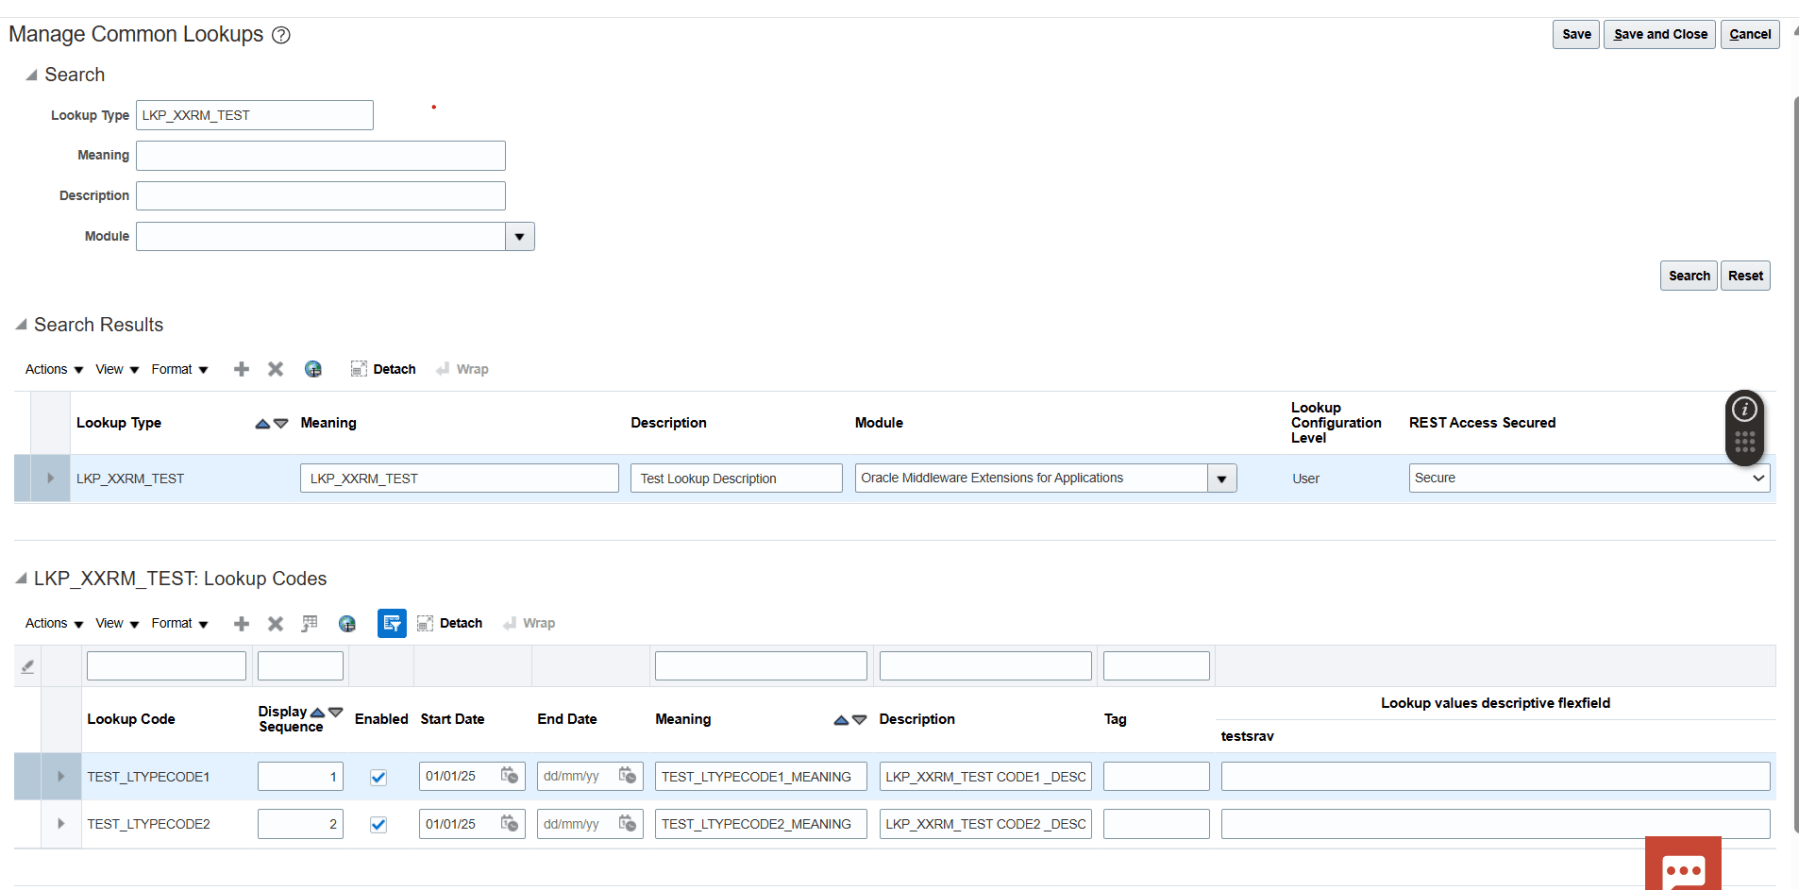
LKP_XXRM_TEST| LKP_XXRM_TEST| Test Lookup Description|FND|APPLICATION
Here, we create a Lookup Type named LKP_XXRM_TEST, meaning: LKP_XXRM_TEST, Description: Test Lookup Description under the APPLICATION module (Module Key: FND). You can refer to Document 2210612.1 for details to find ModuleType and ModuleKey.
Once you have prepared the data for Lookup Type, save the file in .csv format. Note that the file should be of UTF-8 encoding. I use Notepad++ for this purpose as shown below.

Similarly, let us create the file for Lookup Codes. The following table shows the columns that should be included for Lookup Codes.
| Header | Description | Data Type | Size | Required or Optional |
| LookupType | Displays the Lookup Type | String | 30 | Required |
| LookupCode | Displays the Lookup Code associated with the Lookup Type | String | 30 | Required |
| DisplaySequence | Sequence in which the Lookup Code appears in the List of Values | Long | Optional | |
| EnabledFlag | Denotes whether the Lookup Code is Enabled or Disabled. This column allows two values: Y = Enabled N = Disabled | String | 1 | Required |
| StartDateActive | The start date from which the Lookup Code is Active. Format to use is dd/MM/yyyy | Date | Optional | |
| EndDateActive | The end date when the Lookup Code will be/was Active. Format to use is dd/MM/yyyy | Date | Optional | |
| Meaning | Displays the name of the Lookup Code | String | 80 | Required |
| Description | Displays the description of the Lookup Code | String | 240 | Optional |
| Tag | Tag associated with the Lookup Code. | String | 150 | Optional |
Typically the entry would look like this.
LookupType|LookupCode|DisplaySequence|EnabledFlag|StartDateActive|EndDateActive|Meaning|Description|Tag
LKP_XXRM_TEST|TEST_LTYPECODE1|1|Y|01/01/2025||TEST_LTYPECODE1_MEANING|LKP_XXRM_TEST CODE1 _DESC|
LKP_XXRM_TEST|TEST_LTYPECODE2|2|Y|01/01/2025||TEST_LTYPECODE2_MEANING|LKP_XXRM_TEST CODE2 _DESC|
Here, for the Lookup Type LKP_XXRM_TEST, we create two Lookup Codes – TEST_LTYPECODE1 and TEST_LTYPECODE2.
Save the file again in .csv format and UTF-8 encoding.
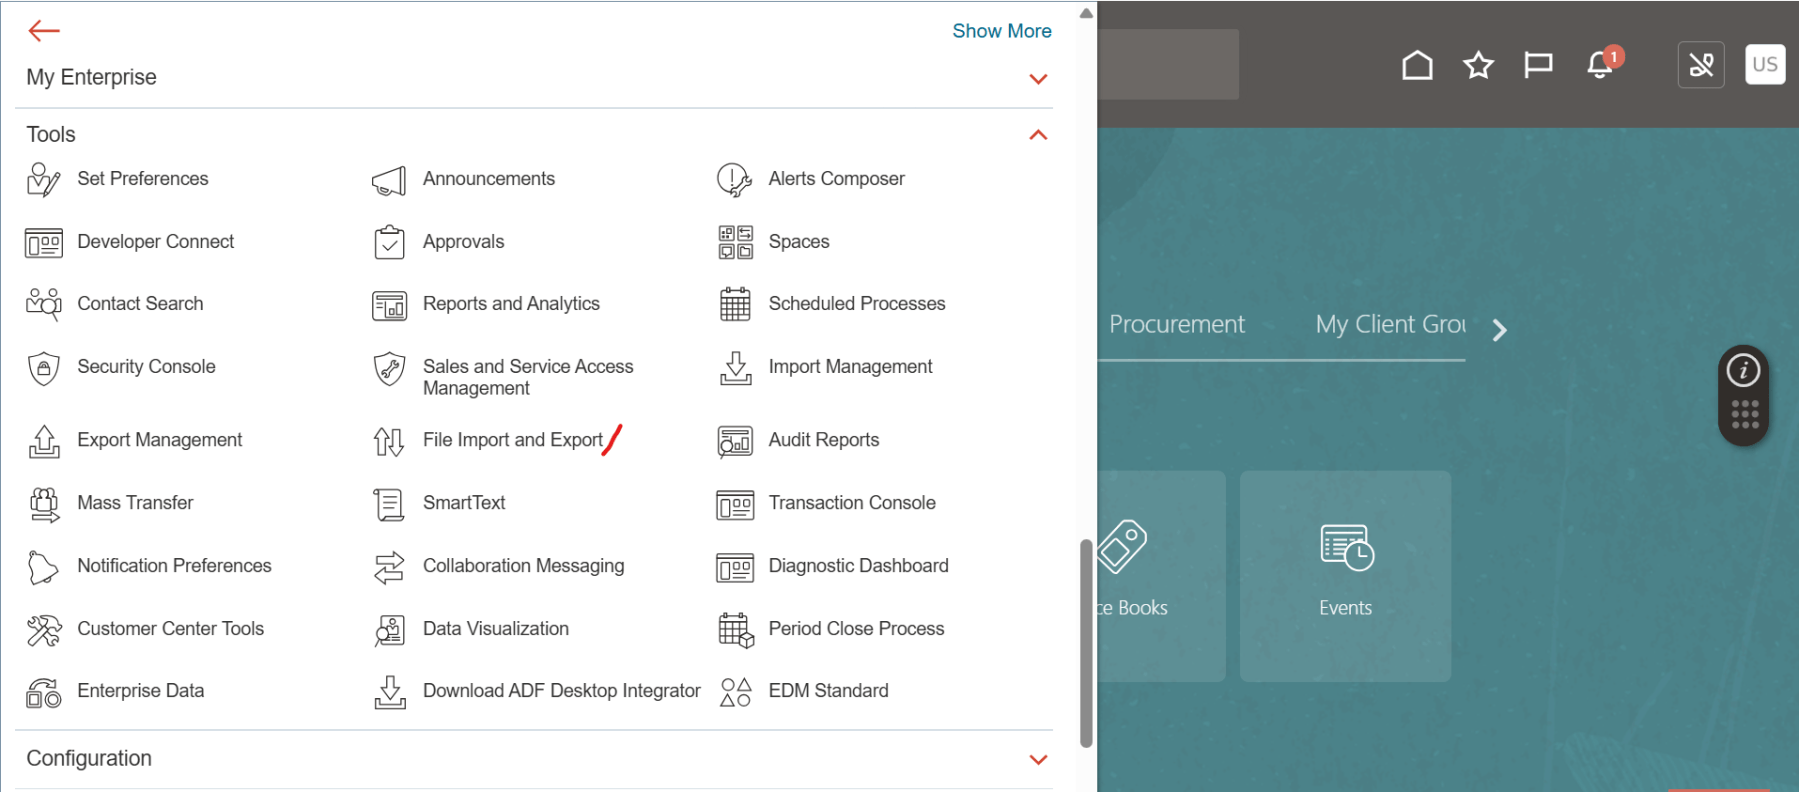
Upload Files to the UCM Server
To upload the files in the UCM server, login to your Oracle Fusion instance and navigate to Tools > File Import and Export.
Click on the Upload icon.
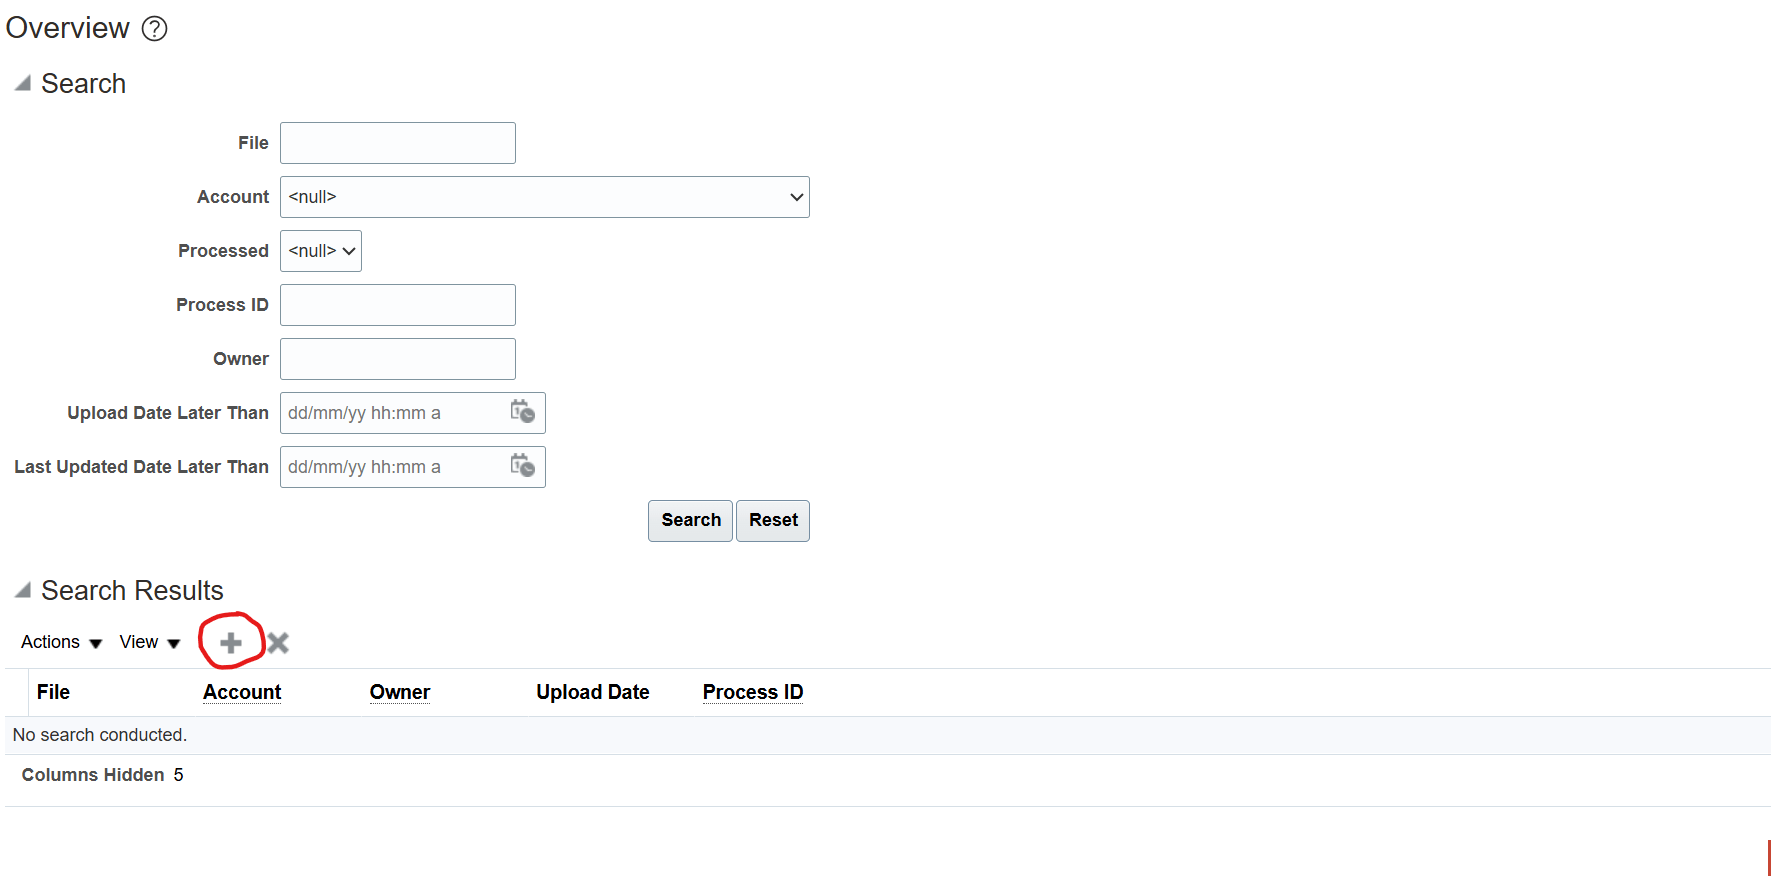
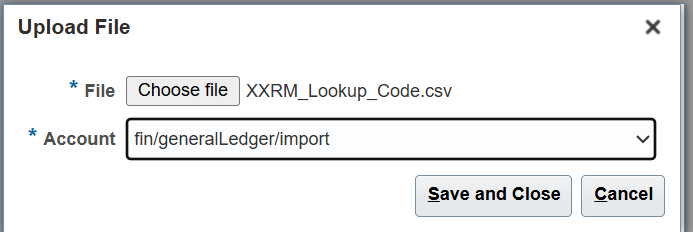
Select the relevant Account from the Account drop-down list. Here, we use ‘fin/generalLedger/import’. Then browse to and select your import file- first we upload the file for Look Type and click on Save and Close.

Then the Lookup Codes.
Import Uploaded Files
Once the files are uploaded to the UCM server, the next step is to Import these files. This process will create the records in the corresponding lookup tables.
To import the files, navigate to Setup and Maintenance and search for either the task Manage Standard Lookups or Manage Common Lookups.
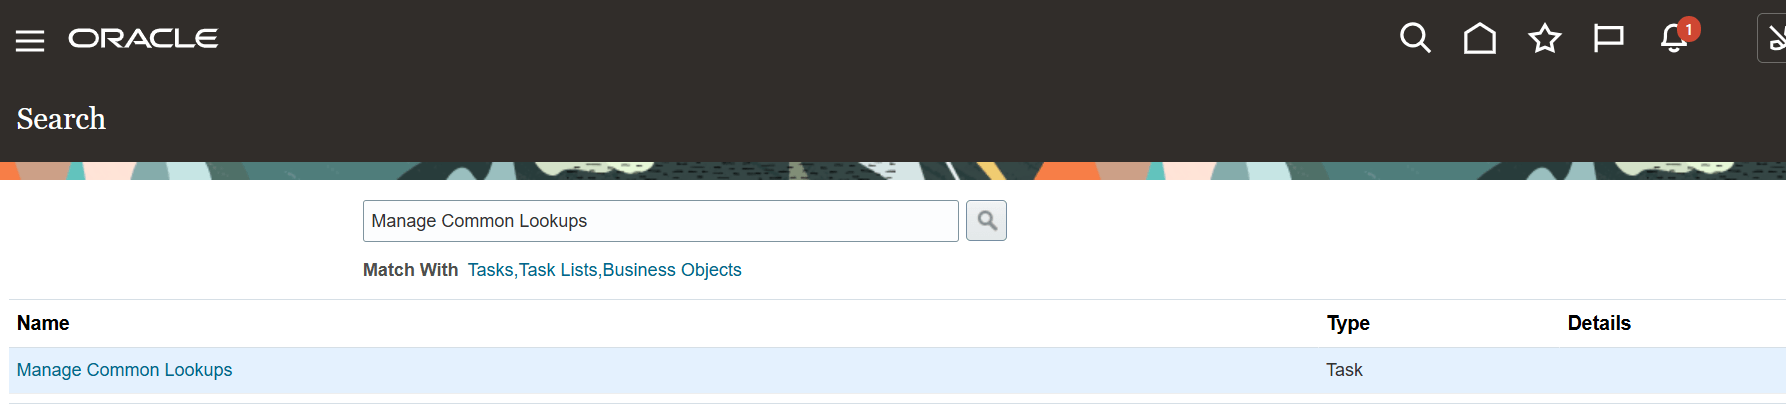
Click on the task hyperlink.
Now select Actions > Import as shown below.

In Import Lookups popup, select the Account name you used while uploading the files. Now type in the Lookup Type and Lookup Code File names that you uploaded in the respective fields. Make sure you also type in the .csv extension.

Click Upload. The status of the upload can be seen in the progress bar. You will see the Success message if the lookups are imported successfully, else you will get an error.

Thats it, you have successfully imported the Lookup Type and Lookup Codes. You can check the upload log messages by clicking on the Download Log file hyperlink.
From the logs, we can see that the Lookup Type and the 2 Lookup Codes have been successfully imported.

Verify Imported Data
To verify the Lookup Codes, you can navigate to the Manage Common Lookups task and search for the lookup type.
Hope this is useful. Happy learning!
References

Pingback: Bulk Upload Value Sets in Oracle Fusion | RishOraDev's Oracle Blogs