How to Bulk Upload Value Sets in Oracle Fusion
In this blog we will look at how we can bulk upload Value Sets into Oracle Fusion. We will learn the process to import both Independent and Dependent Value Sets. Similar to Bulk Upload Lookup Types and Lookup Codes, we will be using File Based Loader. The process consists of the following steps.
- Prepare the Flat files for import
- Upload the Files to the UCM server
- Import the Uploaded Files
- Verify imported data
Prepare Files for Upload
First step is to create the import files including all the mandatory columns and optional columns. We need to use the pipe ‘|’ as the delimiter in the file.
The following table shows the mandatory columns that should be included for Independent Value Sets. In addition to the mandatory columns, you can add other optional columns. Refer to the “Additional Optional Columns” section in this Oracle note.
| Column Name | Description | Data Type | Size | Required or Optional |
| ValueSetCode | Displays the Value Set Code | Varchar2 | 60 | Required |
| Value | Displays the value of contained in the Value Set | Varchar2 | 150 | Required |
| EnabledFlag | Denotes whether the value is Enabled or Disabled. This column allows two values: Y = Enabled N = Disabled | Varchar2 | 1 | Required |
Typically the file would look like this.
ValueSetCode | Value | Description | EnabledFlag
XXRMCOUNTRY | UK | United Kingdom | Y
XXRMCOUNTRY | IN | India | Y
Here we create a Value Set – Country. Note that here, Description is an optional column.
Similarly, the following table shows the mandatory columns that should be included for Dependent Value Sets.
| Column Name | Description | Data Type | Size |
| ValueSetCode | Displays the Value Set Code | Varchar2 | 60 |
| IndependentValue | Name of the Independent Value | Varchar2 | 150 |
| Value | Displays the value of contained in the Value Set | Varchar2 | 150 |
| EnabledFlag | Denotes whether the value is Enabled or Disabled. This column allows two values: Y = Enabled N = Disabled | Varchar2 | 1 |
Typically the file would look like this.
ValueSetCode | IndependentValue | Value | EnabledFlag
XXRMCITY | UK | London | Y
XXRMCITY | UK | Manchester | Y
XXRMCITY | IN | Kolkata | Y
XXRMCITY | IN | Hyderabad | Y
XXRMCITY | IN | New Delhi | Y
Here we create a Value Set – City, which is dependent on the values of Country .
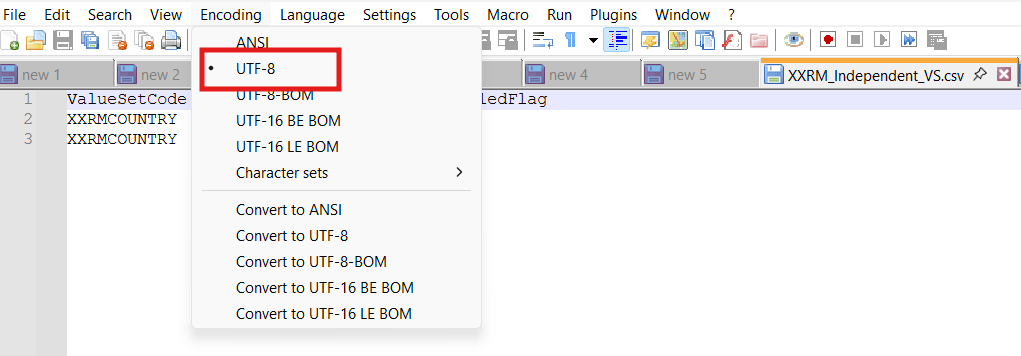
Once you have prepared the files, save the files in .csv format. Note that the files should be of UTF-8 encoding. I use Notepad++ for this purpose as shown below.
Upload Files to the UCM Server
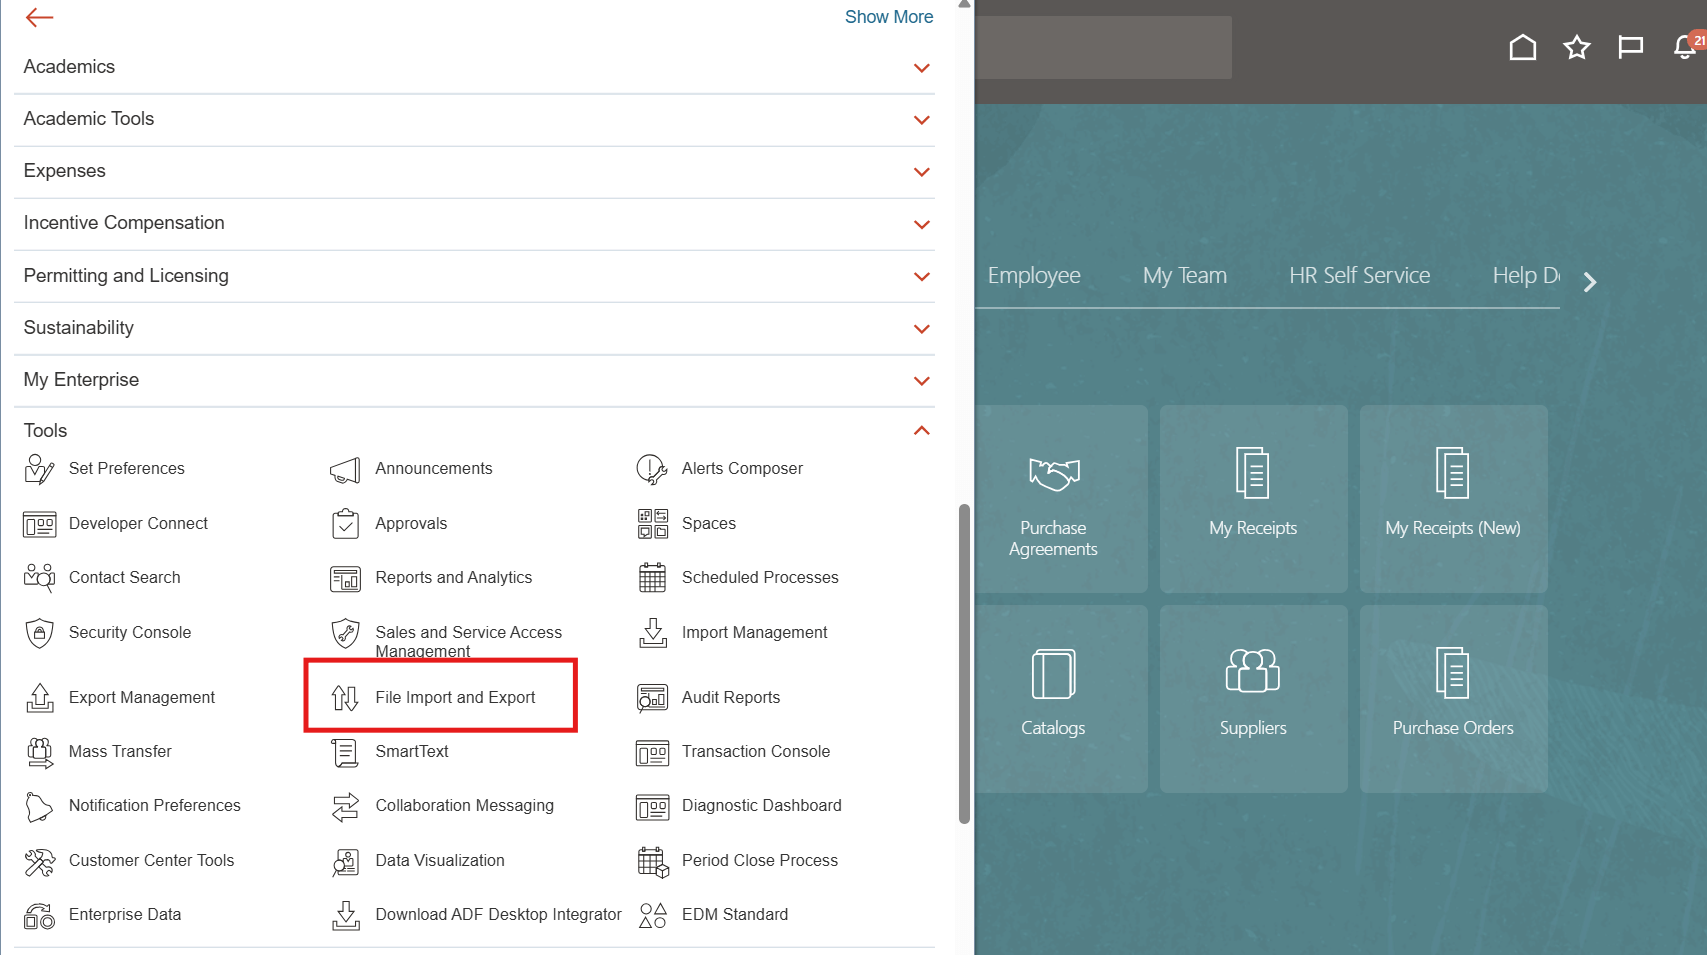
To upload the files in the UCM server, login to your Oracle Fusion instance and navigate to Tools > File Import and Export.
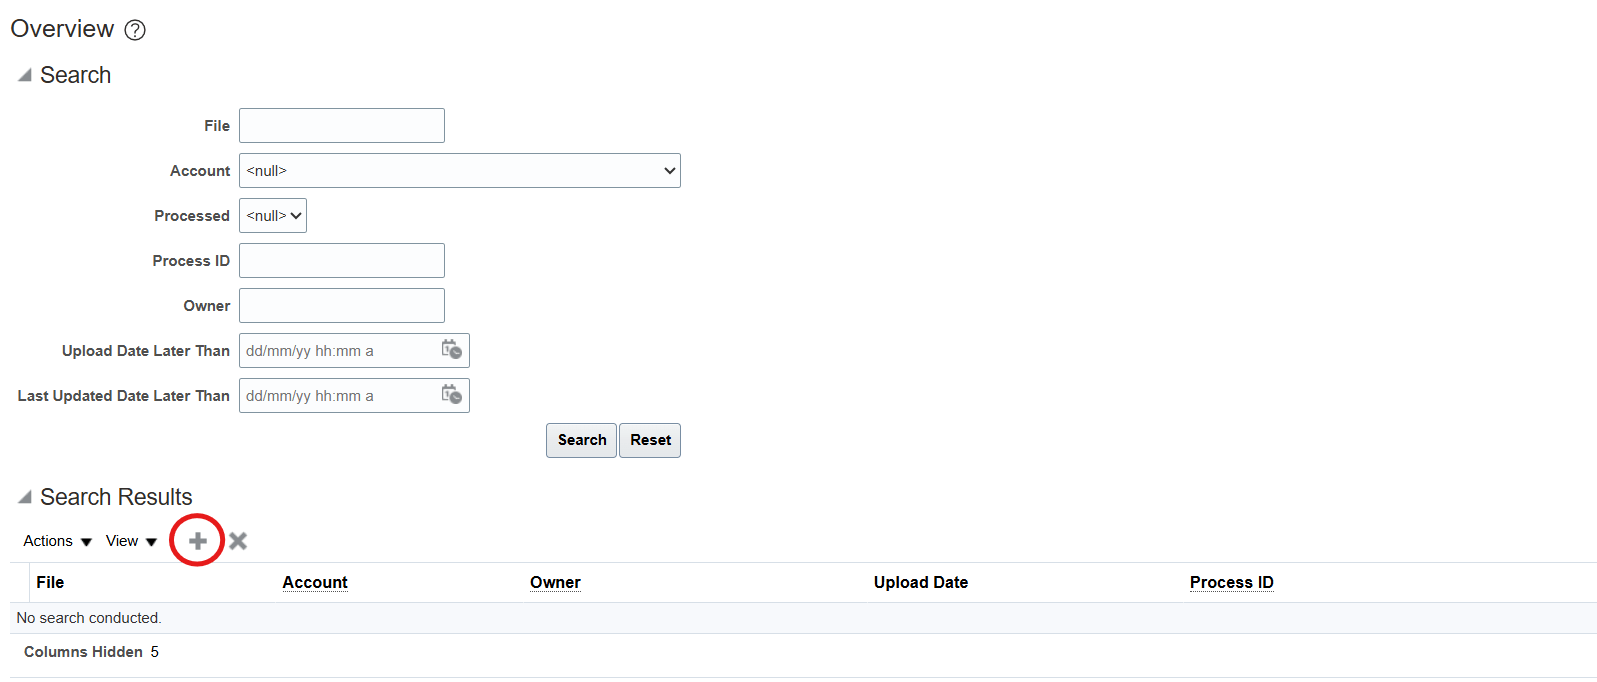
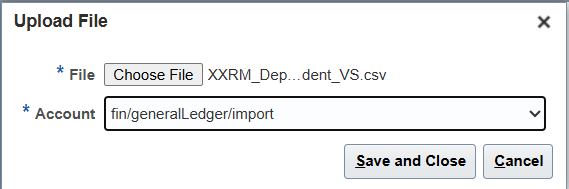
Click on the Upload icon.
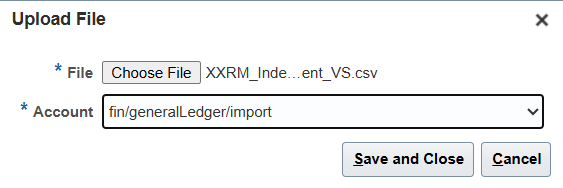
Select the relevant Account from the Account drop-down list. Here, we use ‘fin/generalLedger/import’. Then browse to and select your import file- first we upload the file for Independent Value Set. Click on Save and Close to complete the Upload.
Do the same for the Dependent Value Set flat file.
Import Uploaded Files
Once the files are uploaded to the UCM server, the next step is to Import these files. This process will create the records in the corresponding tables.
To import the files, navigate to Setup and Maintenance and search for the task Manage Value Sets. [ Note: If you are uploading Value Sets for Oracle HCM Cloud, then search for task Manage Value Sets for Global Human Resource ]

Click on the task hyperlink.
For Value Sets, you first need to create the Value Set, before you import the values for the value set contained in the flat file. To create the value set, click on the Create icon.

In the Create Value Set window, pop in the Value Set Code, Module, Validation Type, Validation Data Type, Value Subtype and Maximum Length. In this case, select the Module General Ledger. Since we are uploading an Independent Value Set, we select the Validation Type as Independent. Once you have entered all the values, click on Save and Close and the Value Set will be created.

Similarly, create the Dependent Value Set by entering the details in the relevant fields. Note that when you are creating a Dependent Value Set, you need to enter the Validation Type as Dependent . In the Independent Value Set section, enter the name of the value set that it is dependent on. In our case, we create a Value Set City which is dependent on the value set Country. Once you are done, click on Save and Close.

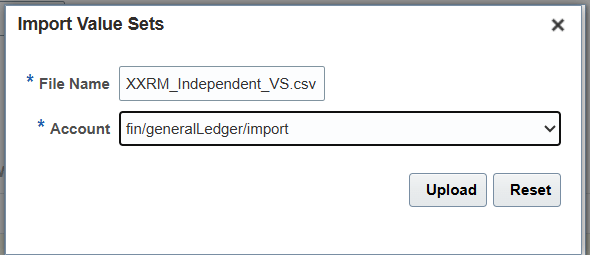
Now Search for the Independent Value Set.

Now select Actions > Import as shown below.

In Import Value Sets popup, type in the flat file name. Make sure you also type in the .csv extension. Then, select the Account name you used while uploading the files.
Click Upload. The status of the upload can be seen in the progress bar. You will see the Success message if the Value Set is imported successfully, else you will get an error.
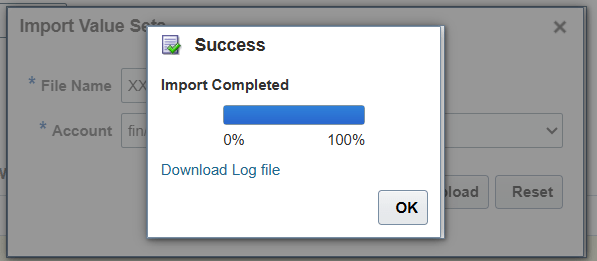
You can check the upload log messages by clicking on the Download Log file hyperlink.
From the logs, we can see that the Value Set was successfully imported.

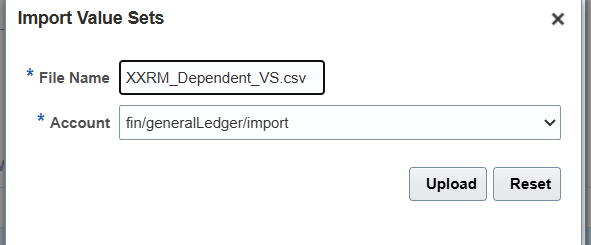
For importing the Dependent Value Set, follow the same steps.
First search for the Dependent Value Set.

Select Actions > Import and key in the file name and Account. Then click on Upload.
Once the upload is successful, verify the logs.

Verify Imported Data
You can verify the Value sets from the UI. Search for the Value Set. Click on Manage Values.

In the Manage Values screen, click Search.


You can also execute the following query from BI publisher to view the details of Value Sets.
SELECT    ffvs.flex_value_set_id
        , ffvs.flex_value_set_name
        , ffvs.description value_set_description
        , ffvs.validation_type
        , ffv.flex_value
        , ffvt.description value_description
        , ffv.enabled_flag
FROM      fnd_flex_value_sets ffvs
        , fnd_flex_values ffv
        , fnd_flex_values_tl ffvt
WHERE     ffvs.flex_value_set_id = ffv.flex_value_set_id
AND       ffv.flex_value_id = ffvt.flex_value_id
AND       ffvt.language = USERENV('LANG')
AND       ffvs.flex_value_set_name = <<VALUE_SET_NAME>>
Hope this is useful. Happy learning!
References
