Creating a basic OIC Integration with REST
This post would be particularly useful for those who are just starting their learning journey with Oracle Integration Cloud. We will create a basic and fundamental integration to call and invoke a simple REST web service in an orchestrated integration. We will learn how to:
- Create Project
- Create REST Adapter Connection
- Create and Design the Integration
- Activate and Run the Integration
So let us begin.
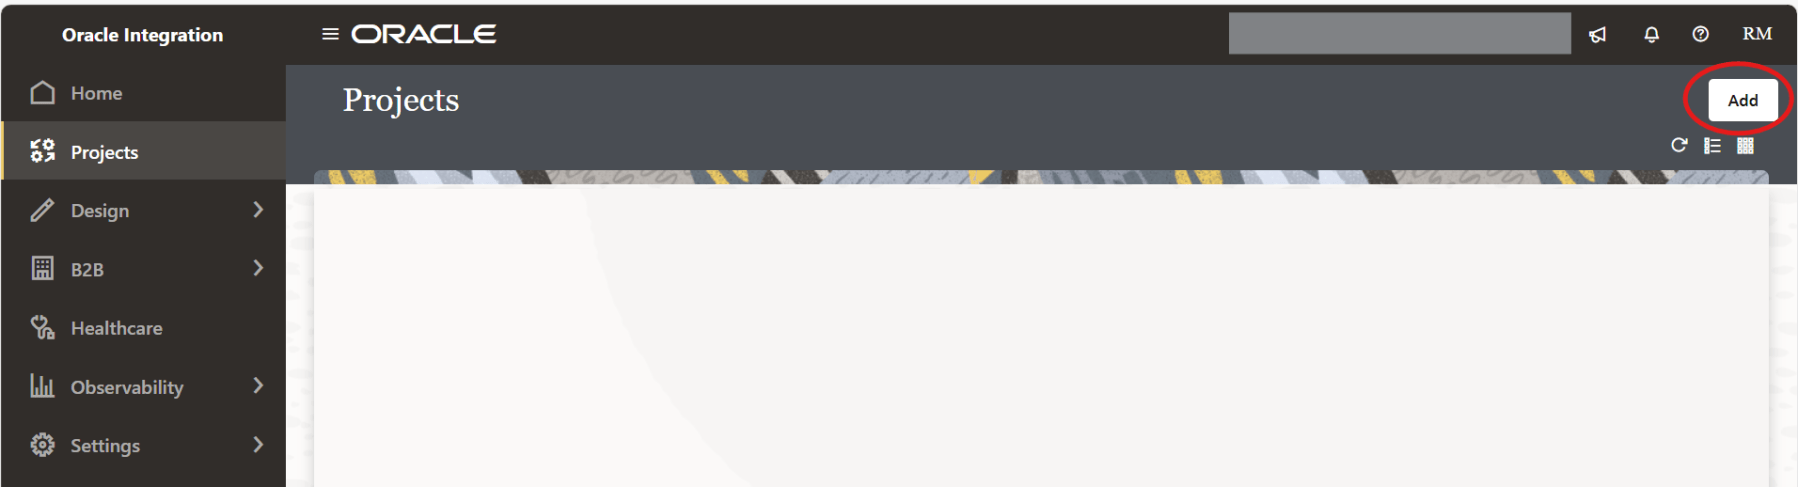
Create Project
It is always recommended that you create an integration under a project. Hence, we will create a project. To create a project, from the Navigation Pane, click on Projects. Then click Add.
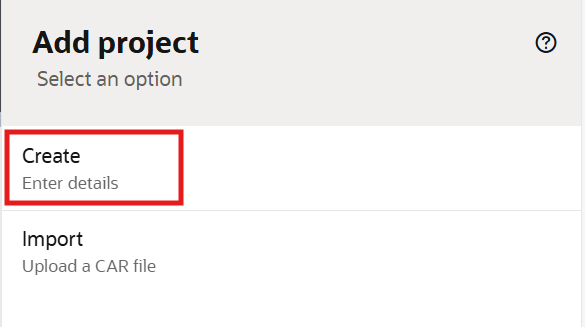
Click Create.
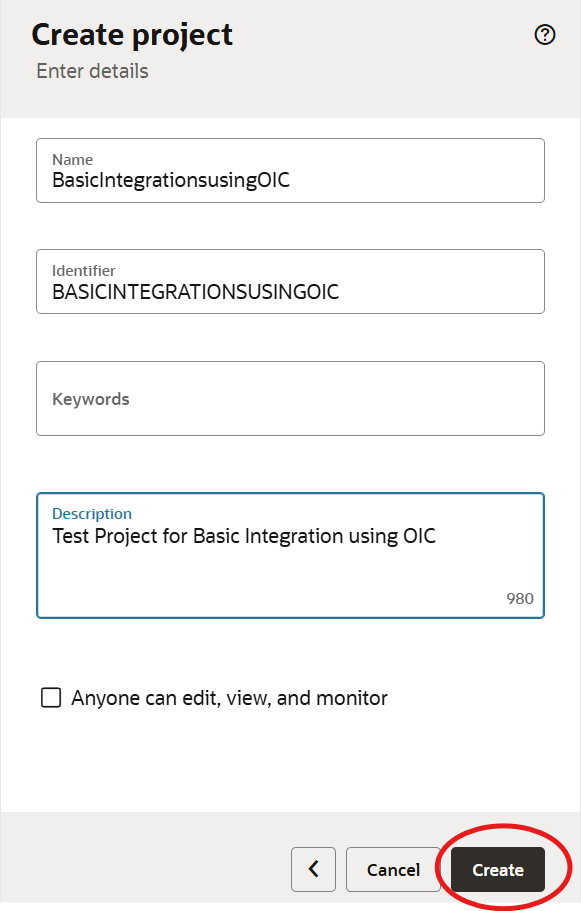
Enter a valid Name and Identifier for the project and click Create.
Create REST Adapter Connection
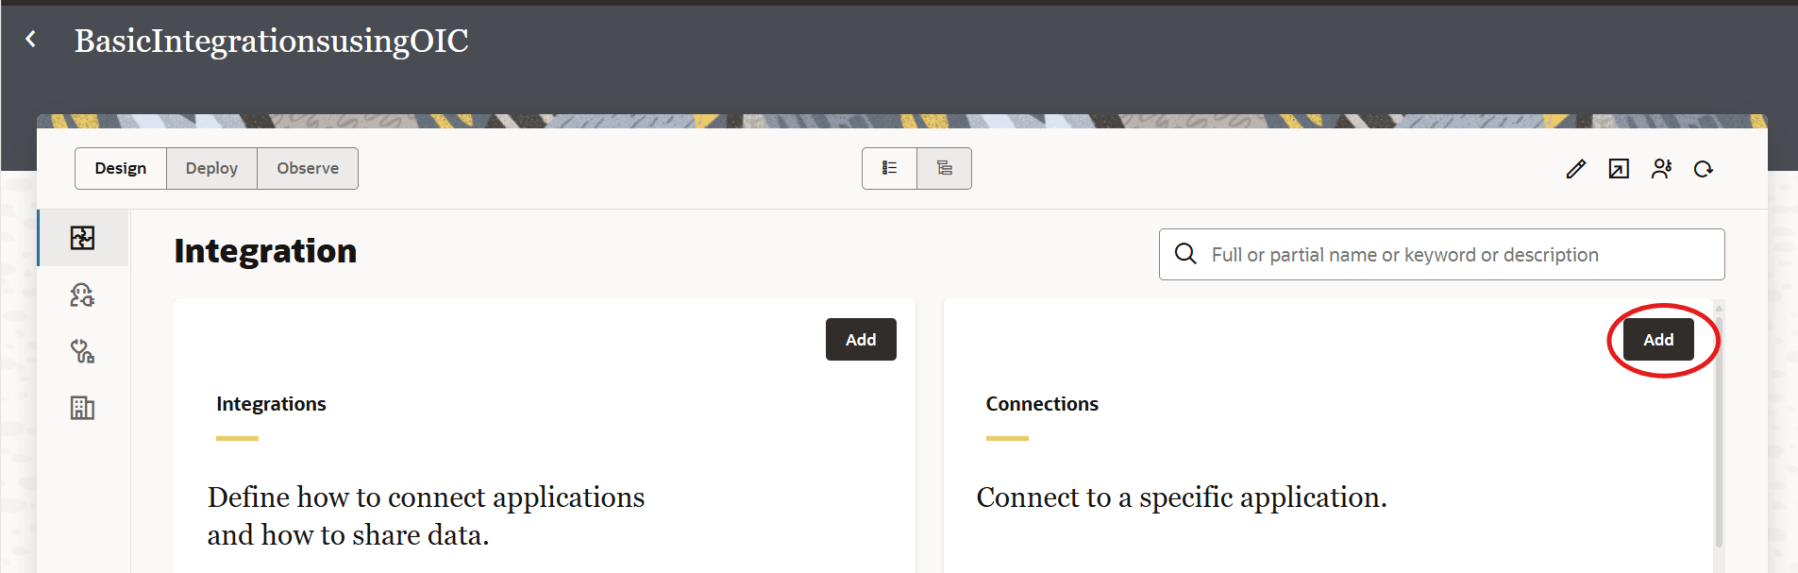
We will start by creating a REST Adapter connection, under the project we created . From the Navigation pane, navigate to Projects. Click on the project that you created earlier.

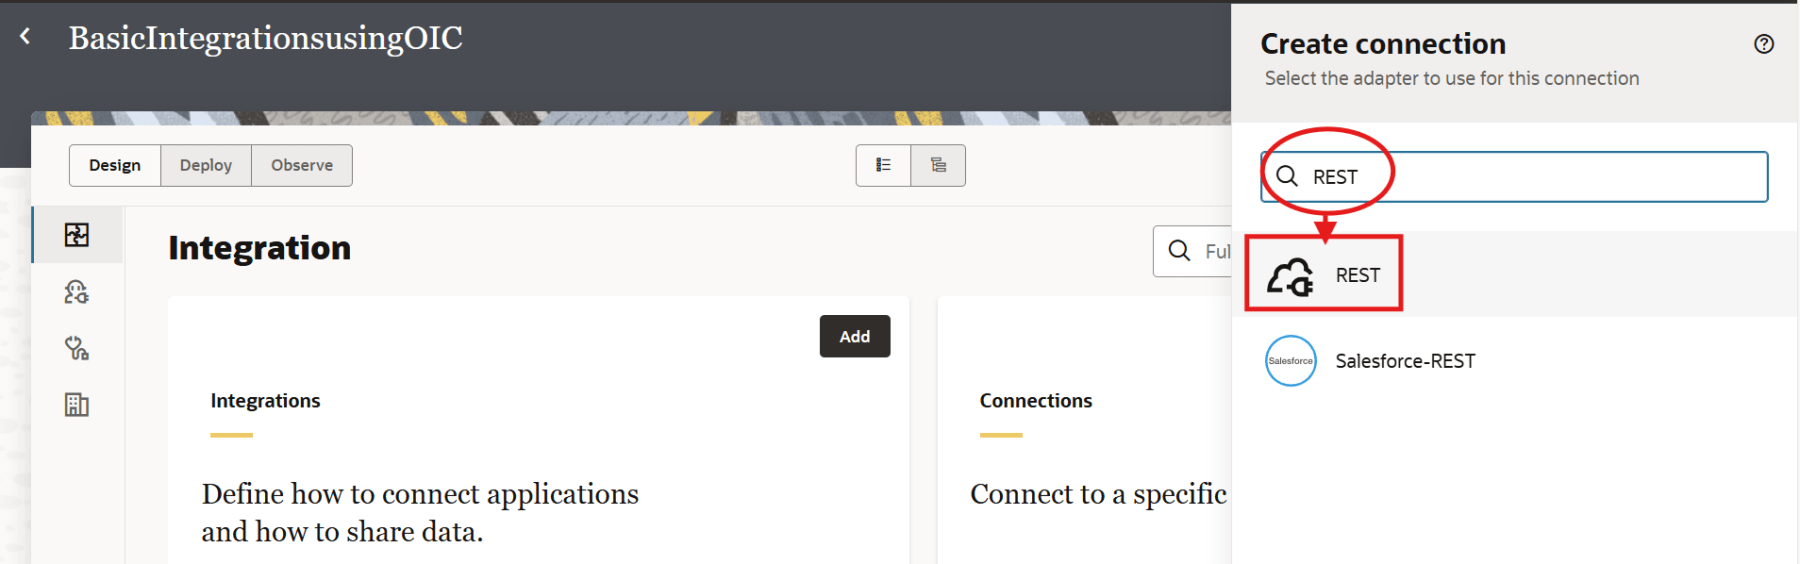
Under Connections, click Add.
In the Search field, type in REST, and select the REST Adapter from the search result.
Enter the Name and Identifier for the REST connection. For Roles, select Trigger. Optionally, add Keywords and Description and click Create.

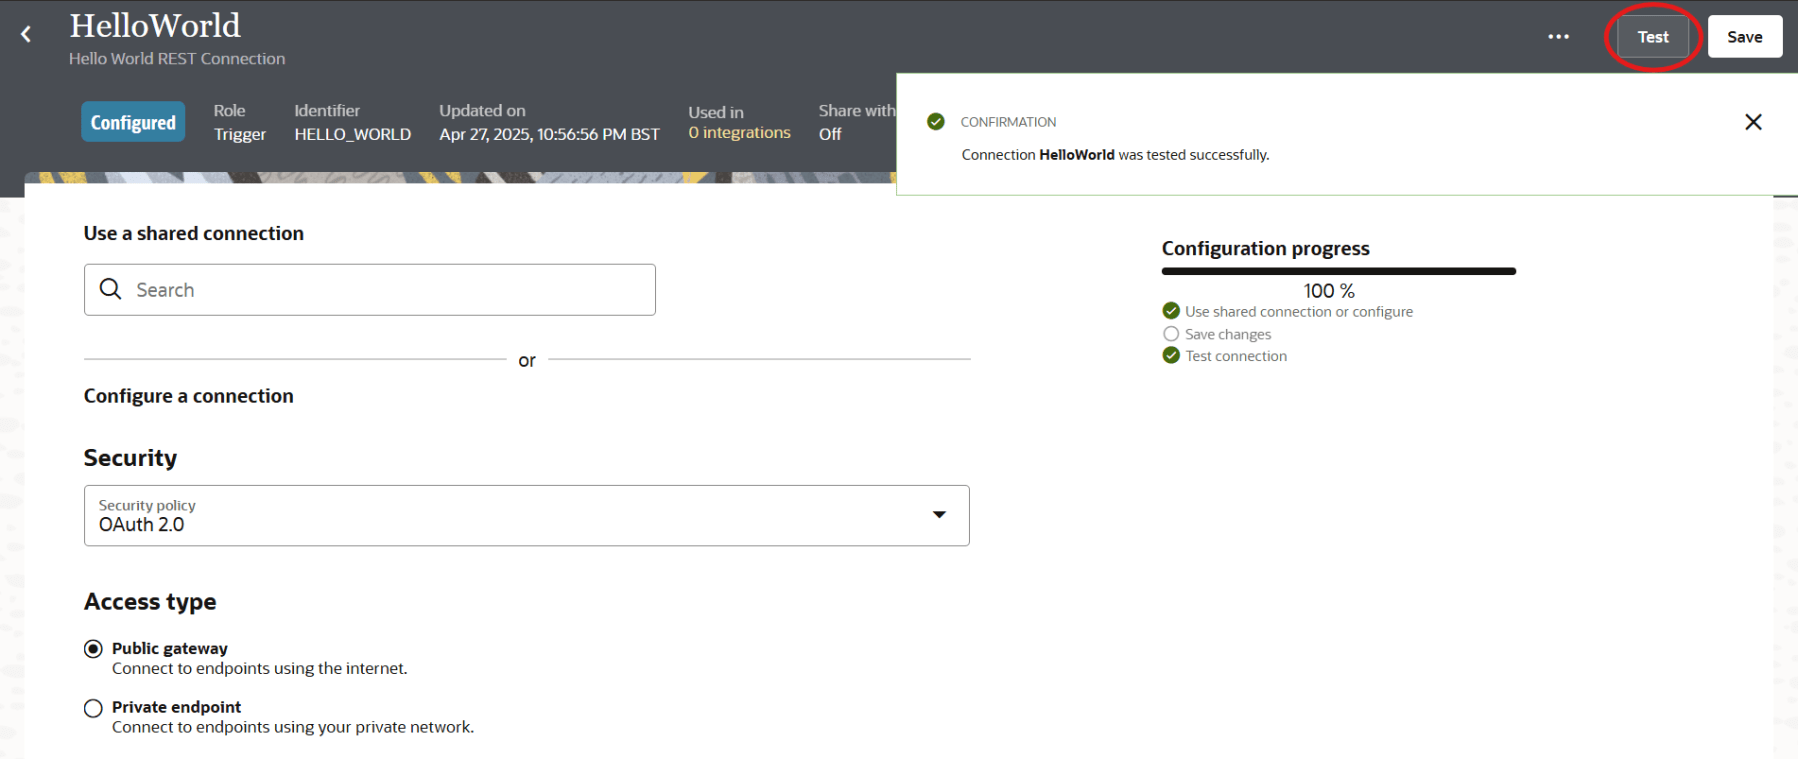
We select OAuth 2.0 as the preferred authentication method under Security. Select Public gateway for Access Type. Click on Test. If the tests are successful, you will see a confirmation message as shown below.
Click Save.

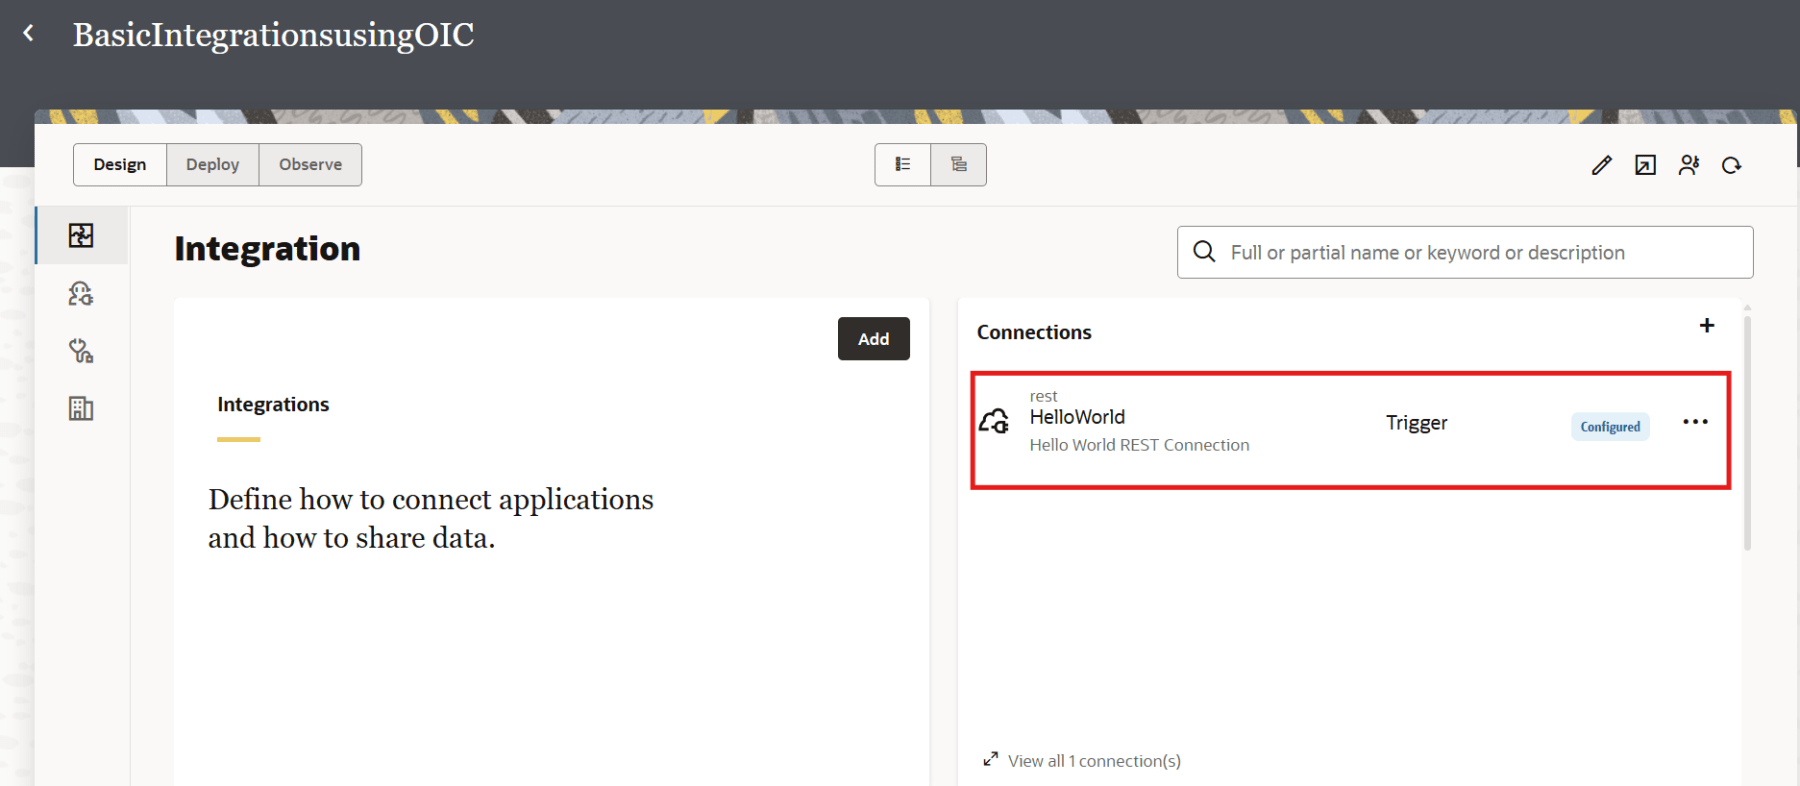
Navigate to the Projects page, and the new connection should be listed.
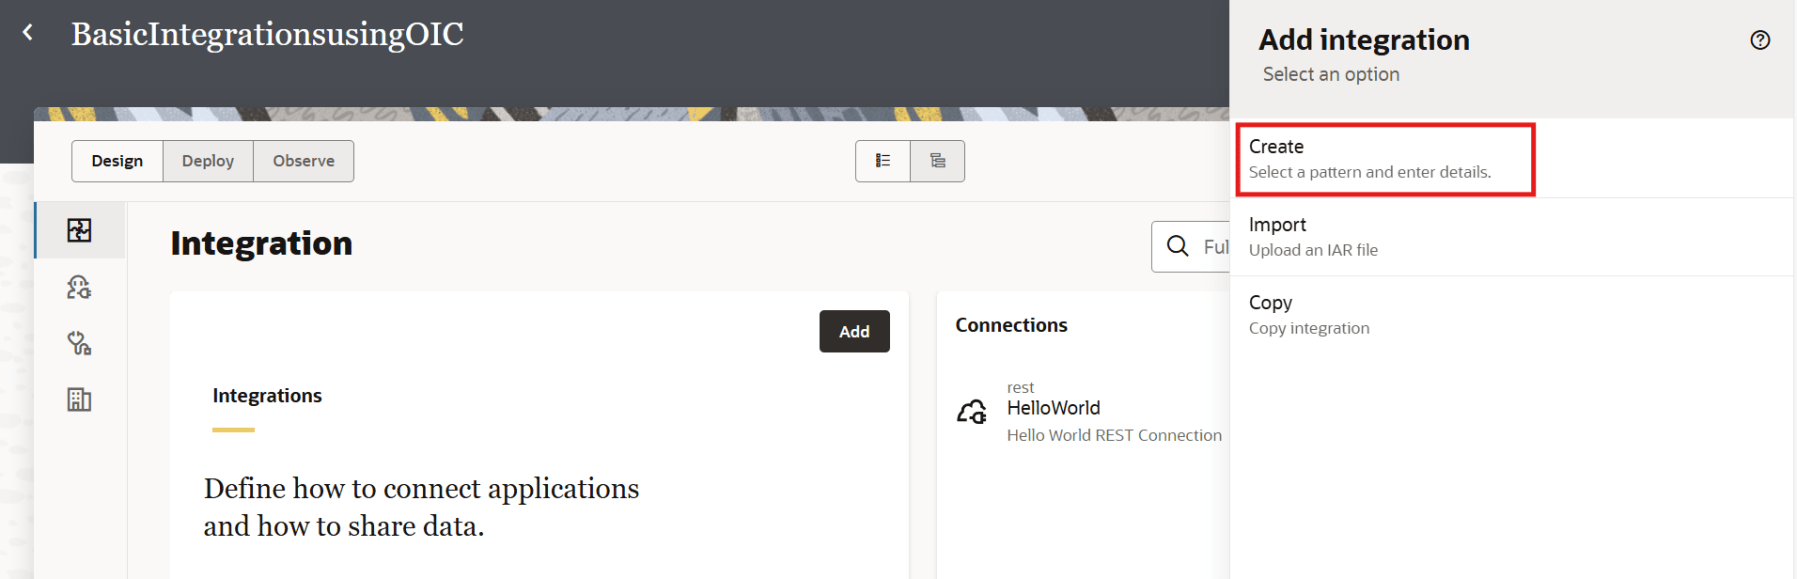
Create and Design the Integration
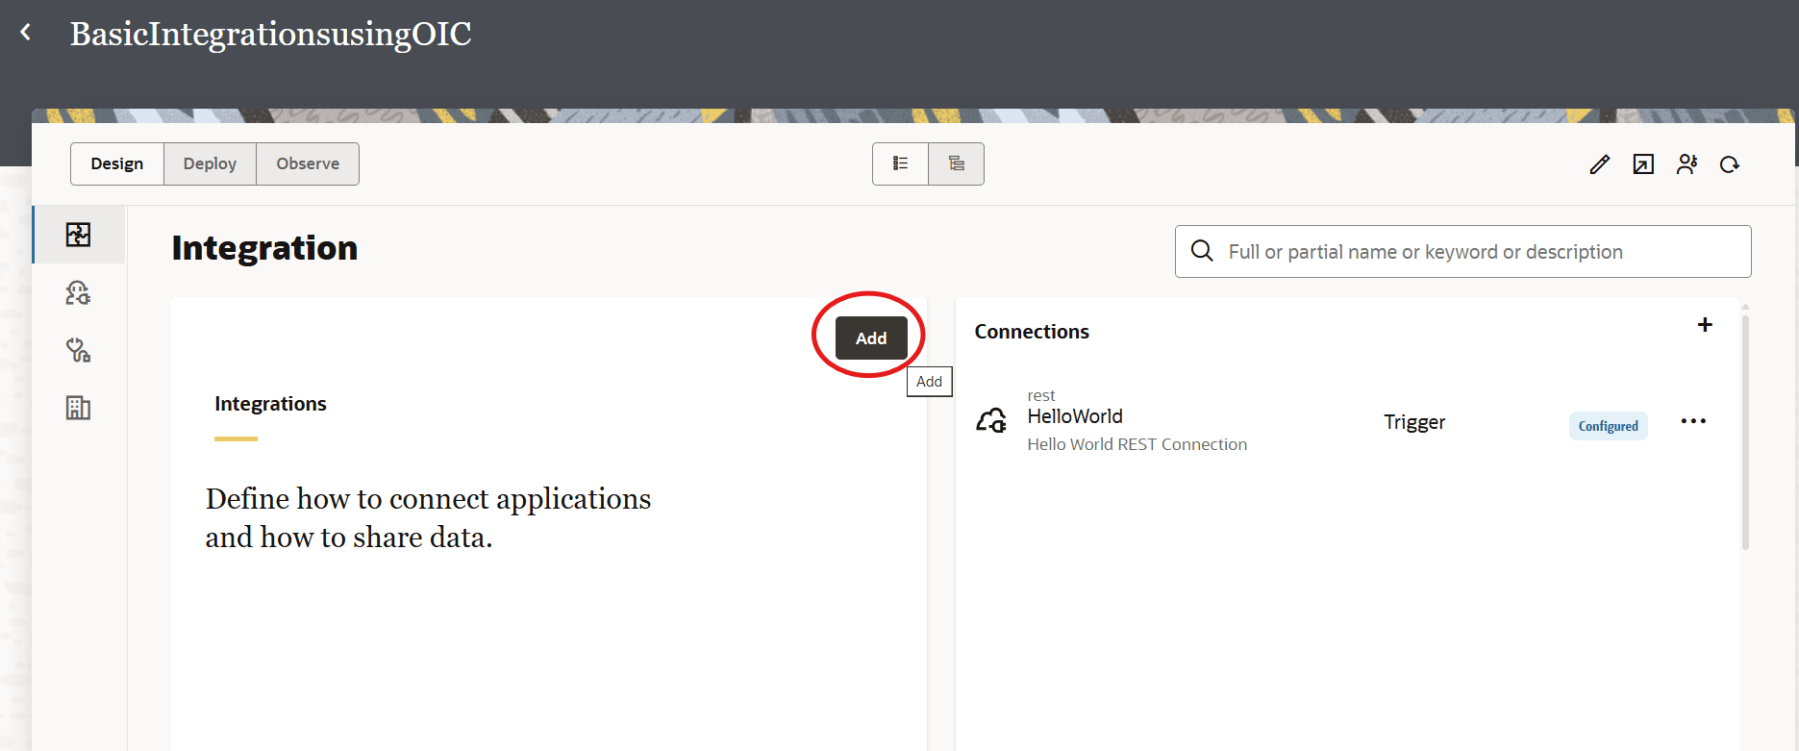
Now that we have created the connection, its time to create the Integration. From the Navigation pane, navigate to Projects. Click on the project that you created earlier.
Click Add Integrations.
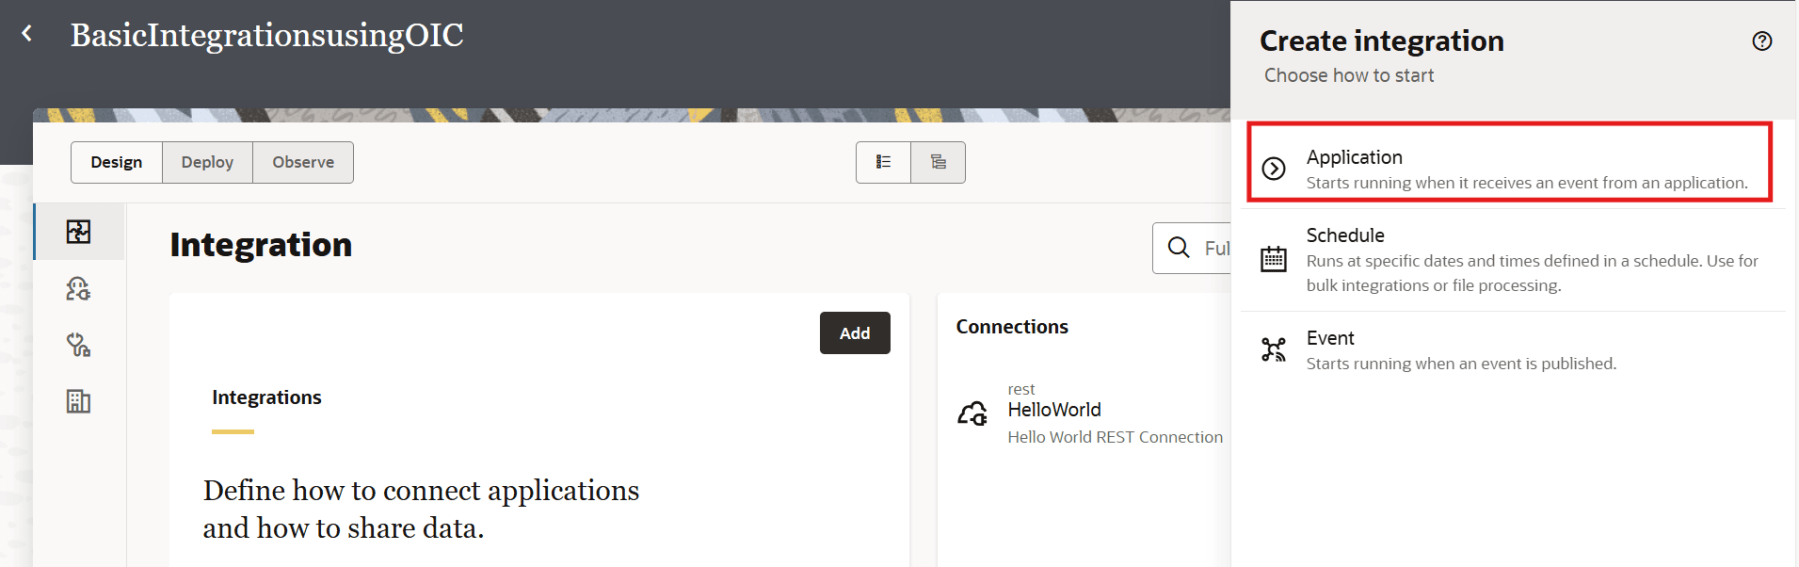
Click Create.
Click Application.
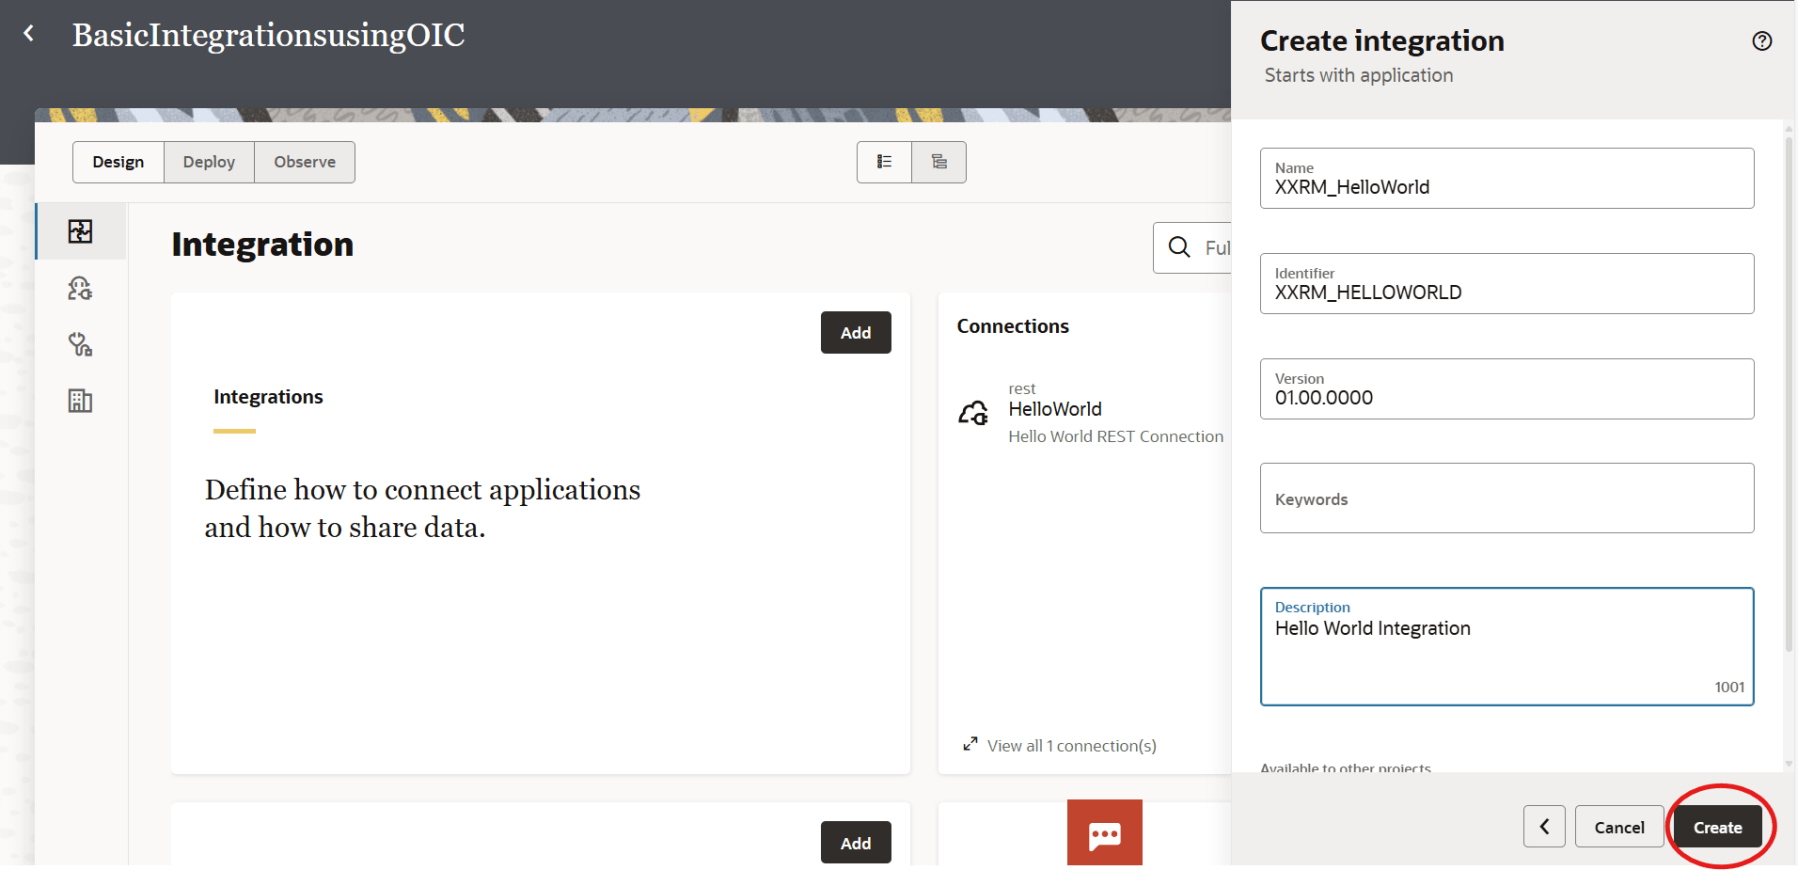
Enter a valid Name and Identifier for the integration. We will understand versioning in a future blog, but for the time-being, we leave the default versioning. Optionally, you can add in a Description. Click Create.
Select the HelloWorld trigger.

On the Configure Basic Info page, enter the details as shown below, then click Continue.

In the Configure Resource Configuration page, enter the details as shown below. Select POST method under What action do you want to perform on endpoint?
Check the checkboxes :
- Configure a request payload for this endpoint
- Configure this endpoint to receive the response
Click Continue.

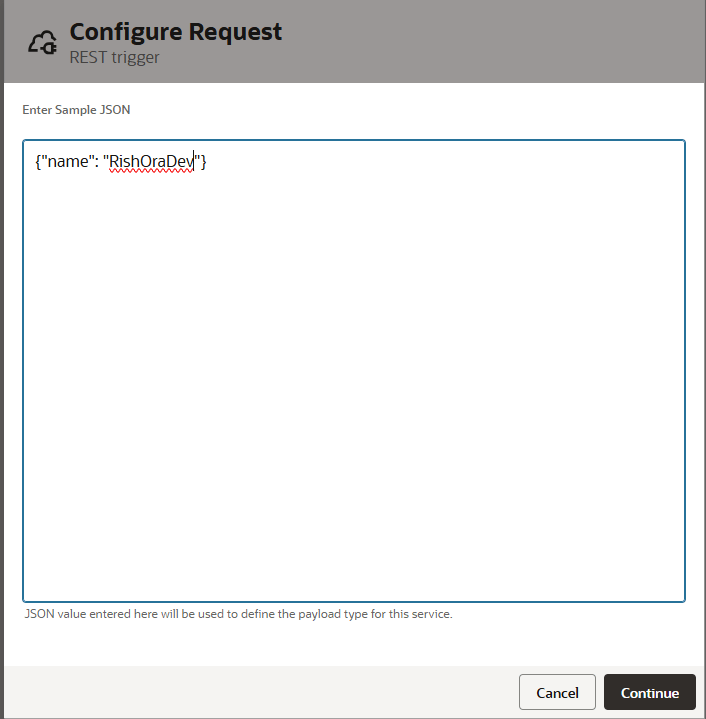
Select JSON as the request payload format. Click <<<inline>>>, as shown below.
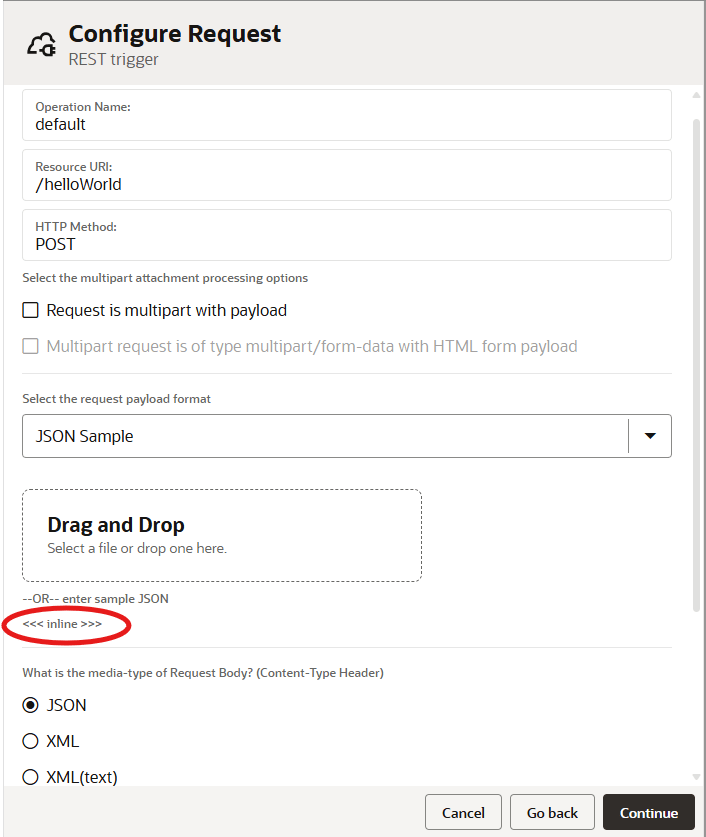
Enter the following message in the JSON sample field.
{"name": "RishOraDev"}
Click Continue.
In the Configure Response page, lick <<<inline>>>.
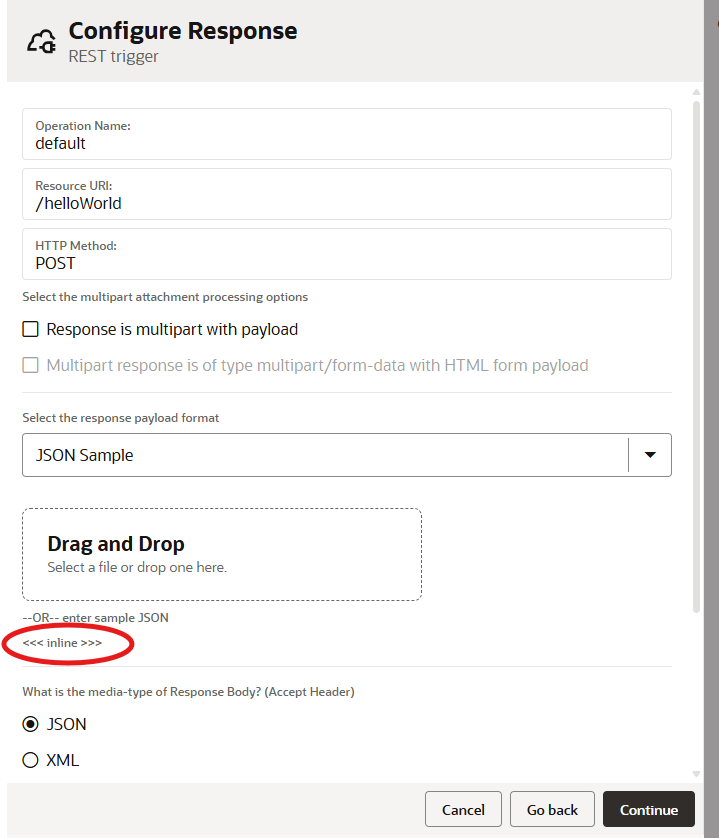
Enter the following message in the Sample JSON field.
{"message": "Welcome RishOraDev! You have now designed your first integration!"}

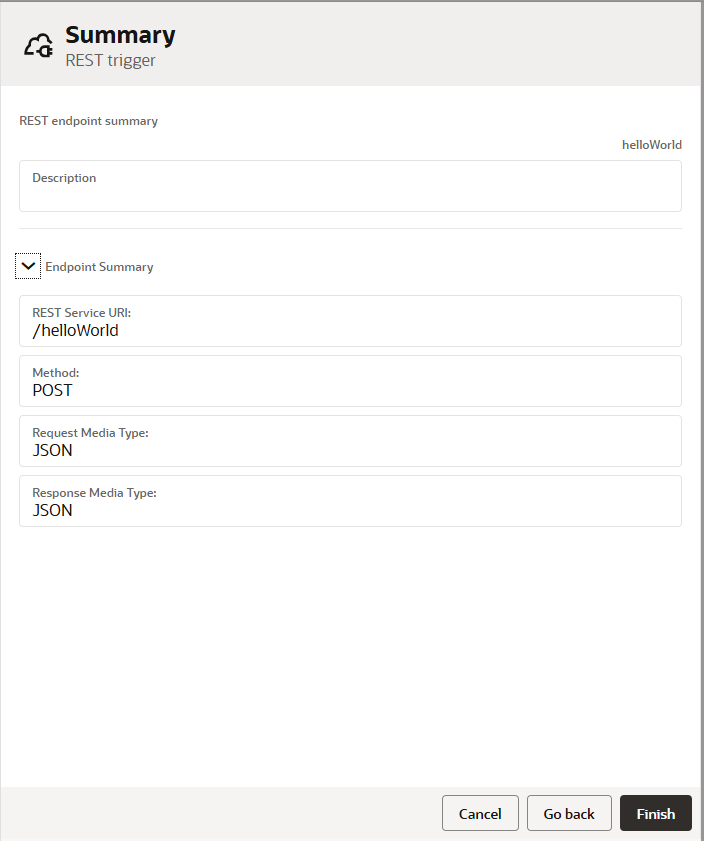
Click Continue. The integration Summary page opens. Click Finish.
The integration canvas opens.
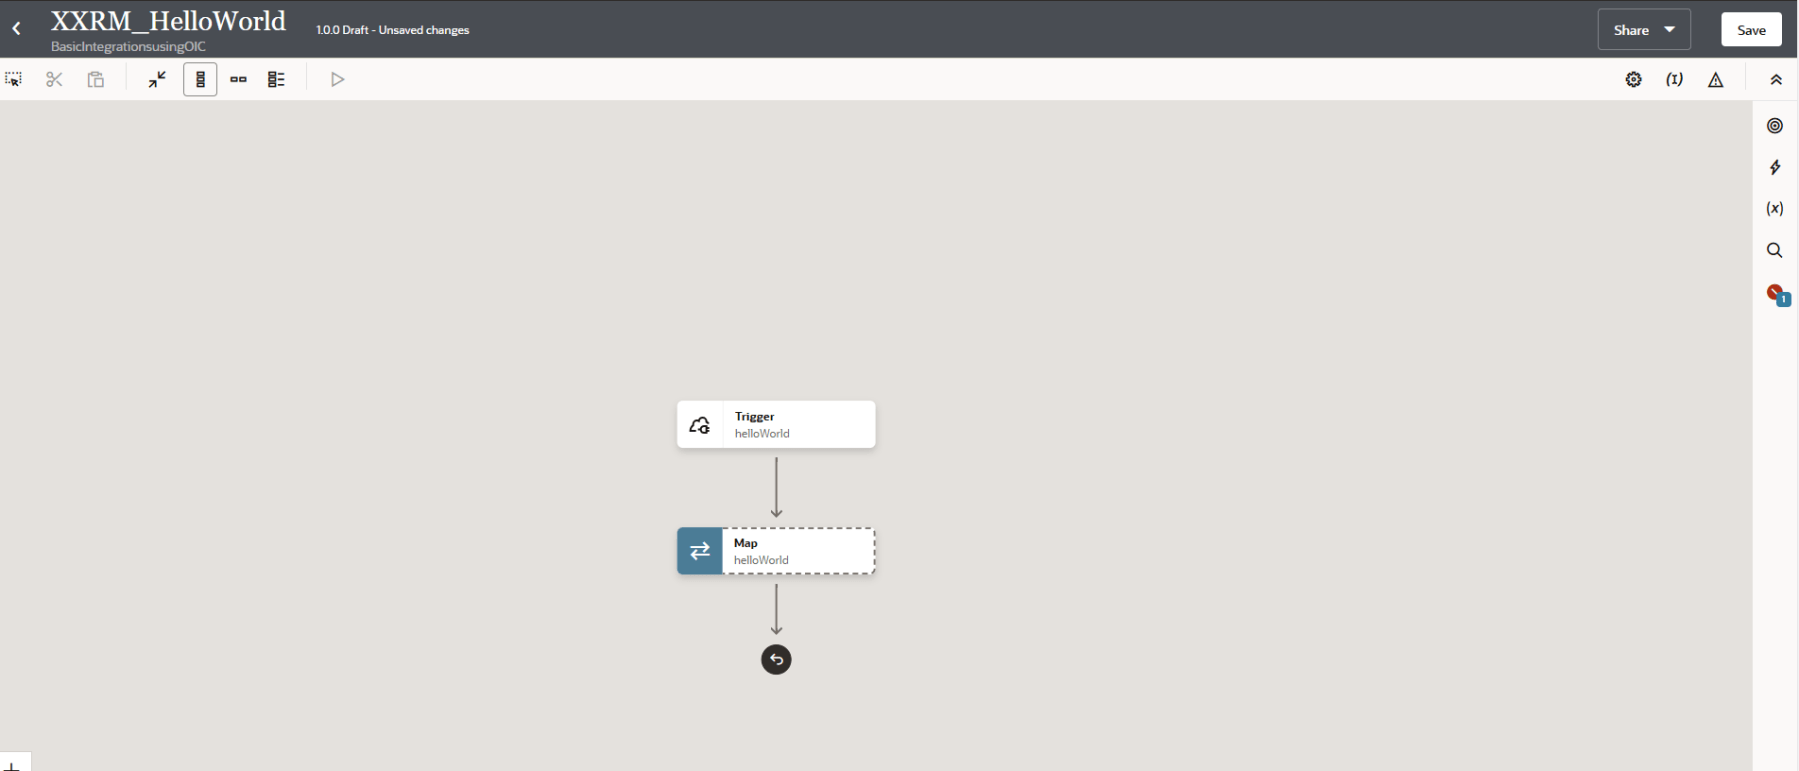
Select Map and click on the Edit icon.
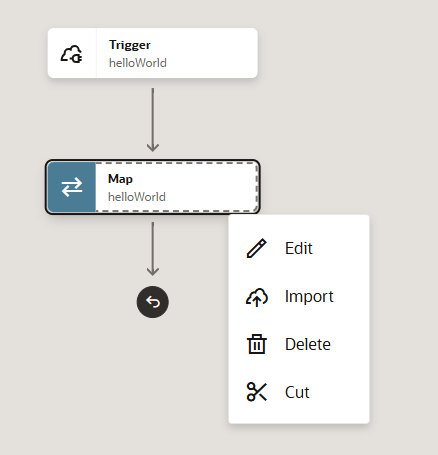
The mapper is displayed. The mapper enables you to map the source data structure to the target data structure.

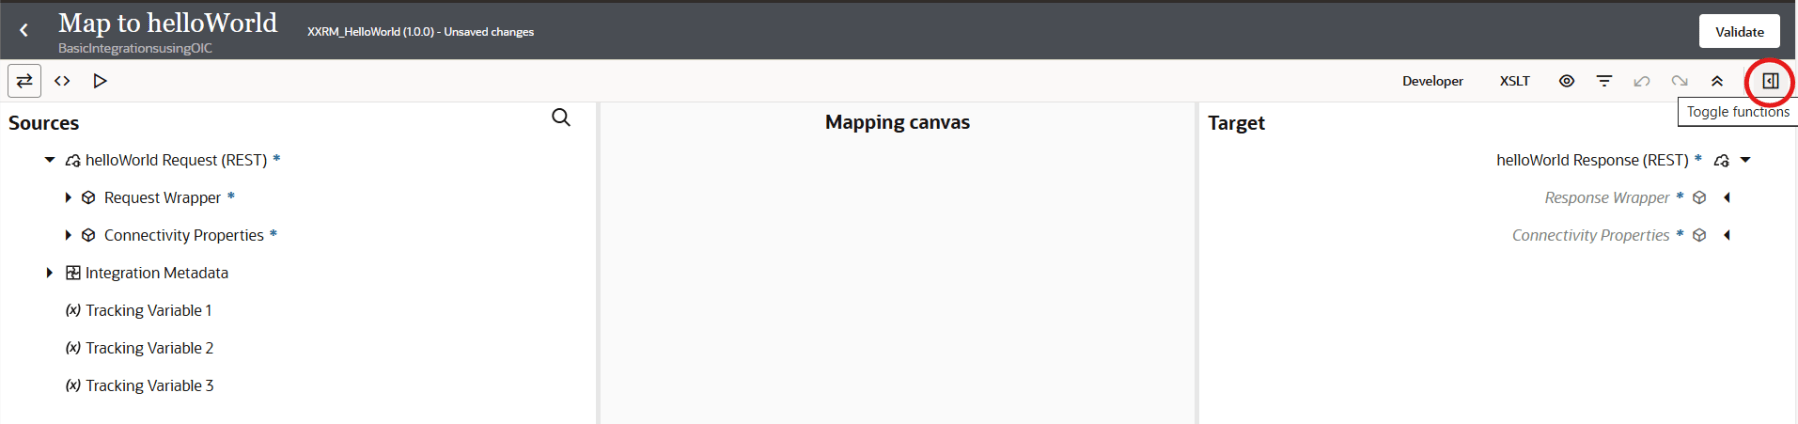
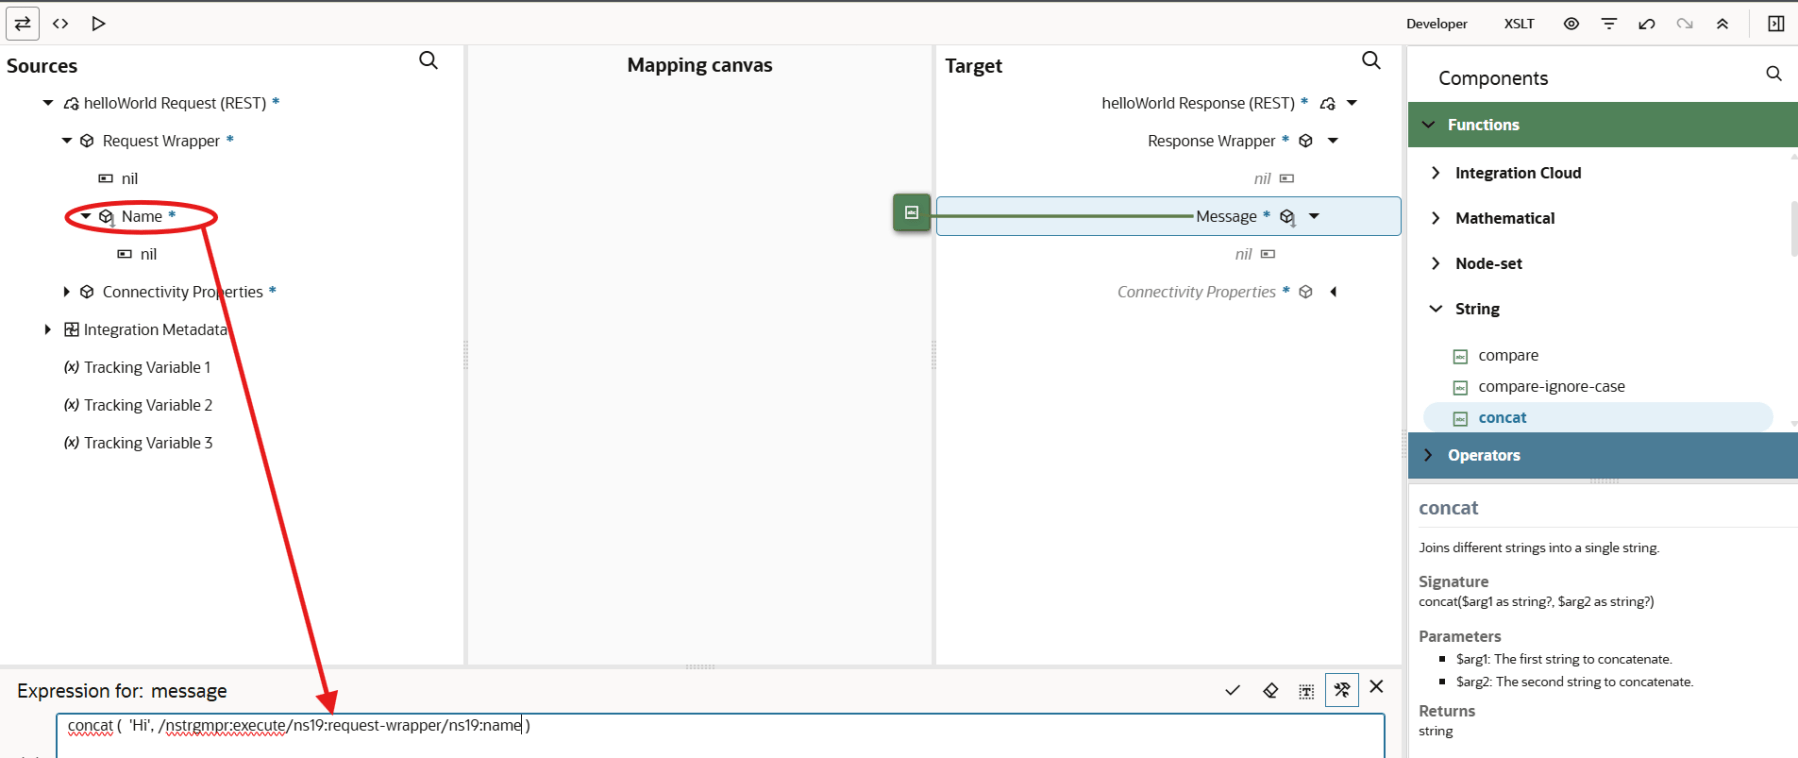
We will use the concat function to concatenate ‘Hi’ + name. To do that click on the Toggle functions icon at the right hand top corner.
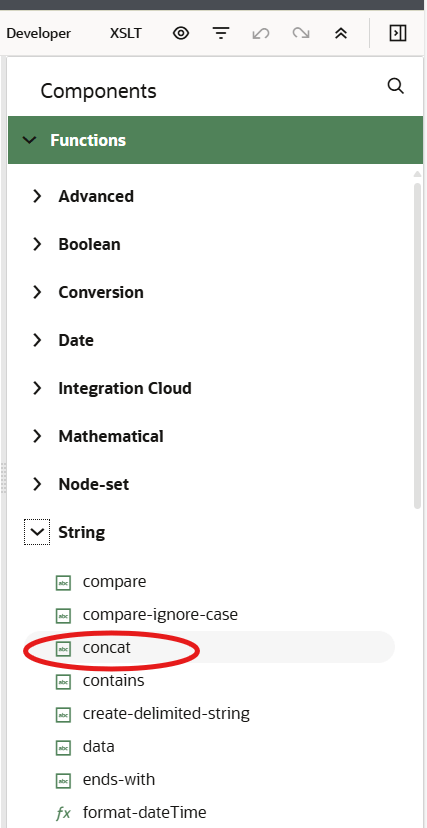
Expand Functions > String and locate the concat function.
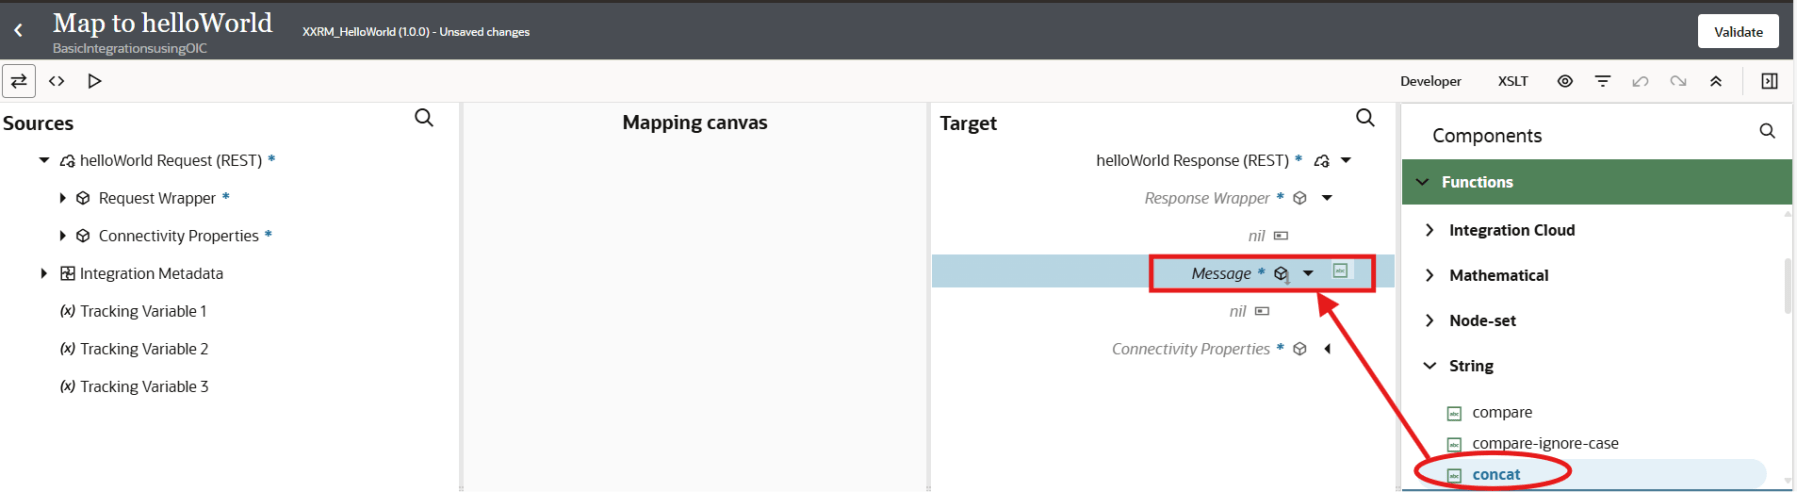
Drag and drop the concat function to the Message element of the Target.
The Expressions Builder window opens. Type in ‘Hi’ as the first parameter of the concat function. For the second parameter, drag and drop the Name field from Request Sources in the Expression Builder window, as shown below.
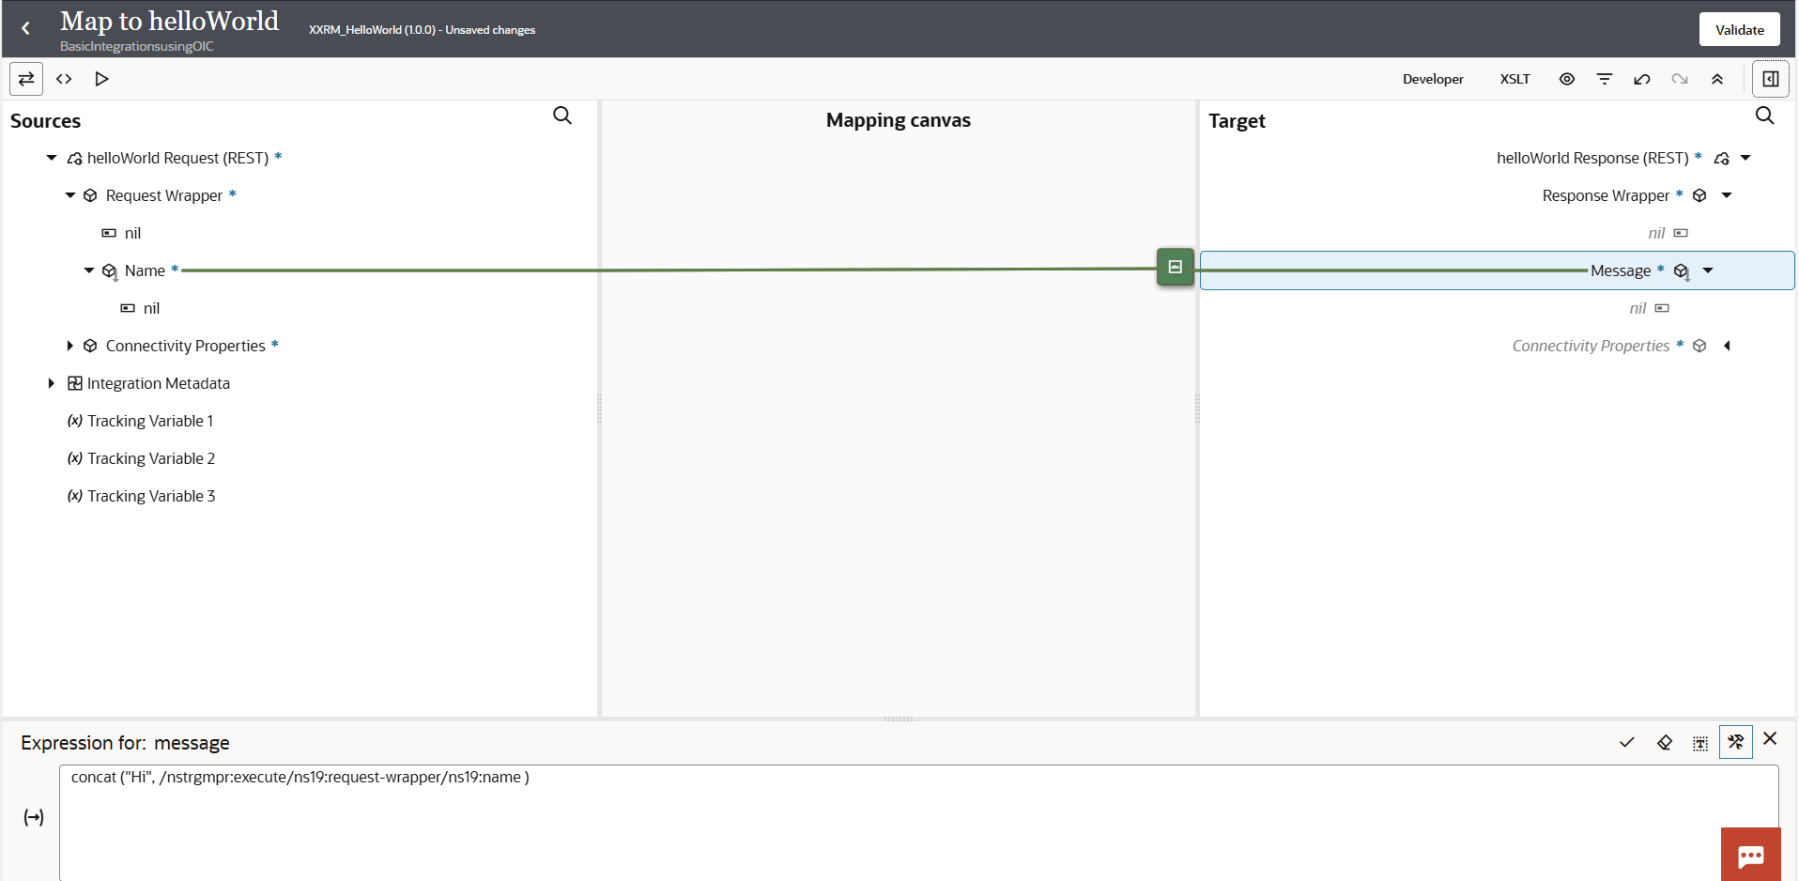
Once done, click on Save.

The mapping is now complete. A green line connecting the two elements is displayed.
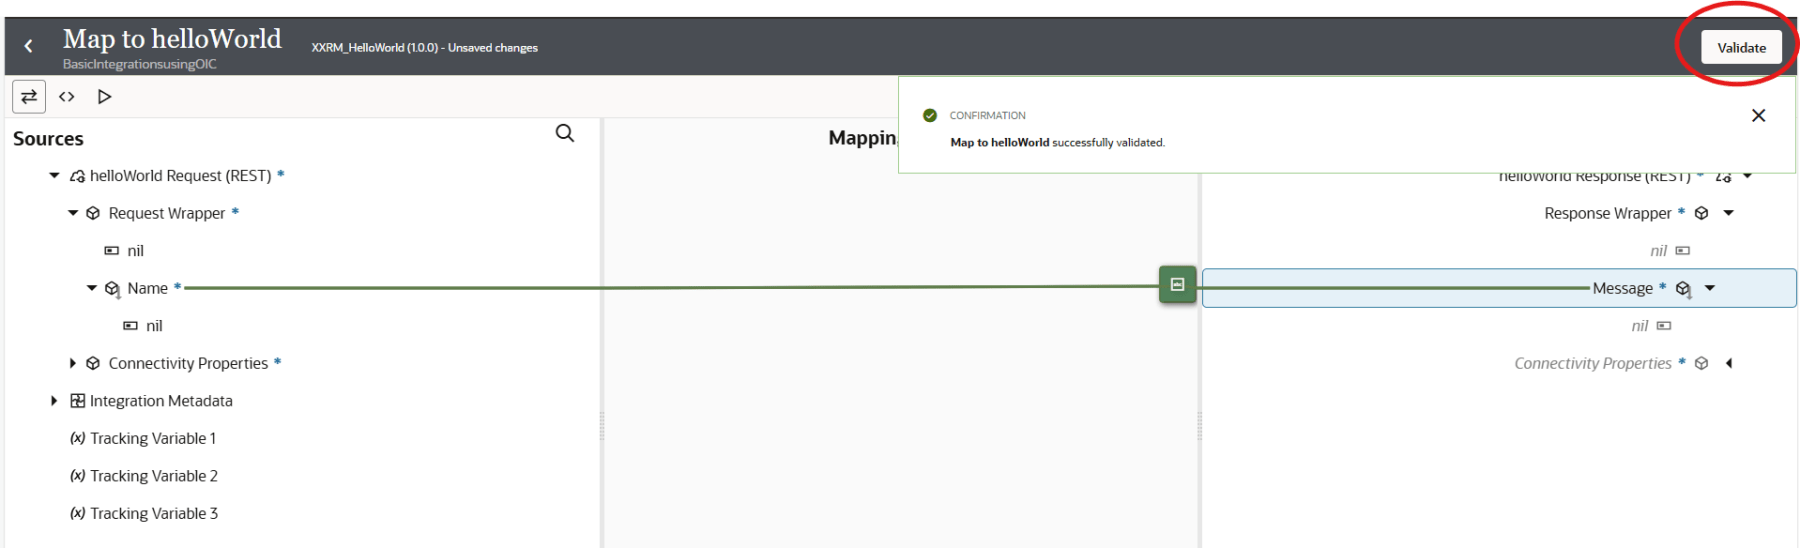
Click the Validate button. On successful validation, you should see the confirmation message.
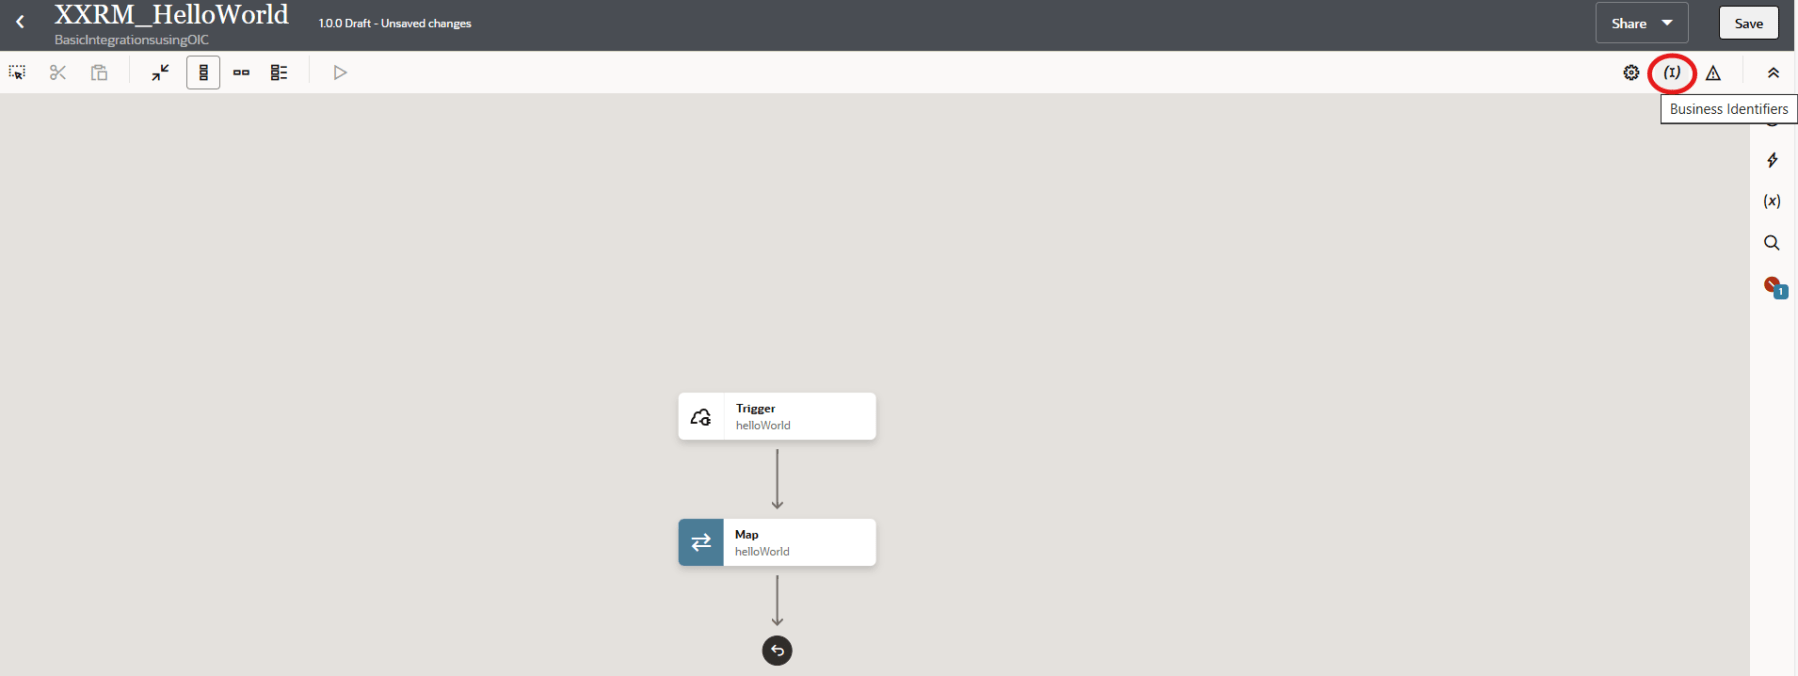
The last step is to set the tracking field. Business identifiers enable runtime tracking of messages. To do so, click on Business Identifiers icon.
In the Source section, drag the name element to the first row of the Business identifier field.

Click Save.

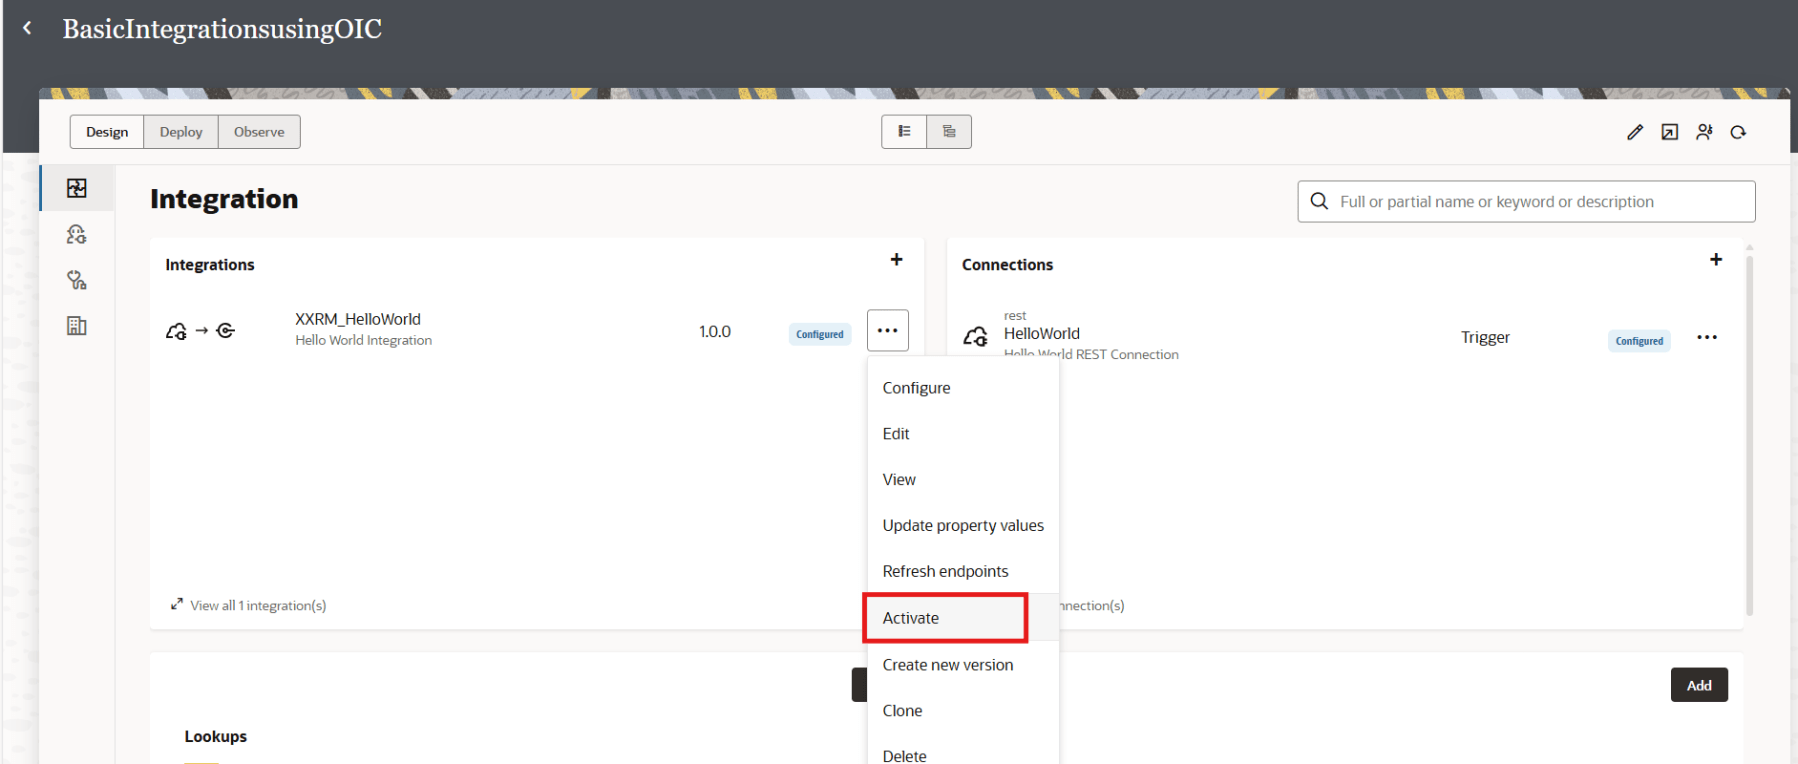
Activate the Integration
Now that we have created the integration, we need to Activate the integration, before we can run it. Exit the Integration Designer and navigate back to the project details page. Click on Options icon and click on Activate.
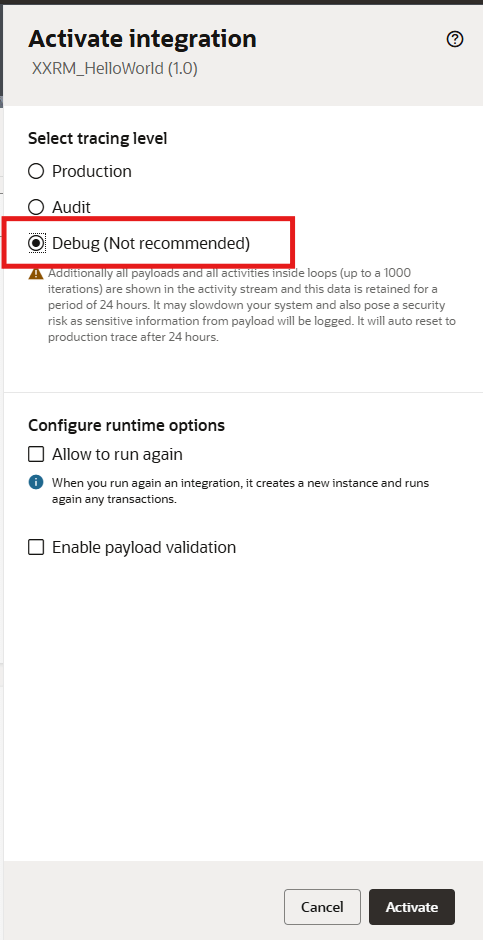
We select Debug for Tracing level. Click Activate.
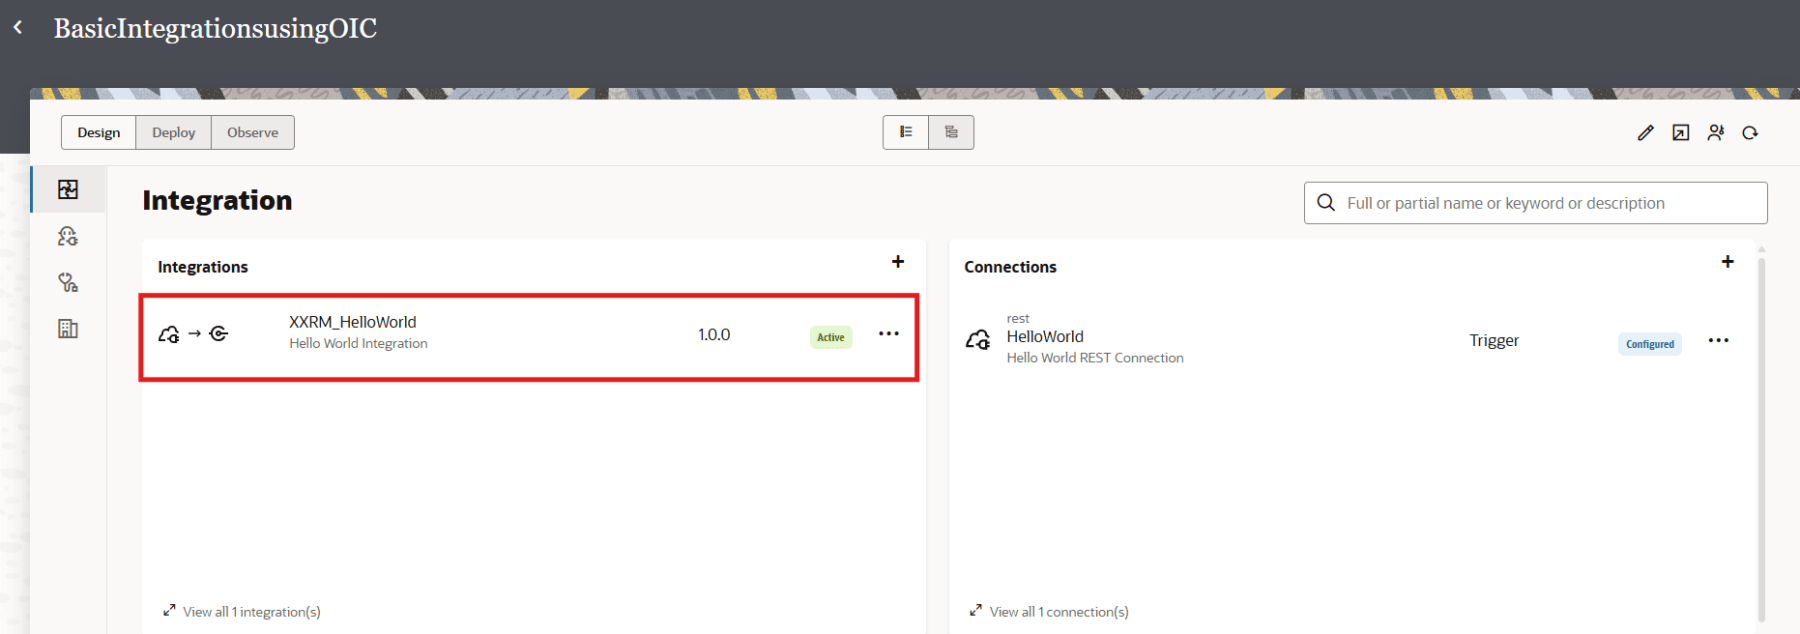
Once the integration is activated, you should see the success message.

The status of the Integration should show Active.
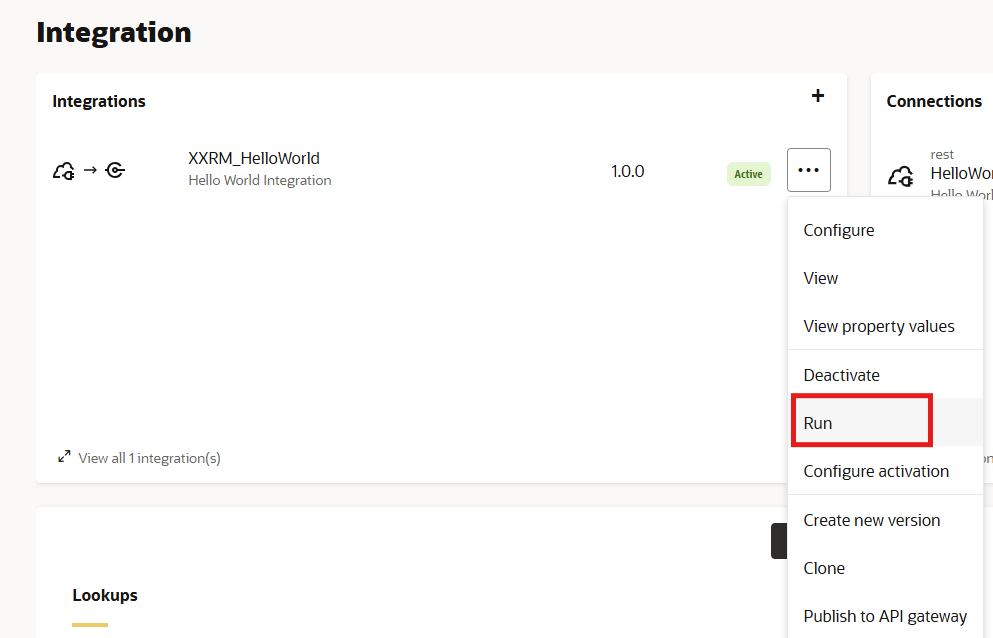
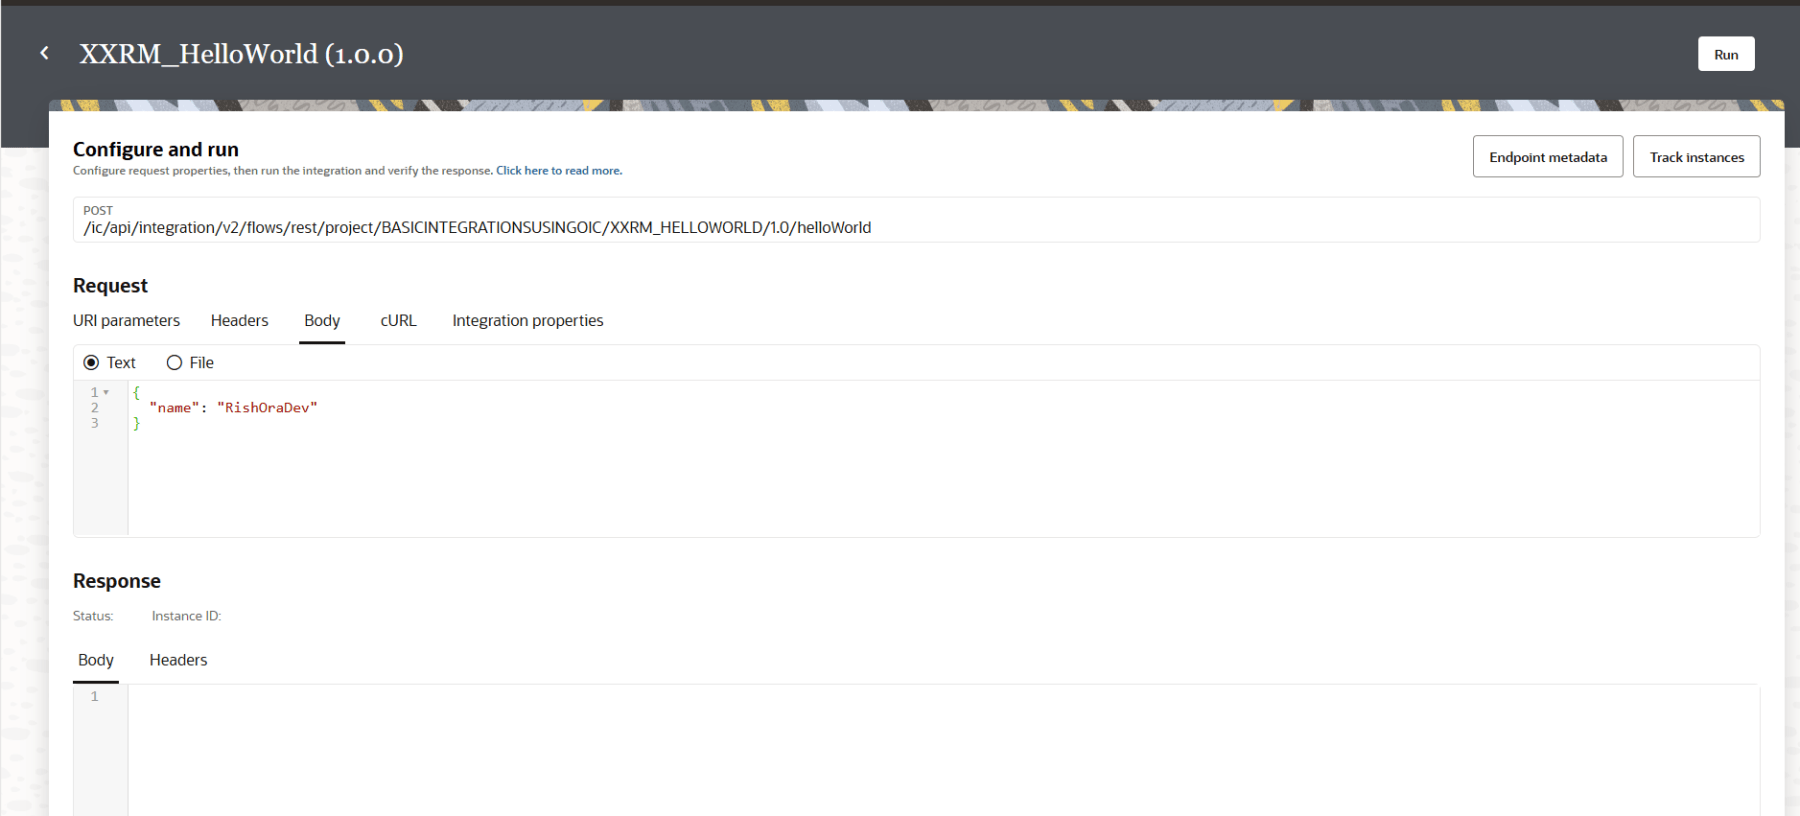
Run the Integration
The integration is now active. We are all set to run our first integration. Click on Options and click on Run.
Navigate to the Body of the Request. Now click Run.
The integration executes. The response is displayed.
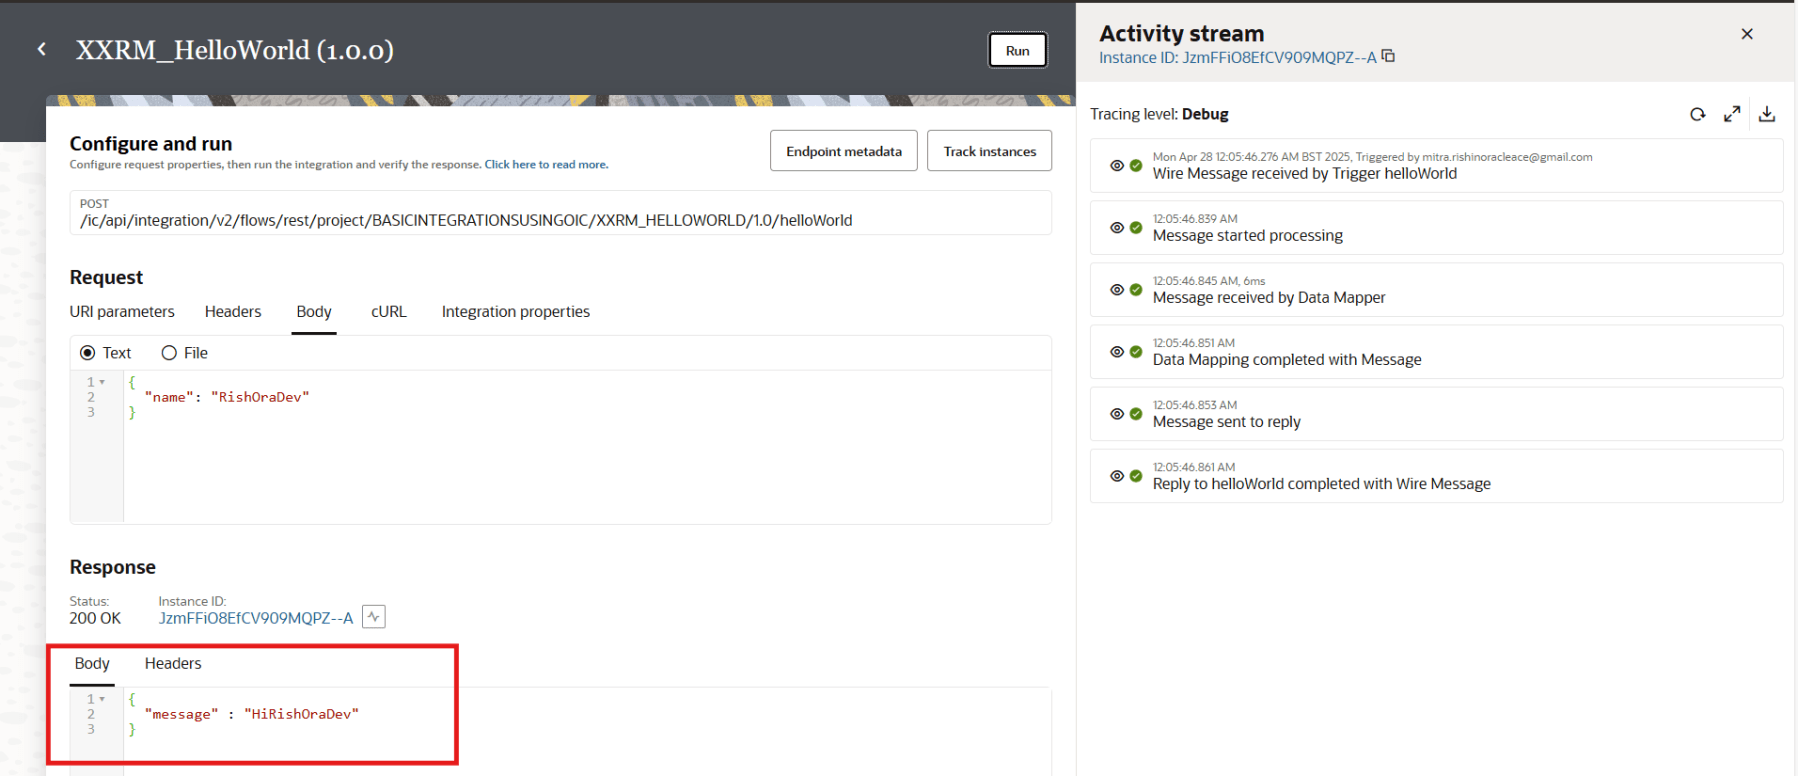
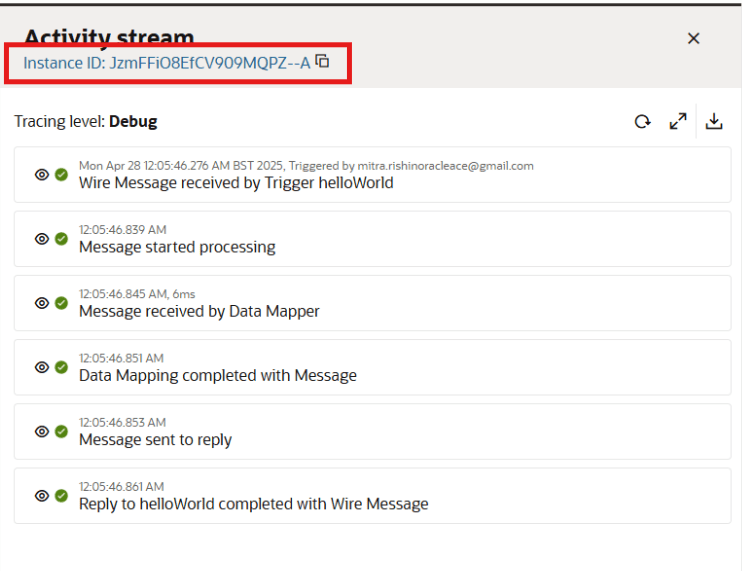
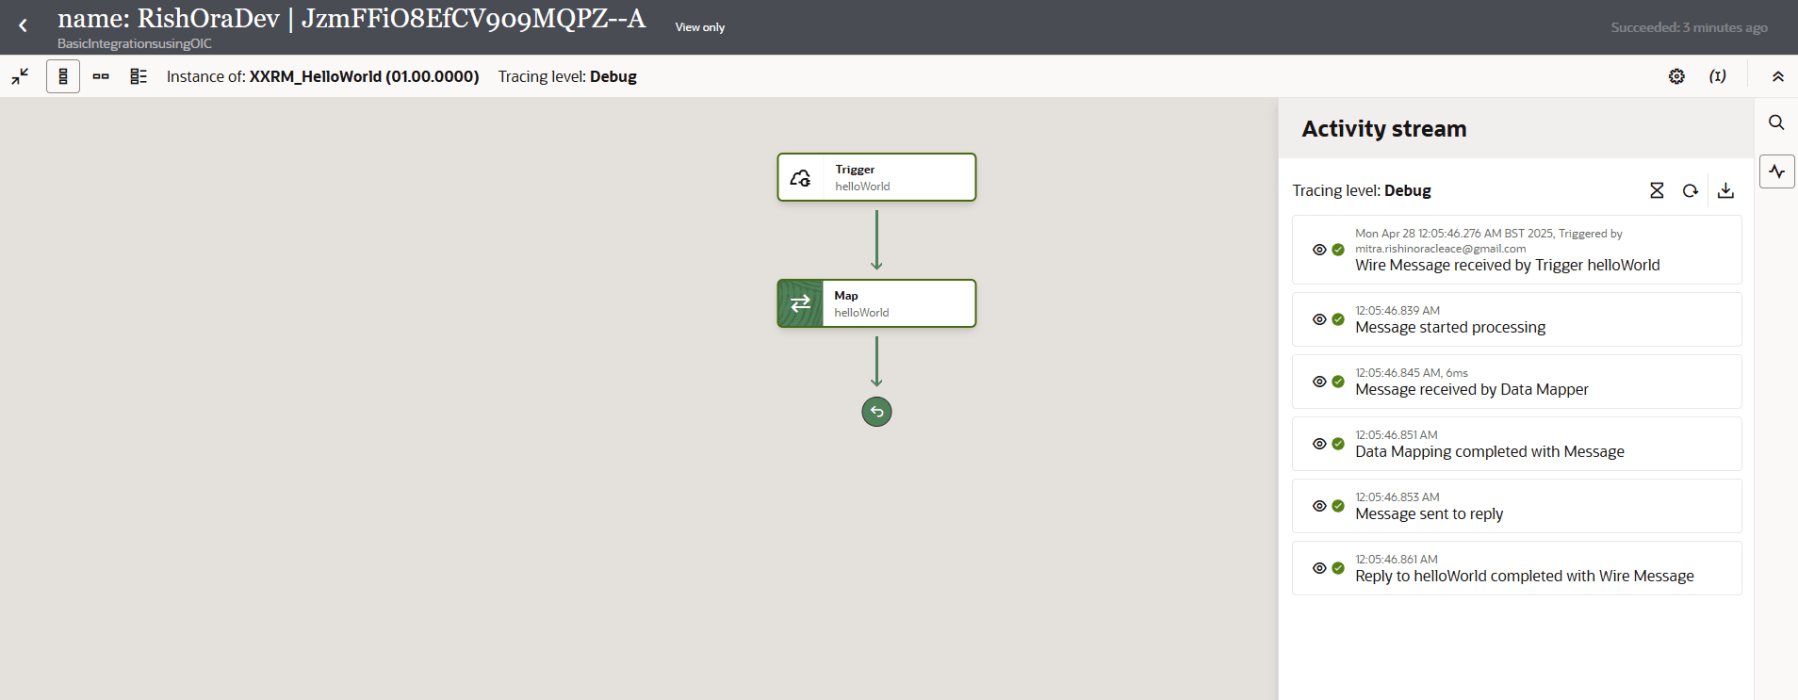
Click on the integration execution Instance ID in the Activity stream, to Trace the integration.
Congratulations. You have just designed your first integration using Oracle Integration Cloud. Hope this was useful. Happy learning!
References
