Create Your First Oracle Generative AI RAG Agent
In my previous blog, we learnt about the pre-requisite steps for provisioning an Oracle Generative AI RAG Agent in Oracle Cloud Infrastructure (OCI). In the subsequent blog, Creating a Knowledge Base for creating Oracle Generative AI RAG Agent, we learnt how to create a storage bucket and then created a knowledge base which derives the data from the text files uploaded in the dataset. In this blog, we will learn how to create a Generative AI Agent within OCI. We will be creating a Retrieval-Augmented Generative (RAG) Agent. We will be using Llama 3, as the preferred Large Language Model (LLM). The AI Agent will interact with the LLM and produce a more accurate and contextually-relevant response using the data defined in the knowledge base. As part of the agent creation process, we will be creating an Endpoint, which will be used to communicate with the Agent.
So let’s crack on!!!
Create Generative AI Agent
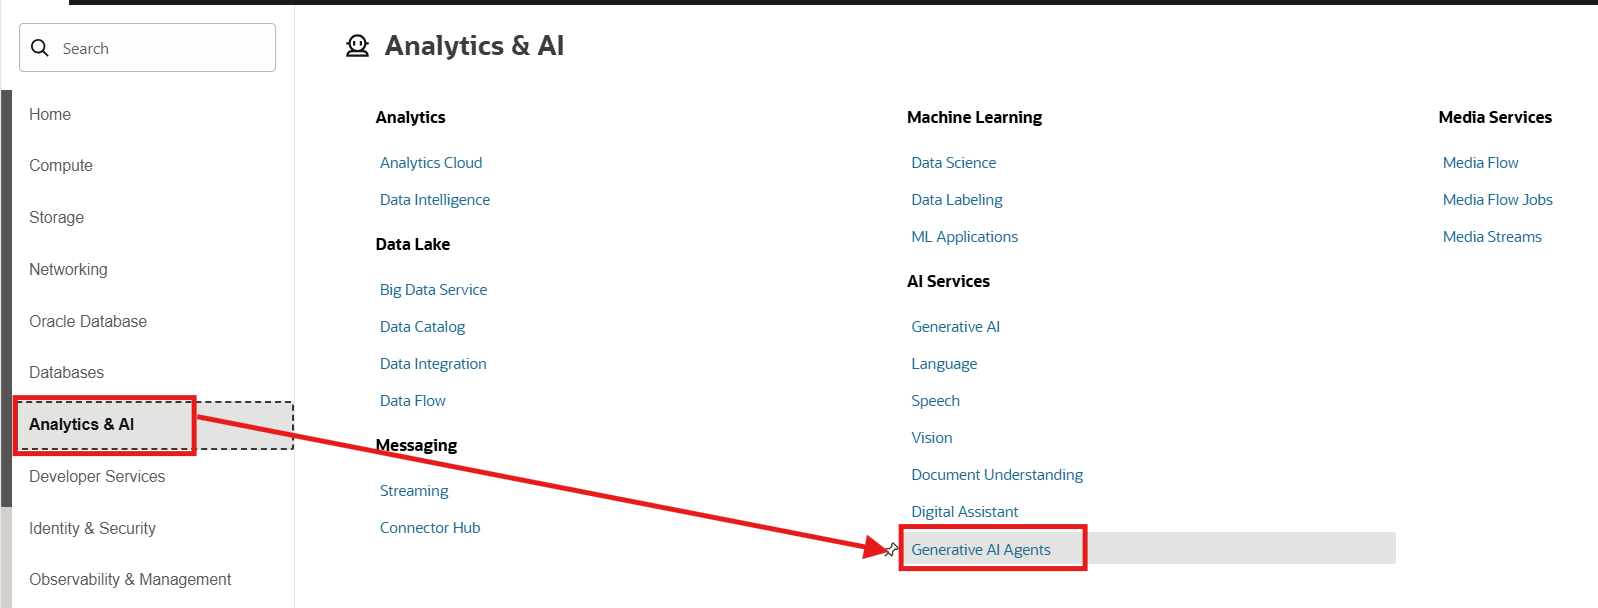
From the navigation menu, click on Analytics & AI > Generative AI Agents.
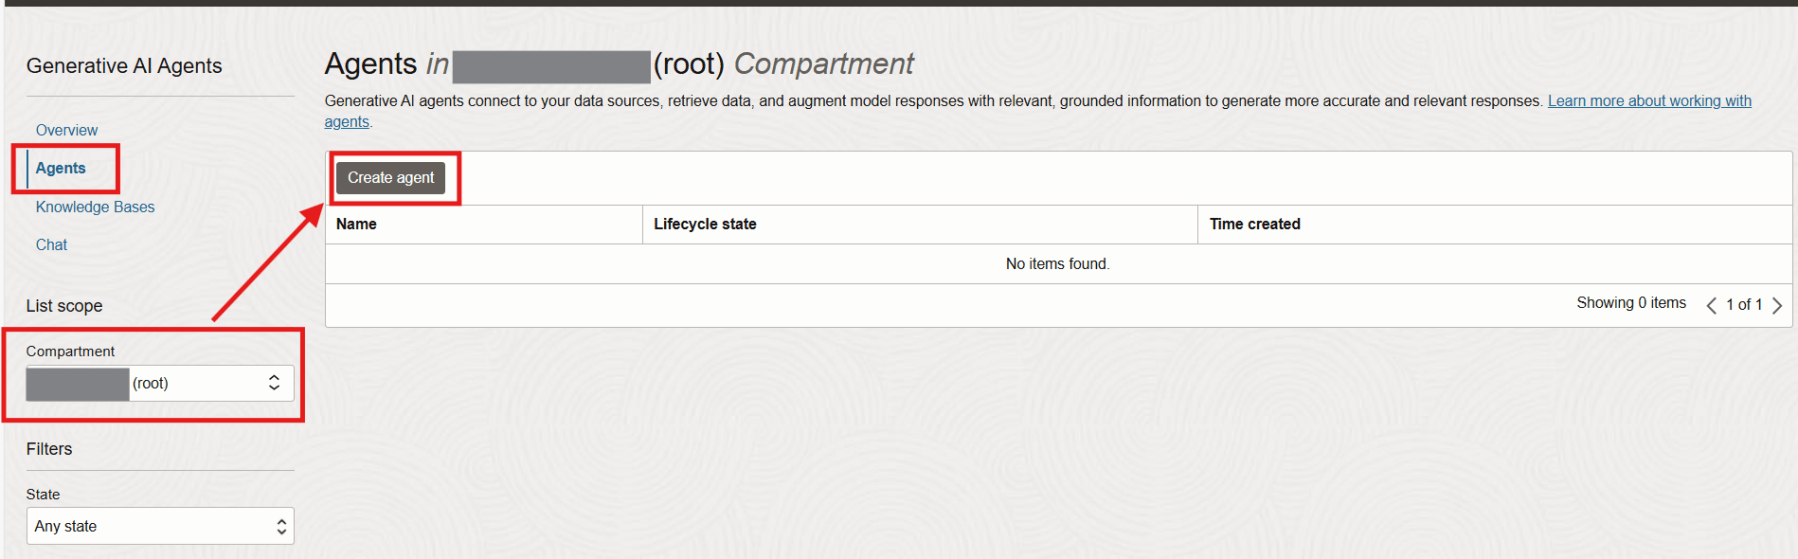
Click on the Agents tab. Make sure you select the compartment where you want to create the agent. In this case, I’m creating the agent in the root compartment.
In the Agents list page, click on Create agent.
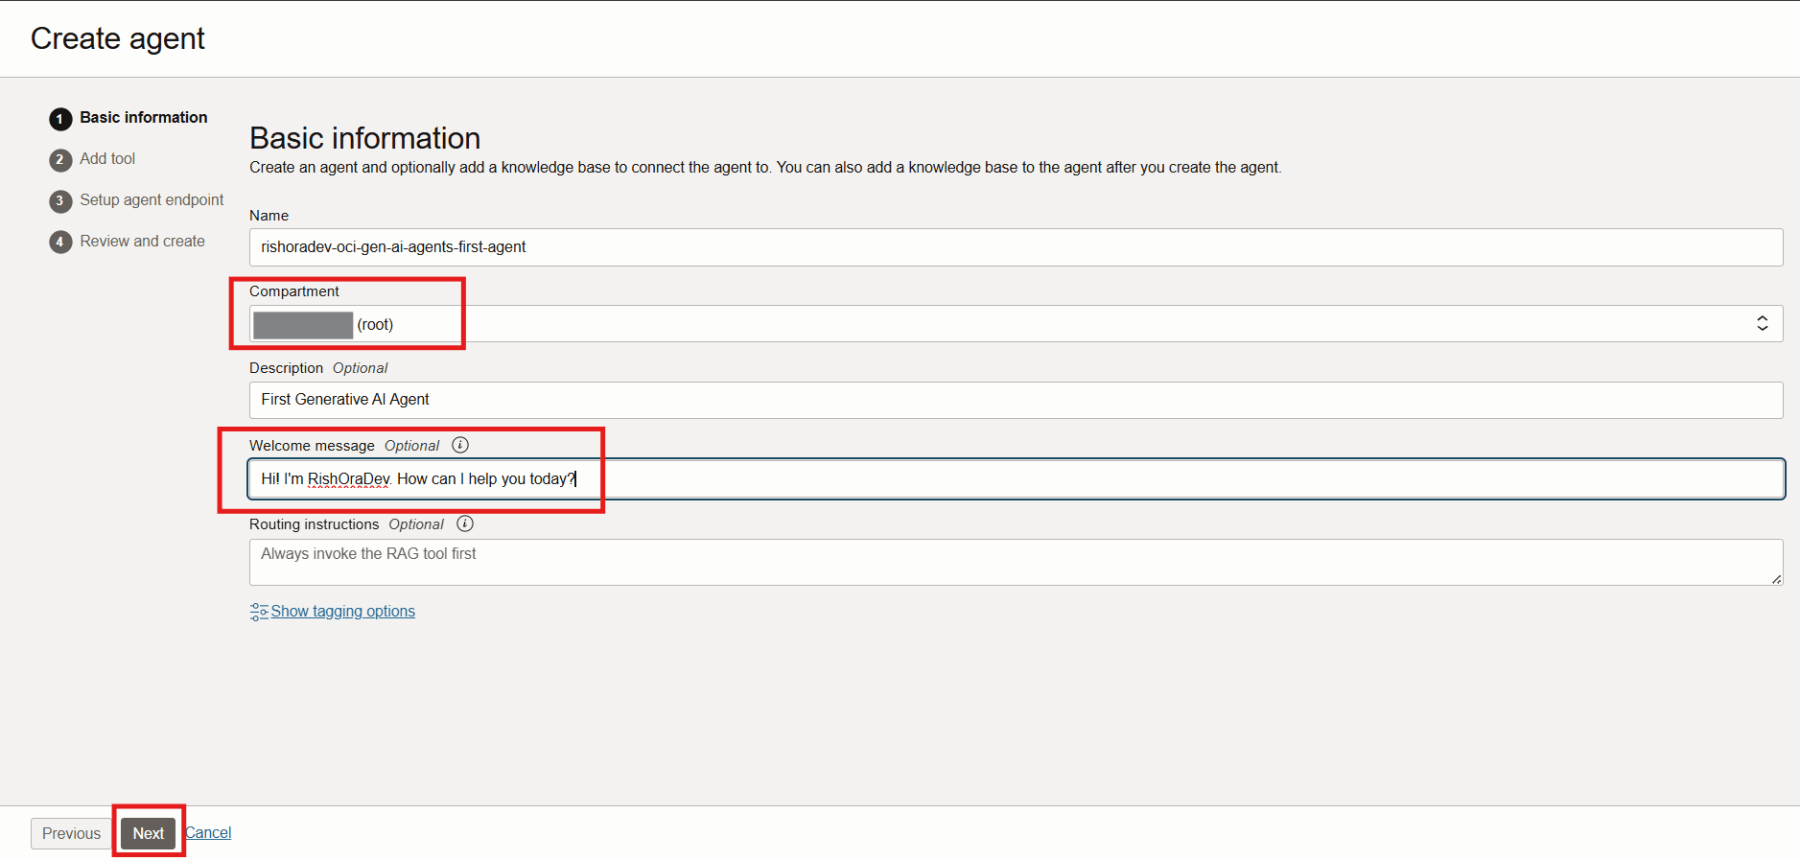
In the Basic information page, provide a meaningful Name for the agent. Chose the correct compartment from the compartment list. Enter a Description for the agent.
Type in a Welcome message. When users start the chat with the agent, they would be greeted by this message. This is optional. If you don’t enter a custom Welcome message, a default Welcome message is displayed.
Note: You can add/create multiple Tools as part of the next step, you can add Routing instructions, which will affect the behavior of the agent. For example, you can say “Always invoke the RAG Tool first”. For this example, since we will create just the RAG Tool for the agent, we will leave this field blank.
Click Next.
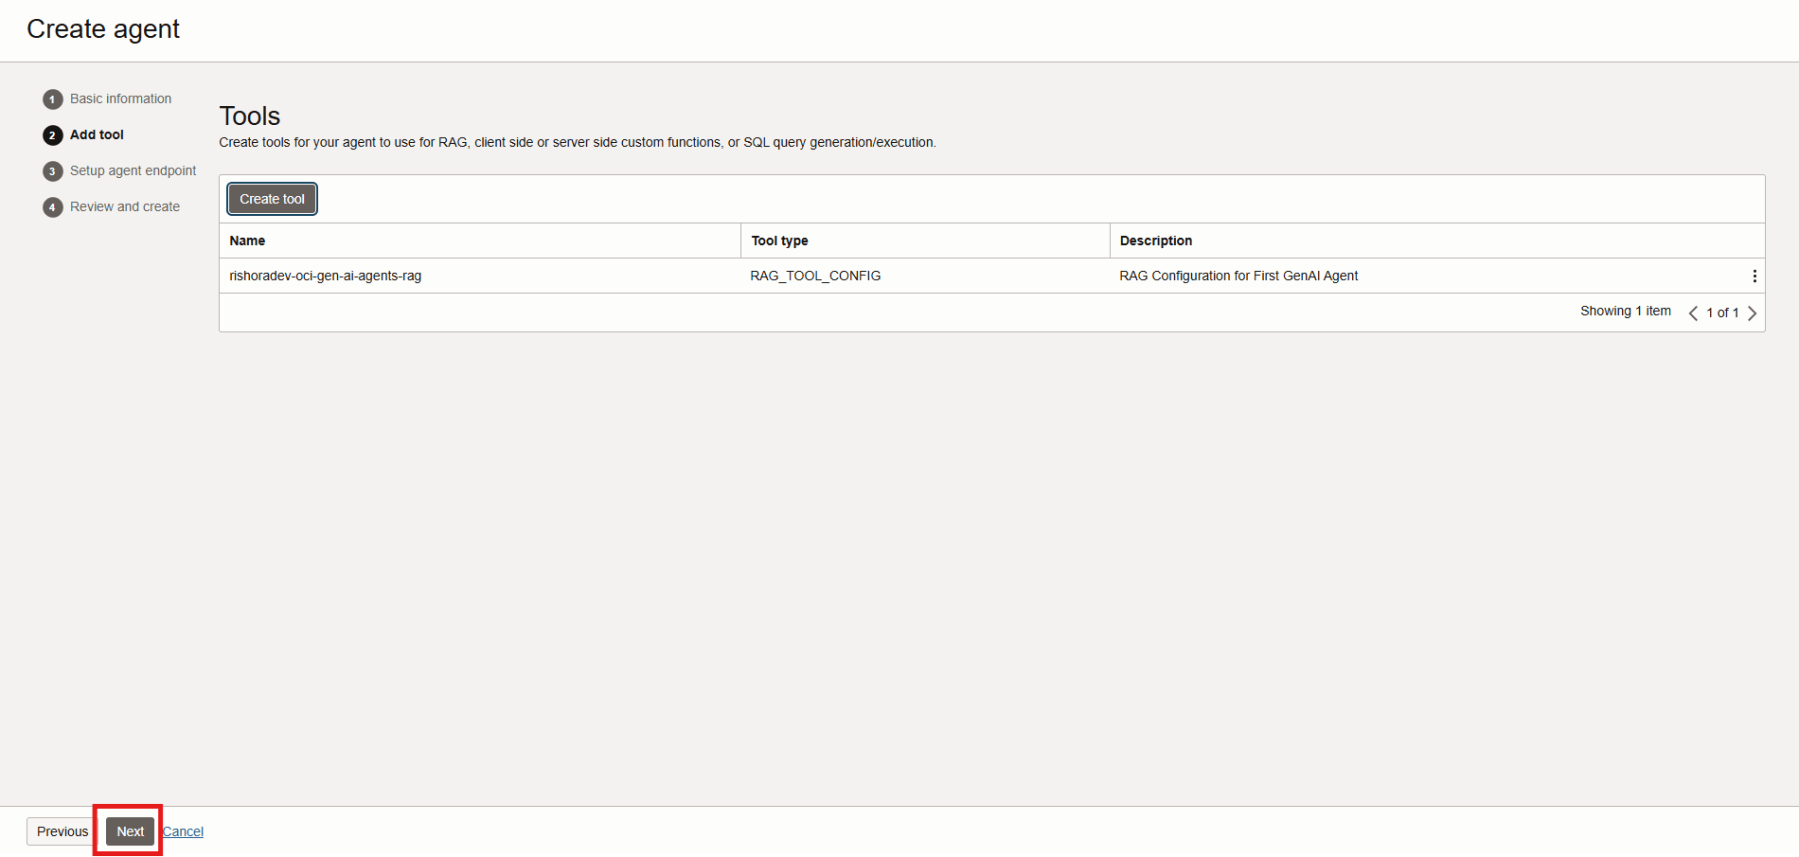
Next step is to create the tool(s). Note that the tools are created after you create the agent. Click on Create tool.

You can select from the pre-built tools – RAG, SQL, Custom tool. For this blog, since we are creating a RAG Agent, we will select RAG.

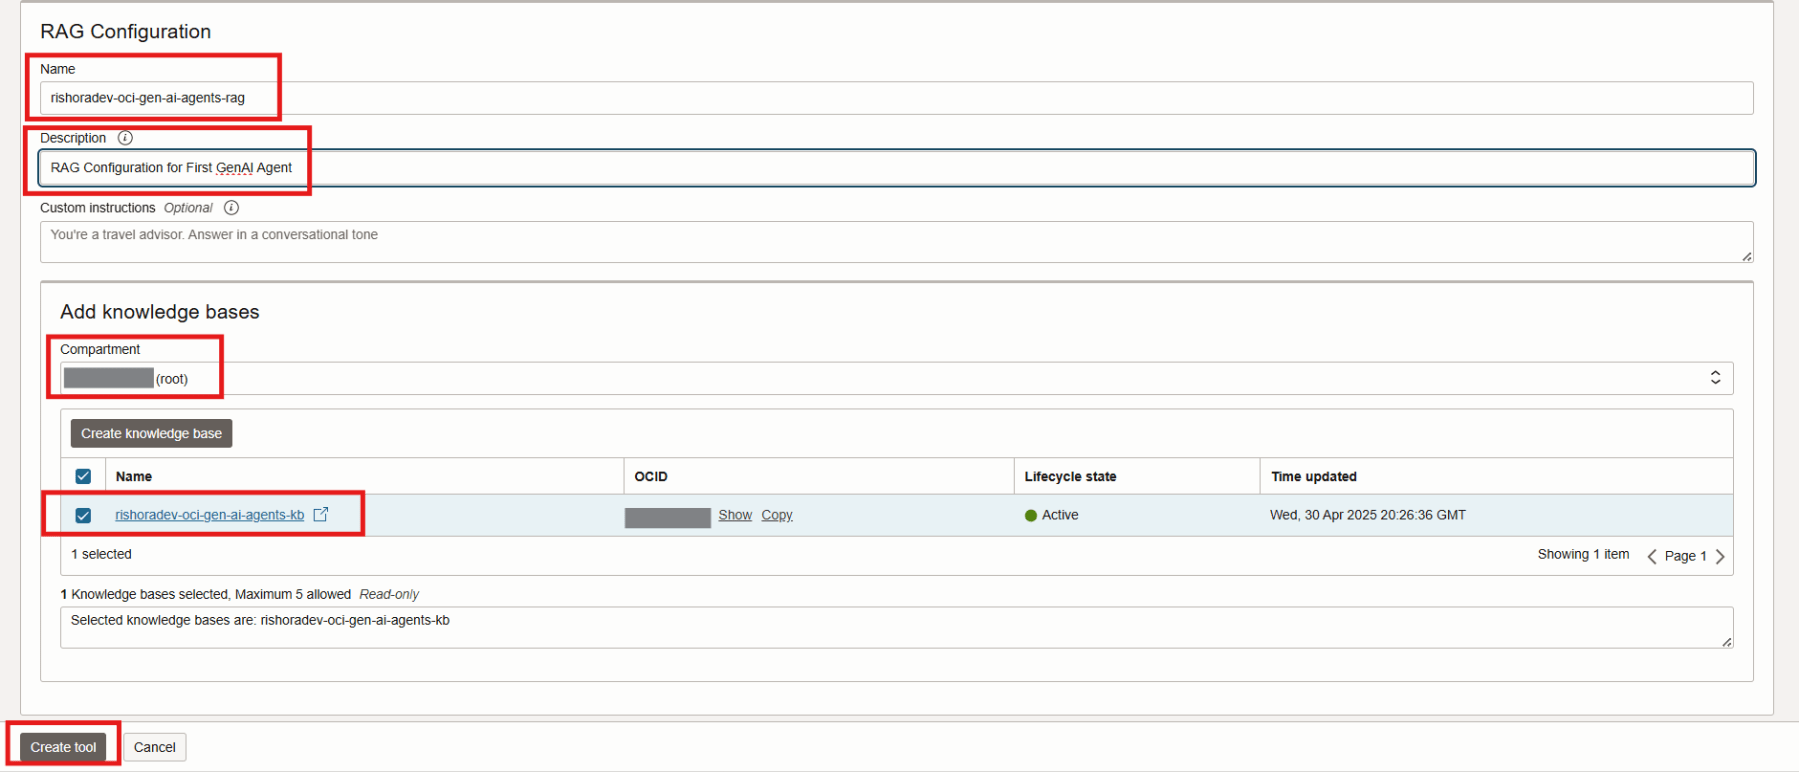
In the RAG Configuration section, provide a meaningful Name to the RAG tool. Enter a Description. In the Custom instructions field, you can enter an instruction in natural language for the agent’s responses. For the purpose of this blog, we will leave it blank.
In the Add knowledge bases section, select the Compartment from the compartment list. Then, select the knowledge base that we had created in the previous post. If you have not gone through that post, please visit “Creating a Knowledge Base for creating Oracle GenAI RAG Agent”.
Now click Create tool.
If you want to add more than one tool, repeat the steps. For this blog, since we will create the agent using just one RAG tool, we will click Next.
Next step is to Setup the endpoint. In the Setup agent endpoint page, select the checkbox Automatically create an endpoint for this agent. This will create an endpoint when the agent is created.
In the Guardrails section, I keep the Enable human in the loop option disabled.
In the Content moderation section, for both for input (user prompt) and output (generated response), I chose to Block any toxic and violent contents. These are Oracle recommended options.
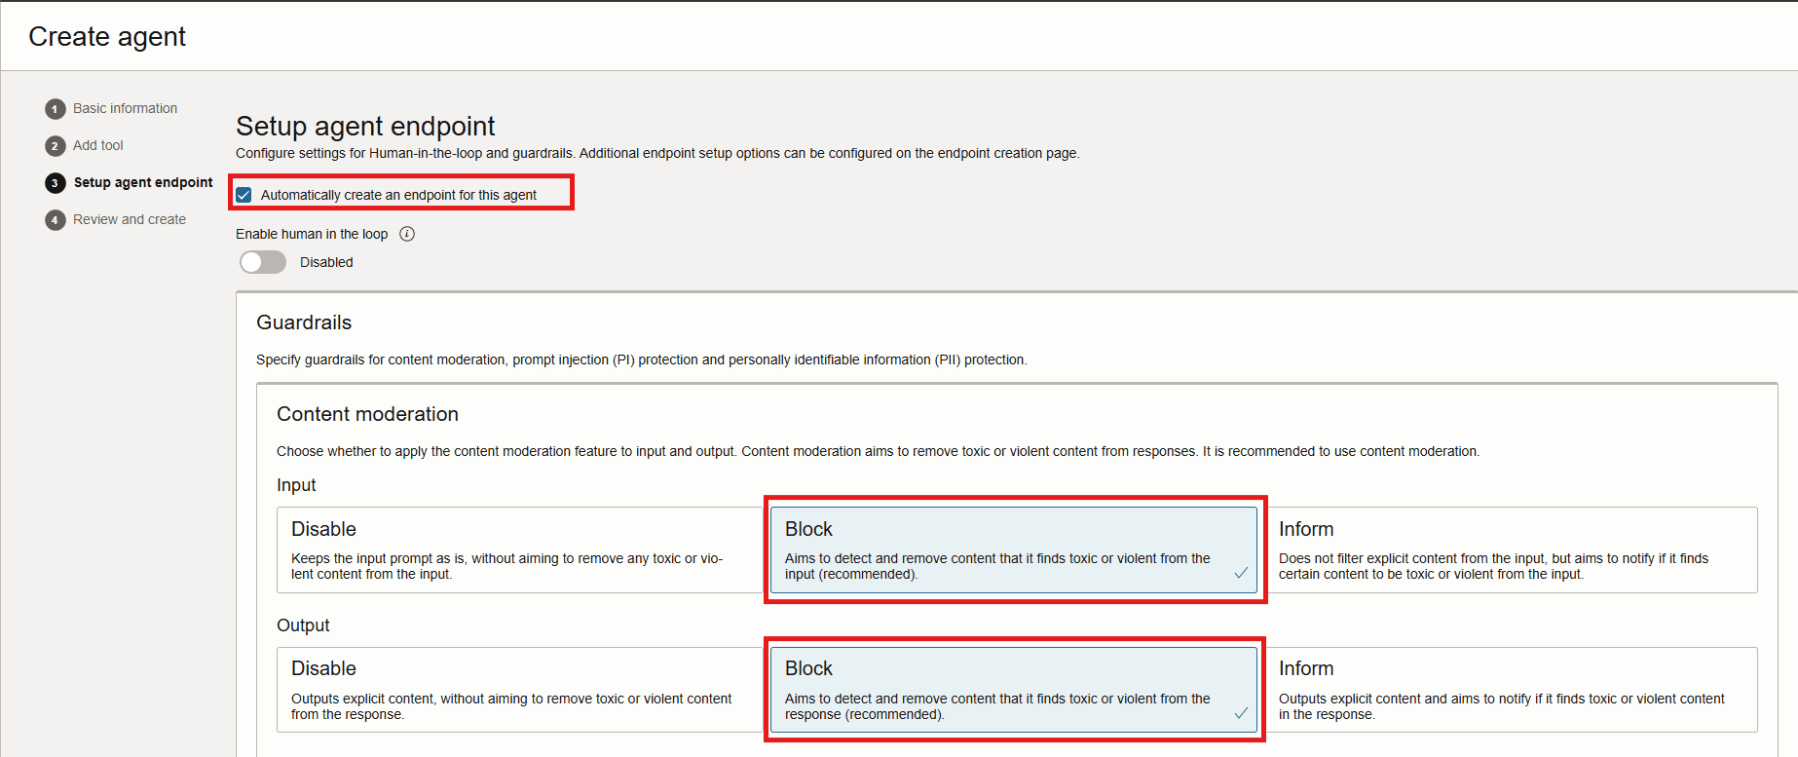
I chose Block for Prompt injection (PI) protection, to identify and protect the response to be manipulated by malicious inputs.
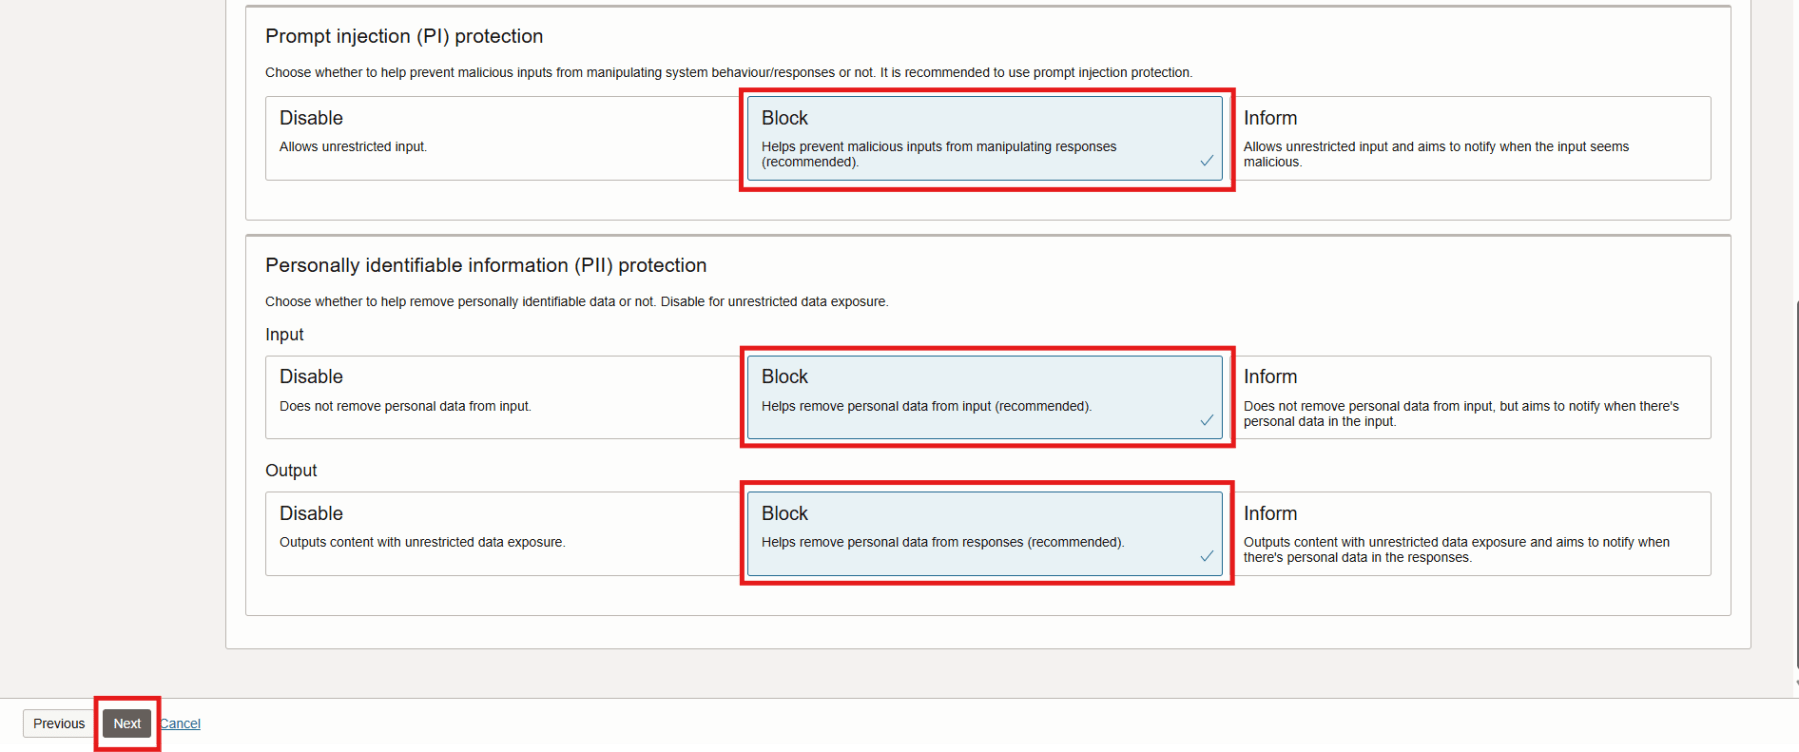
I chose the recommended options to Block Personally identifiable information (PII) protection for input (user prompt) and output (generated response).
Click Next.
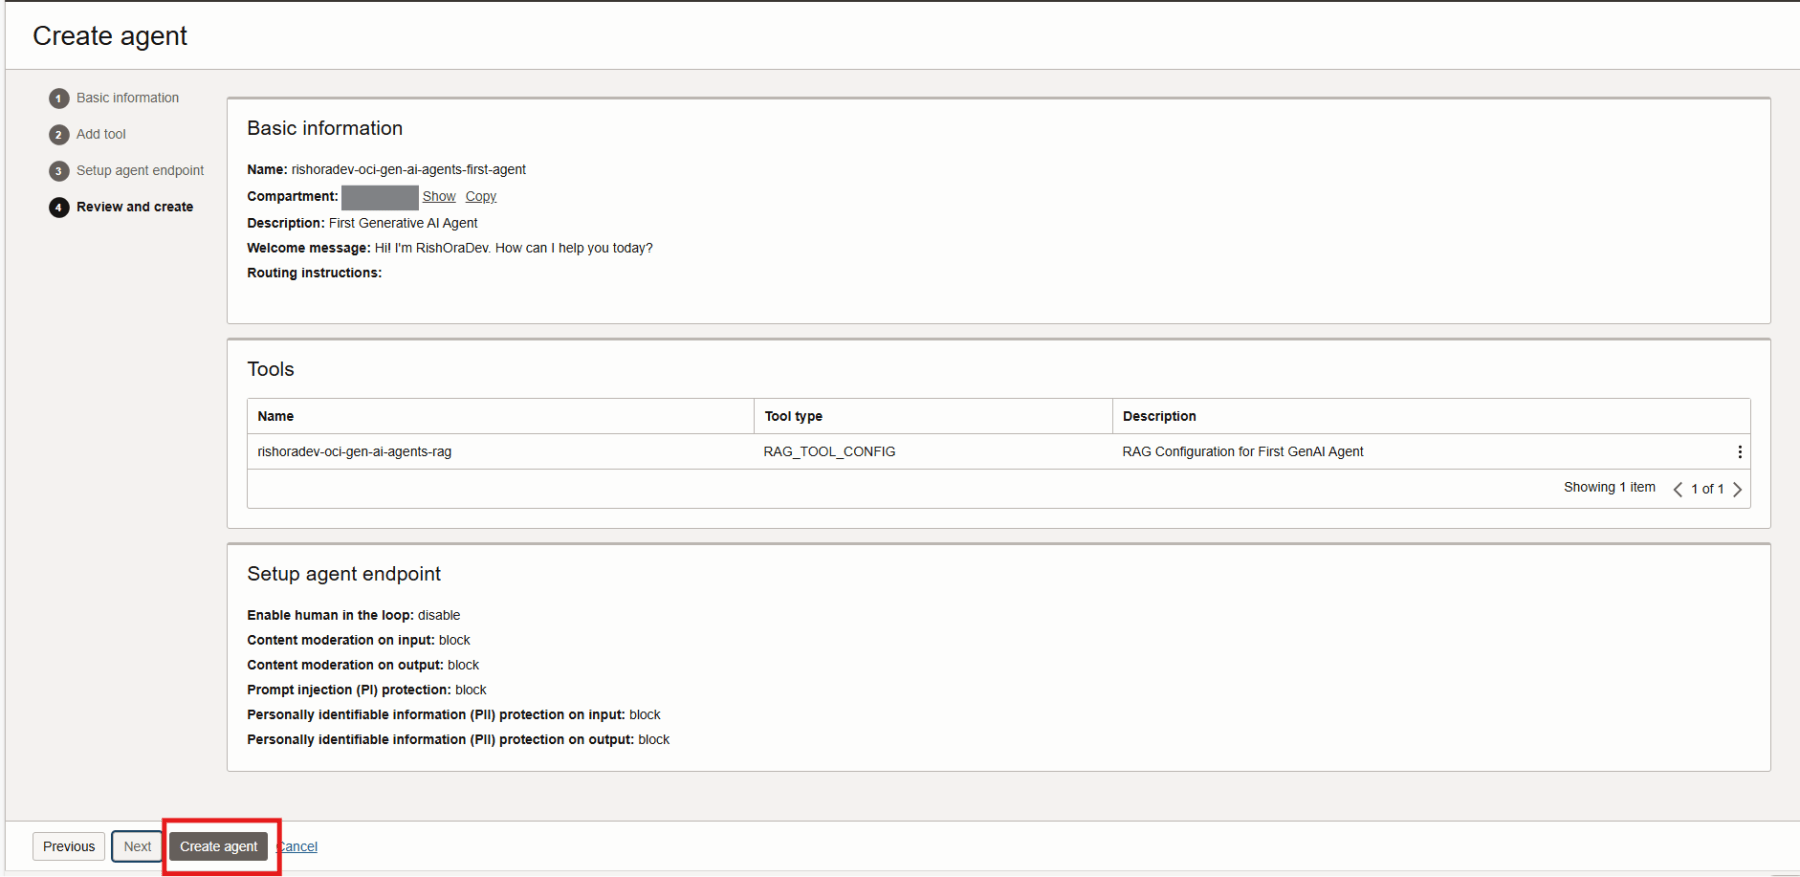
Review the setup. I all looks good, click on Create agent.
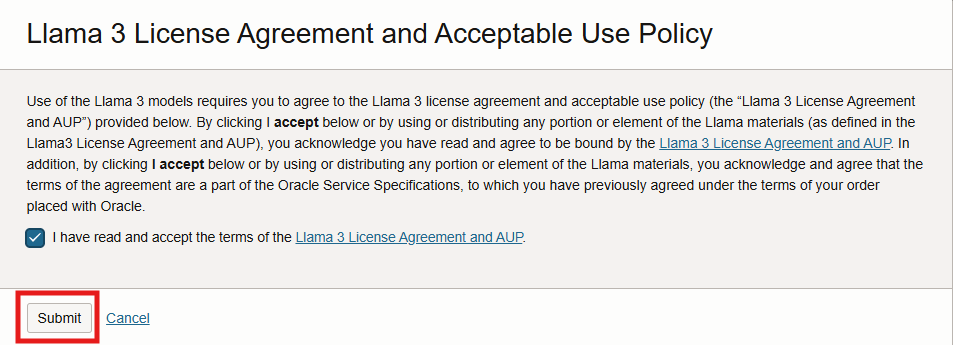
Read carefully the use of Llama 3 LLM for the RAG. Agree and Accept the policy if you prefer, by clicking on the Submit button.
Once you click on submit button, the agent will be created. You can check the status below.

Once the agent creation process is complete, the status will change to Active.

Testing the Generative AI Agent
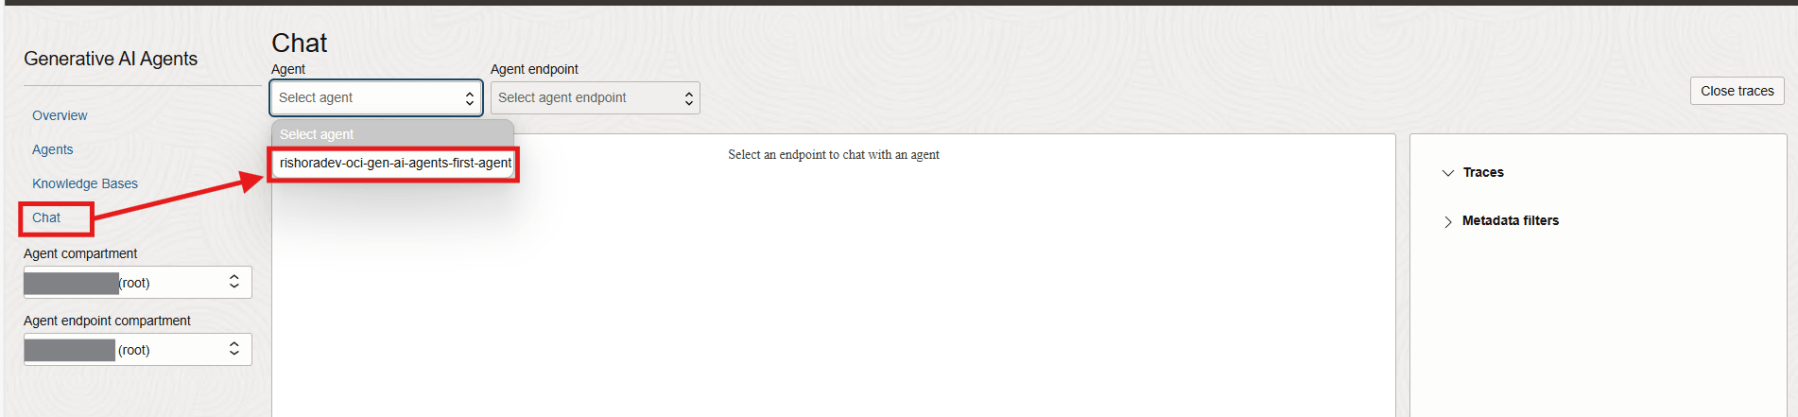
Now that we have successfully created the Generative AI Agent, it is time to test the agent. To interact with the agent, click on Chat.
From the Agent dropdown list, select the agent that you created just now.
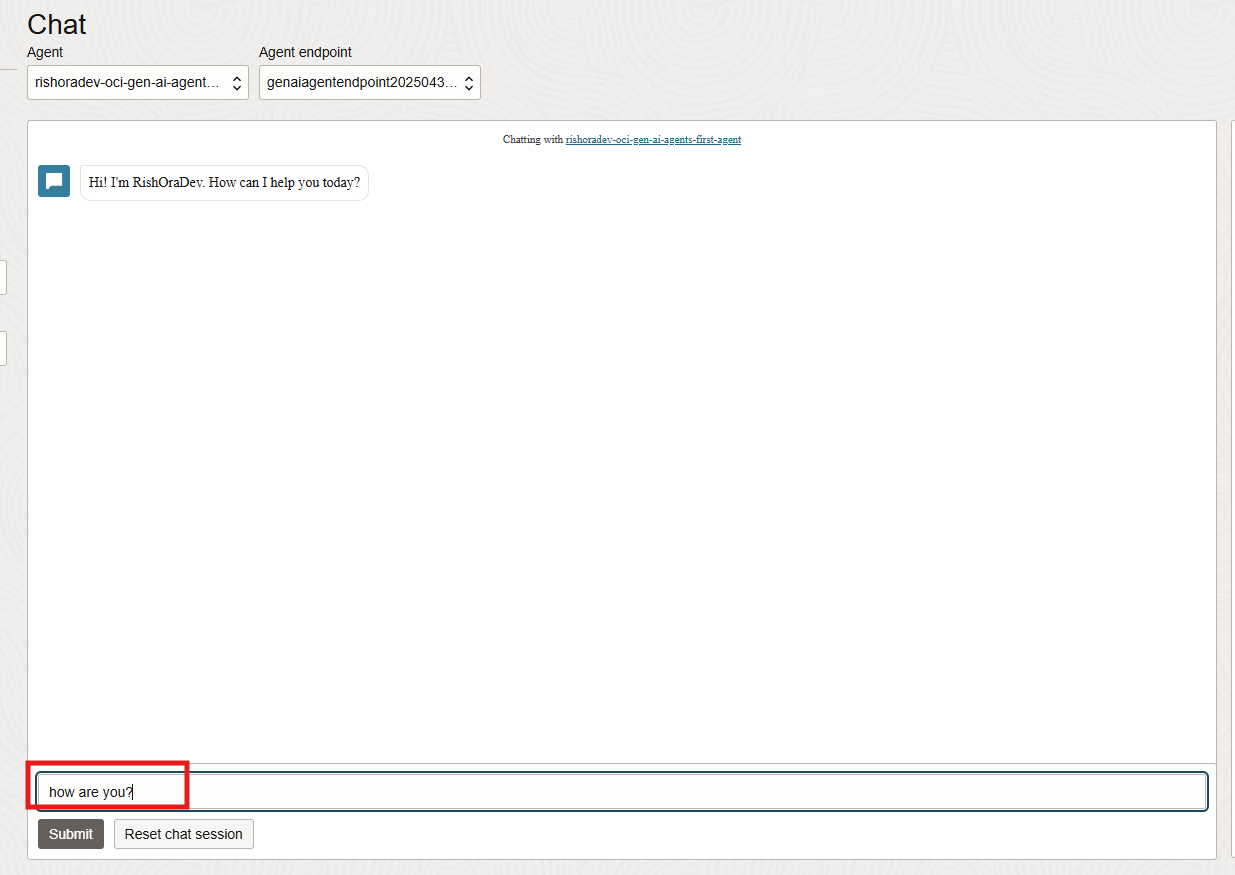
From the Agent endpoint dropdown list, select the agent endpoint you created.
You will see immediately, you will the greeted with the welcome message that you used while configuring the agent.

Now let us ask the agent how it is doing? Type in your query and click on Submit.
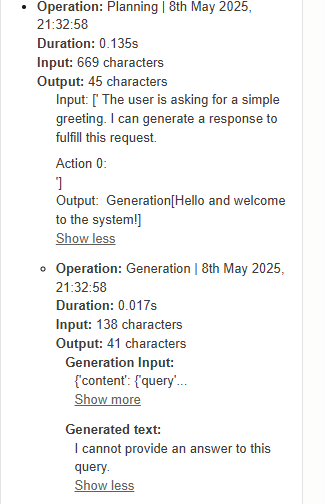
We get an error.

You can expand Traces, to check what has actually happened.
Expand the trace.
We see the input and the response from the agent, where the agent has decided that it cannot provide an answer to this query. Hence the error.
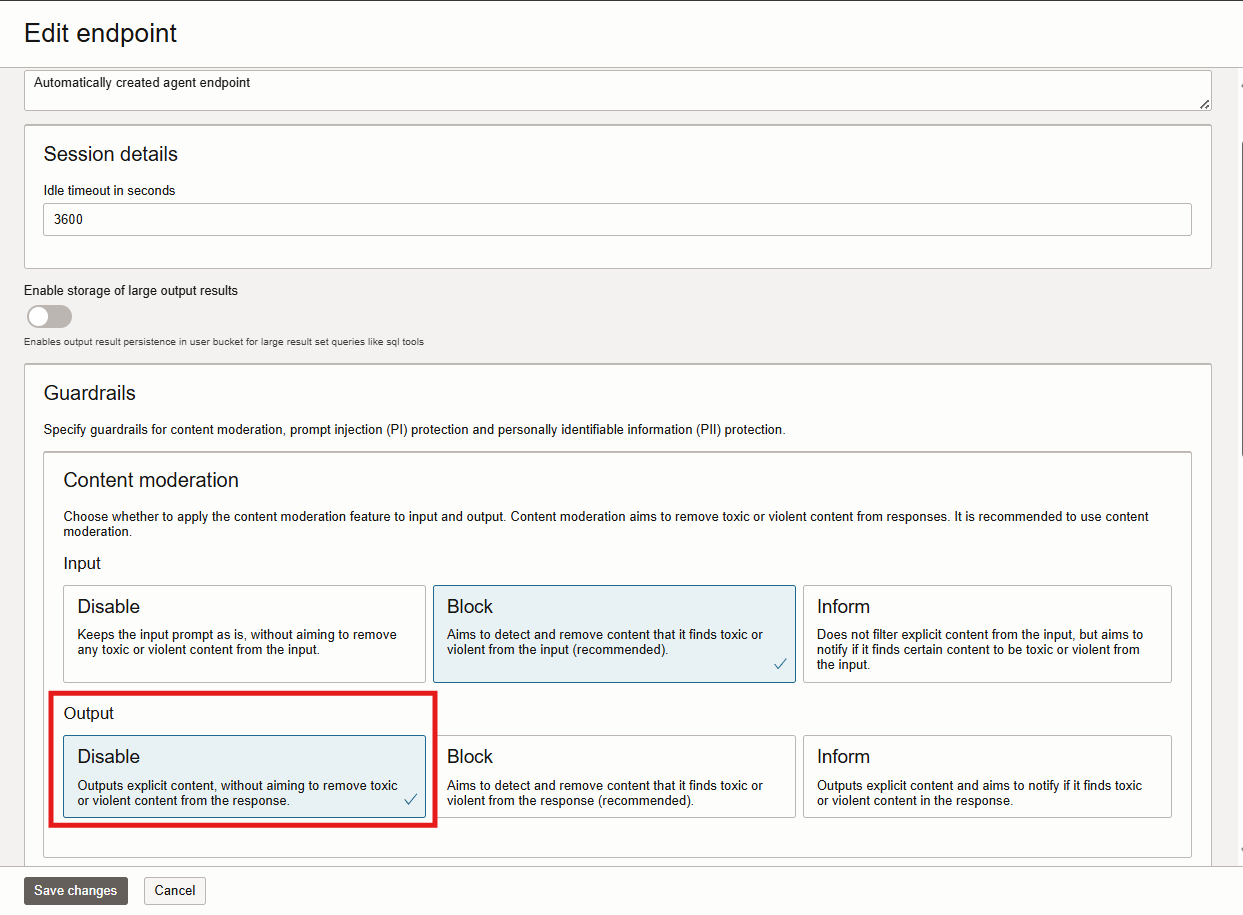
To test it further, I went back to the Endpoint and changed the output moderation from Block to Disable, in the Content moderation section.
Now if I ask the same question, I do get a response.

Next I asked the agent how to create a knowledge base. This is the response that I got.

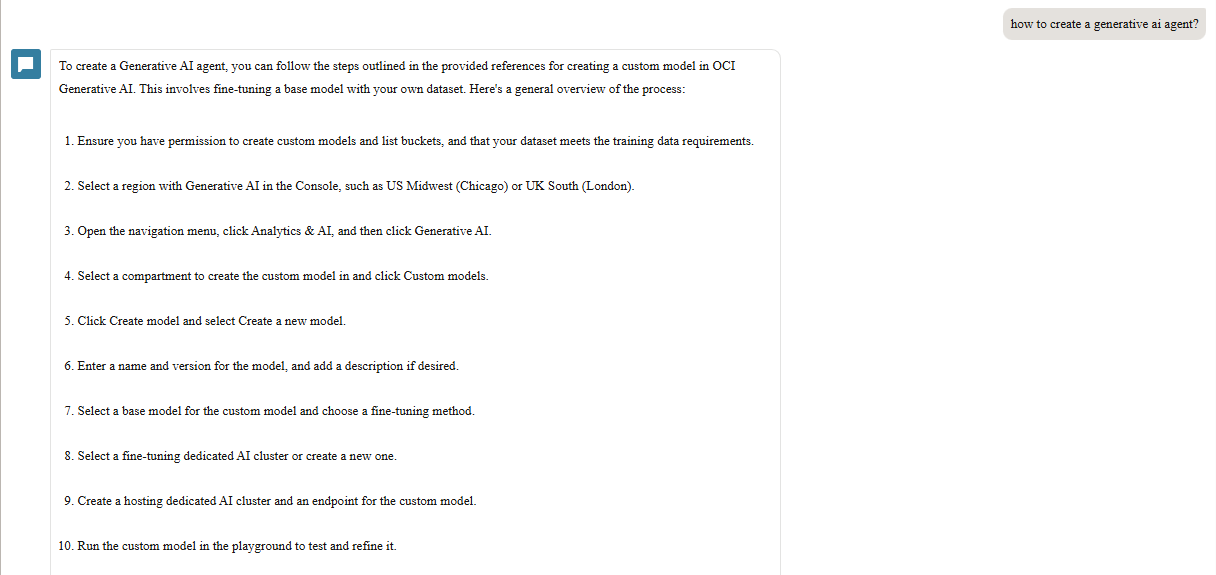
Finally I asked how to create a Generative AI Agent.
The agent was able to provide all the steps to create an GenAI Agent.
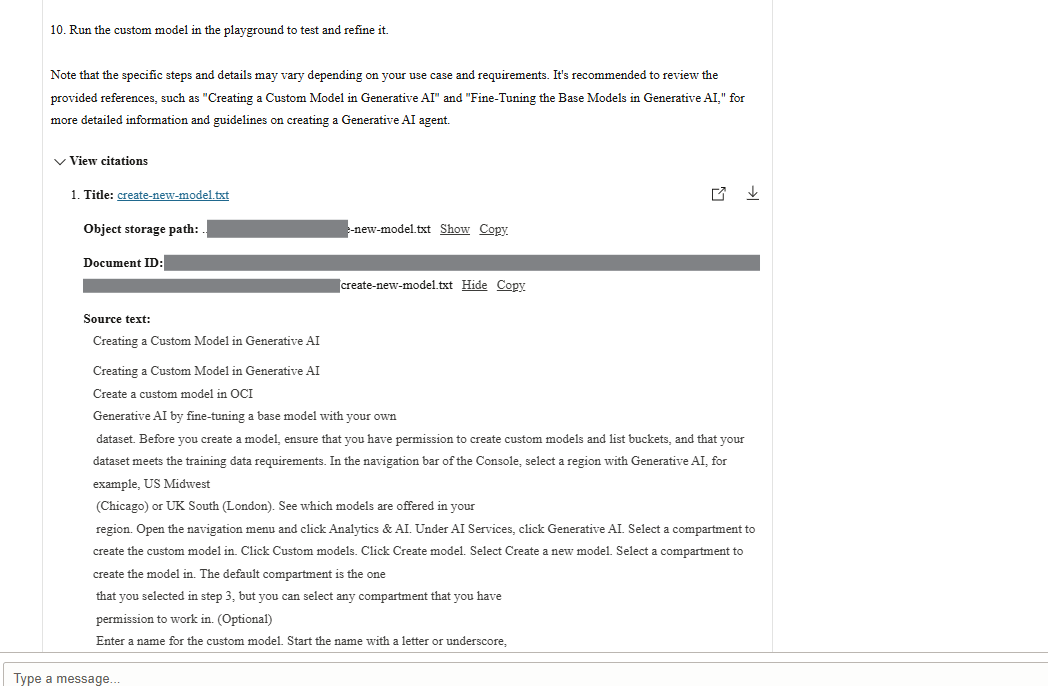
At the end of the answer, in the View citations section, the agent also points out the source that it has used to generate the response, in this case the knowledge base that we had created.
We just learnt the basic building blocks of creating a Generative AI Agent. Hope this was helpful. There would be further blogs coming up in the series where we will develop more complex GenAI agents. We can achieve so much using GenerativeAI Agents, and this is just the tip of the iceberg. Happy learning!!!!
References

Pingback: Creating a Knowledge Base for creating Oracle Generative AI RAG Agent | RishOraDev's Oracle Blogs
Pingback: Enabling Oracle Generative AI Agent for OCI Regions | RishOraDev's Oracle Blogs